Workflow Anatomy
Introducing the new experience of building workflows with BuildShip with the new V2 Workflow Canvas. Here's a everything you need to know to make the most of it.
Build
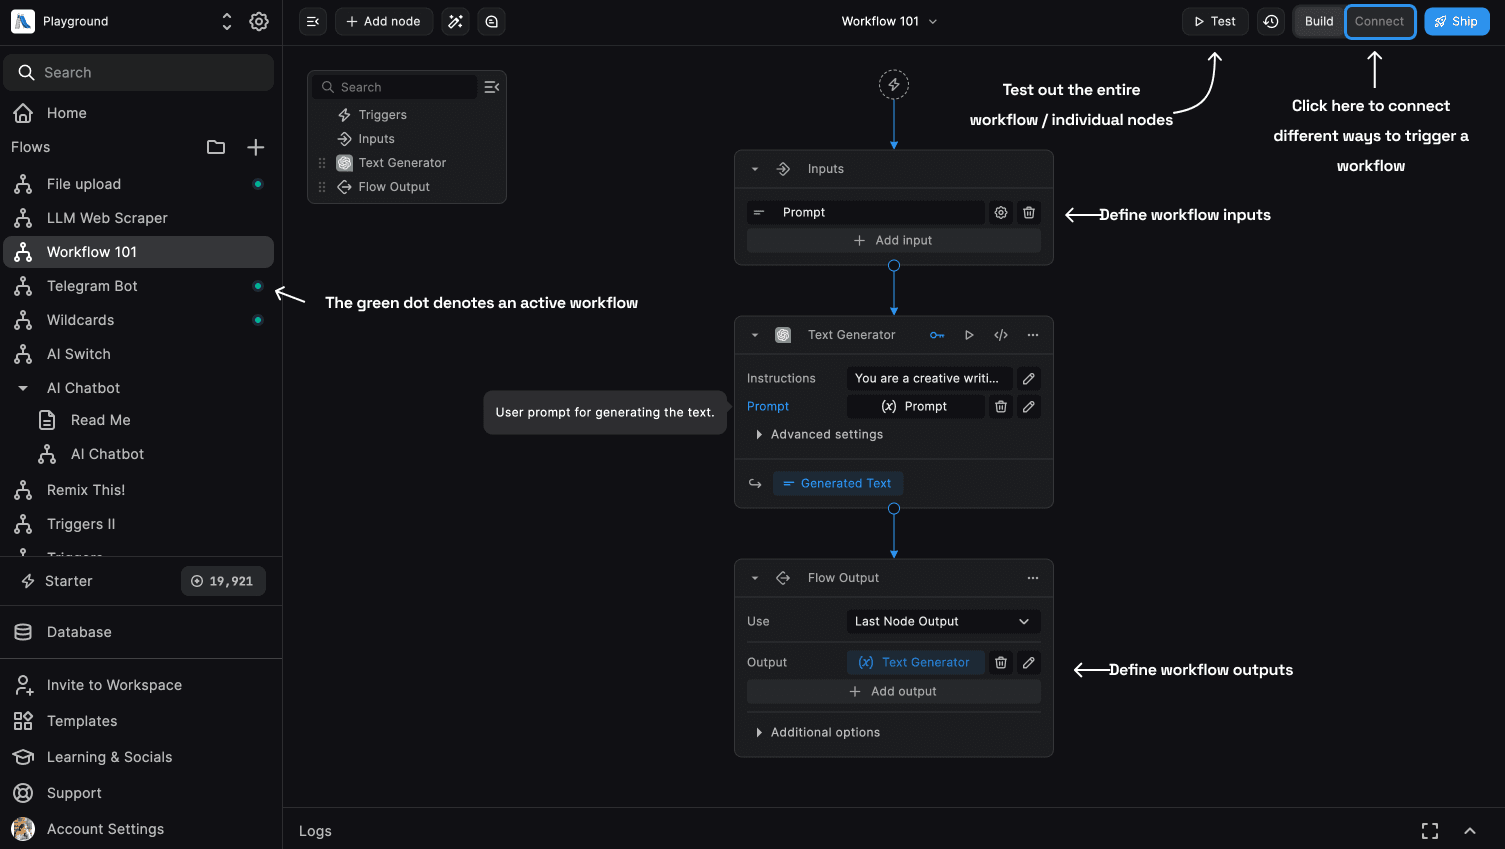
The new V2 Workflow Canvas is designed to make building workflows easier and more intuitive. Build out your workflow end-to-end without the hassle of connecting a trigger first.
Workflow Inputs and Outputs
Build out your entire workflow end-to-end without the hassle of connecting a trigger first. You can define inputs and outputs for your workflow, making it more modular and flexible.
Define the inputs for your workflow in the Inputs node. Add in the type of your input and modify them by clicking on the Settings icon on the node.
The Workflow Inputs are accessible via the context menu on every node.
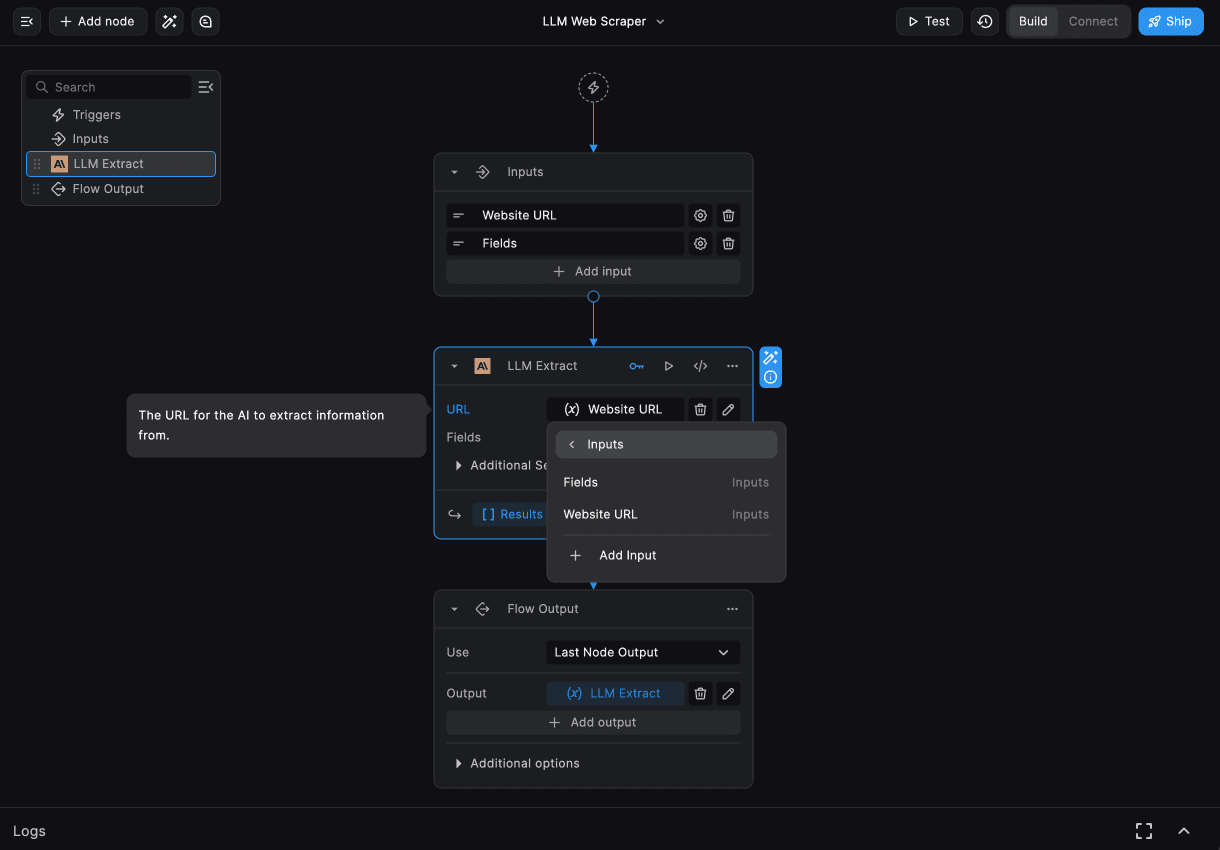
We can define the outputs returned by the workflow in the Outputs node. The outputs can be used to send a response to the trigger (if applicable, depending upon the selected trigger).
BuildShip Nodes also support Environment Variables, Local Variables, and Secrets. You can define these variables via the Context Menu itself.
Logging
You can now log messages in your workflow using the Log Message to Console node or via using logging.log() in the node script.
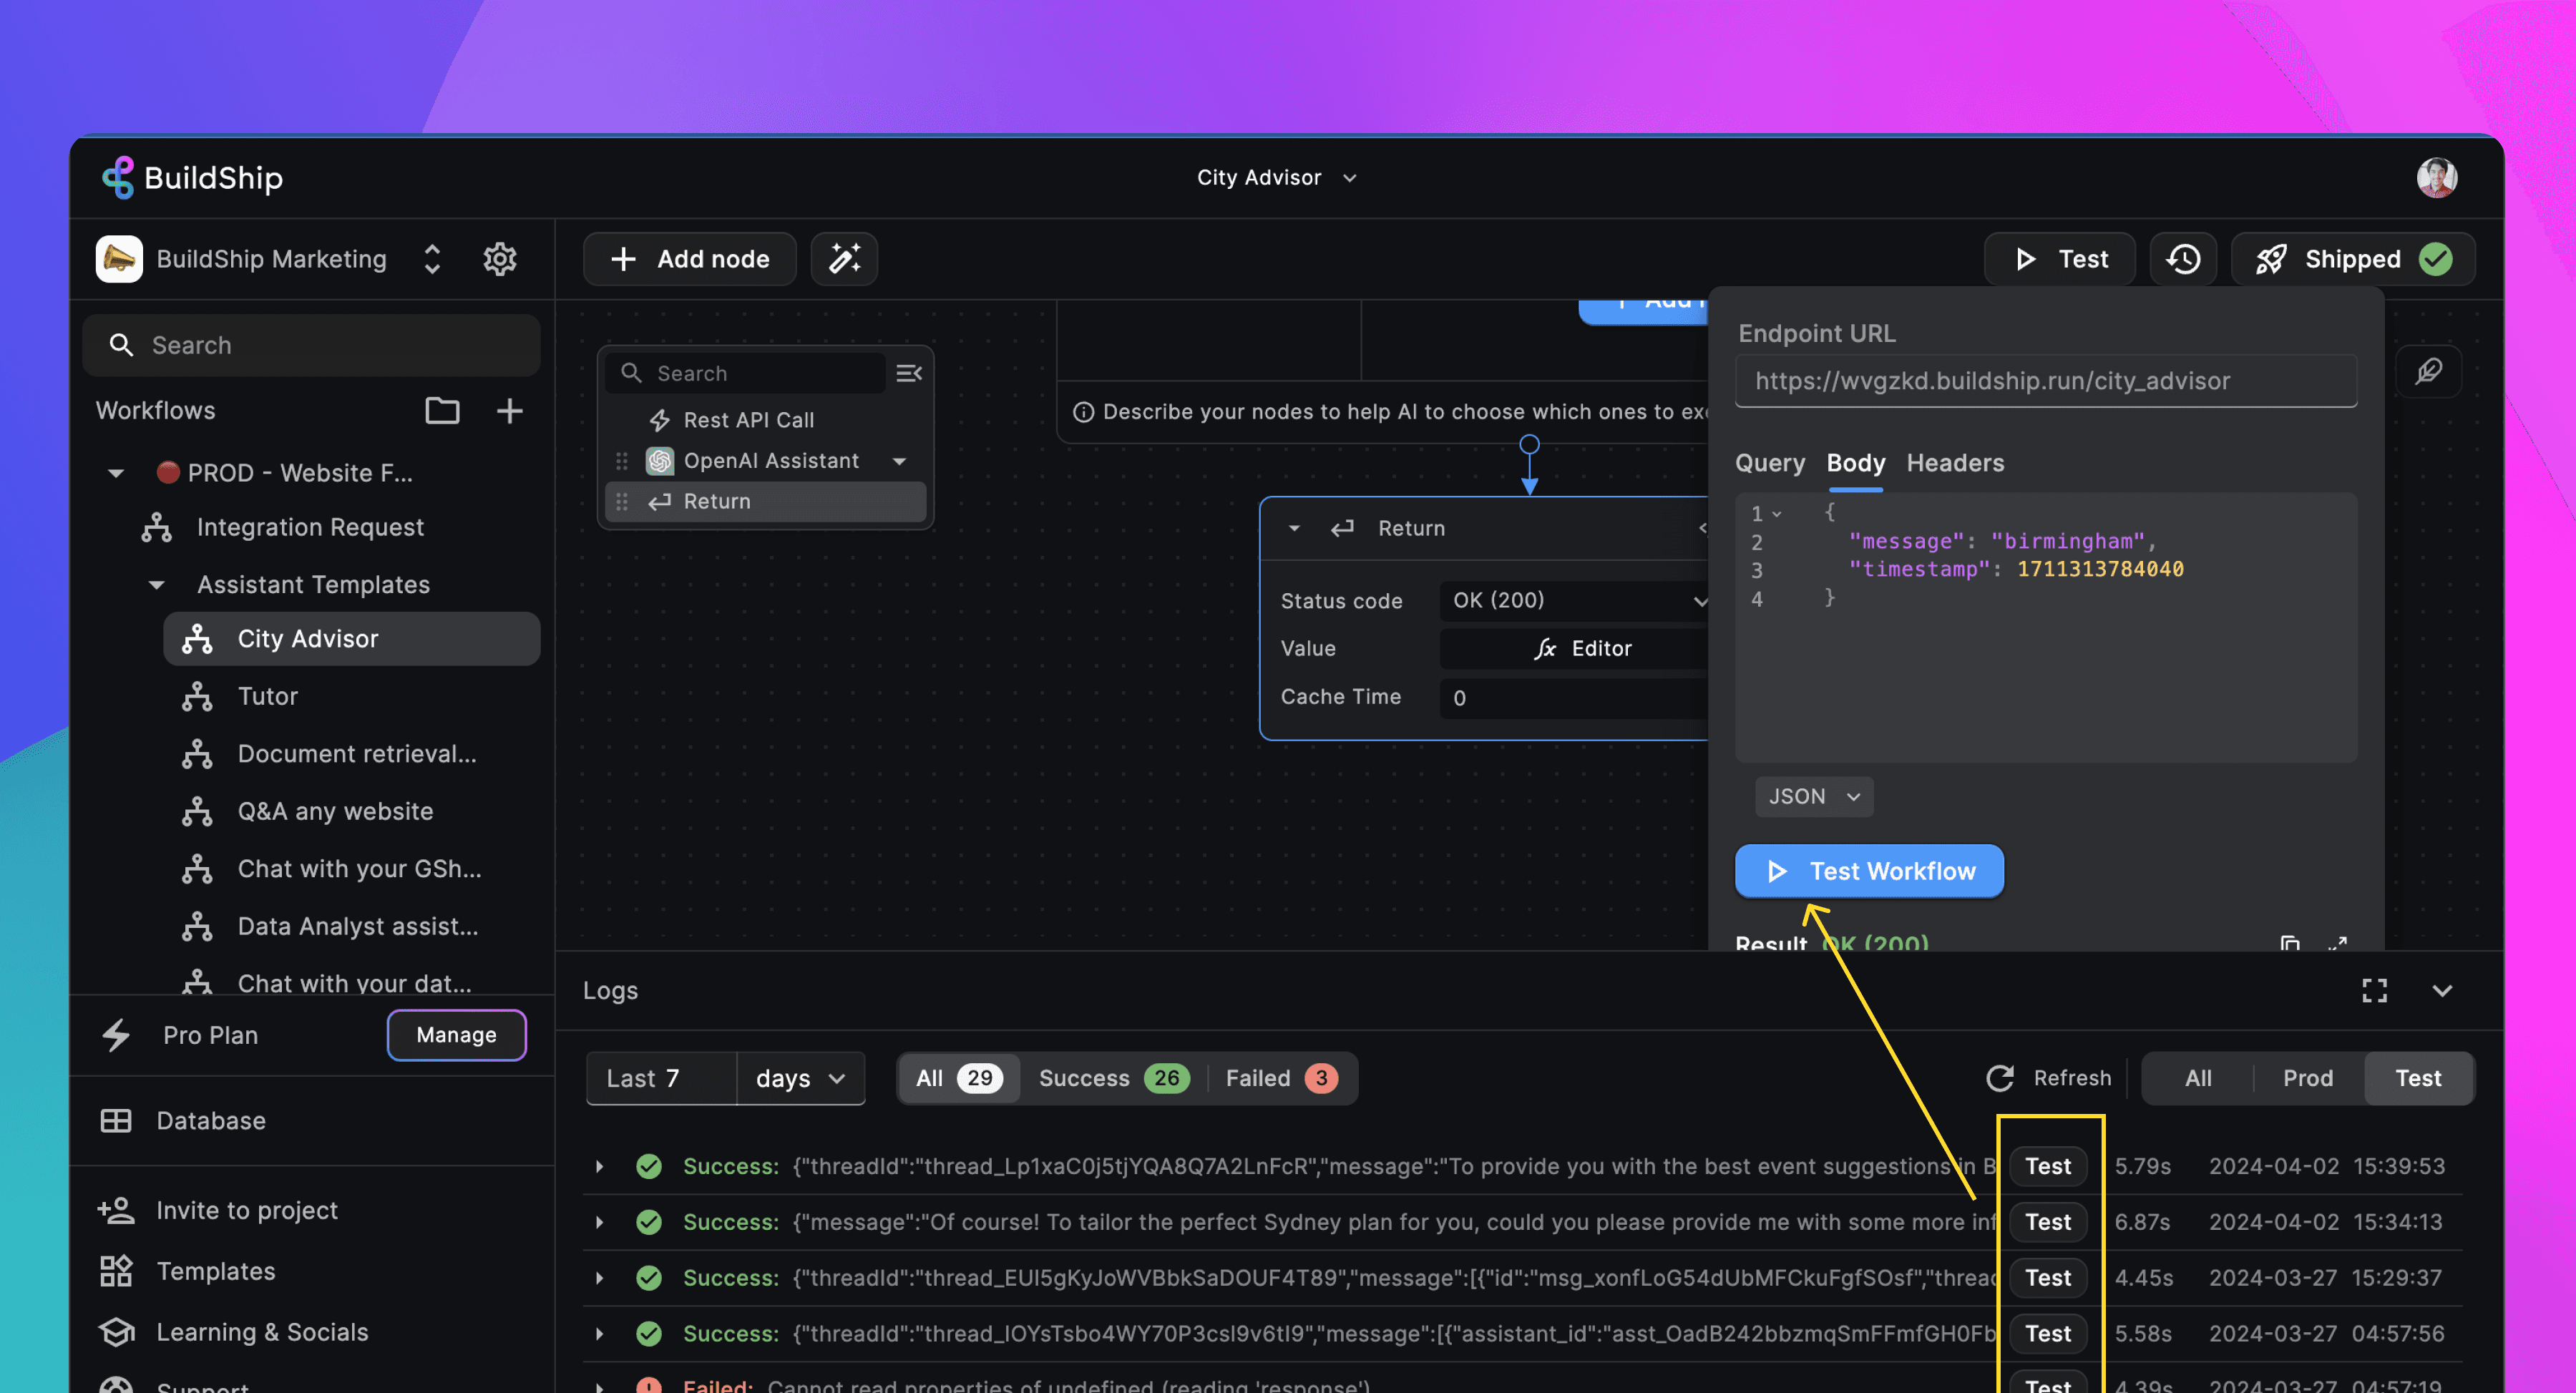
Irrespective of nodes manual logging, all of the workflow executions (both testing and via the production environment) are logged in the Logs section at the bottom.
The logs can be filtered based on the time range.
All the inputs and outputs of the nodes, and trigger request data are logged in the logs section.
Testing
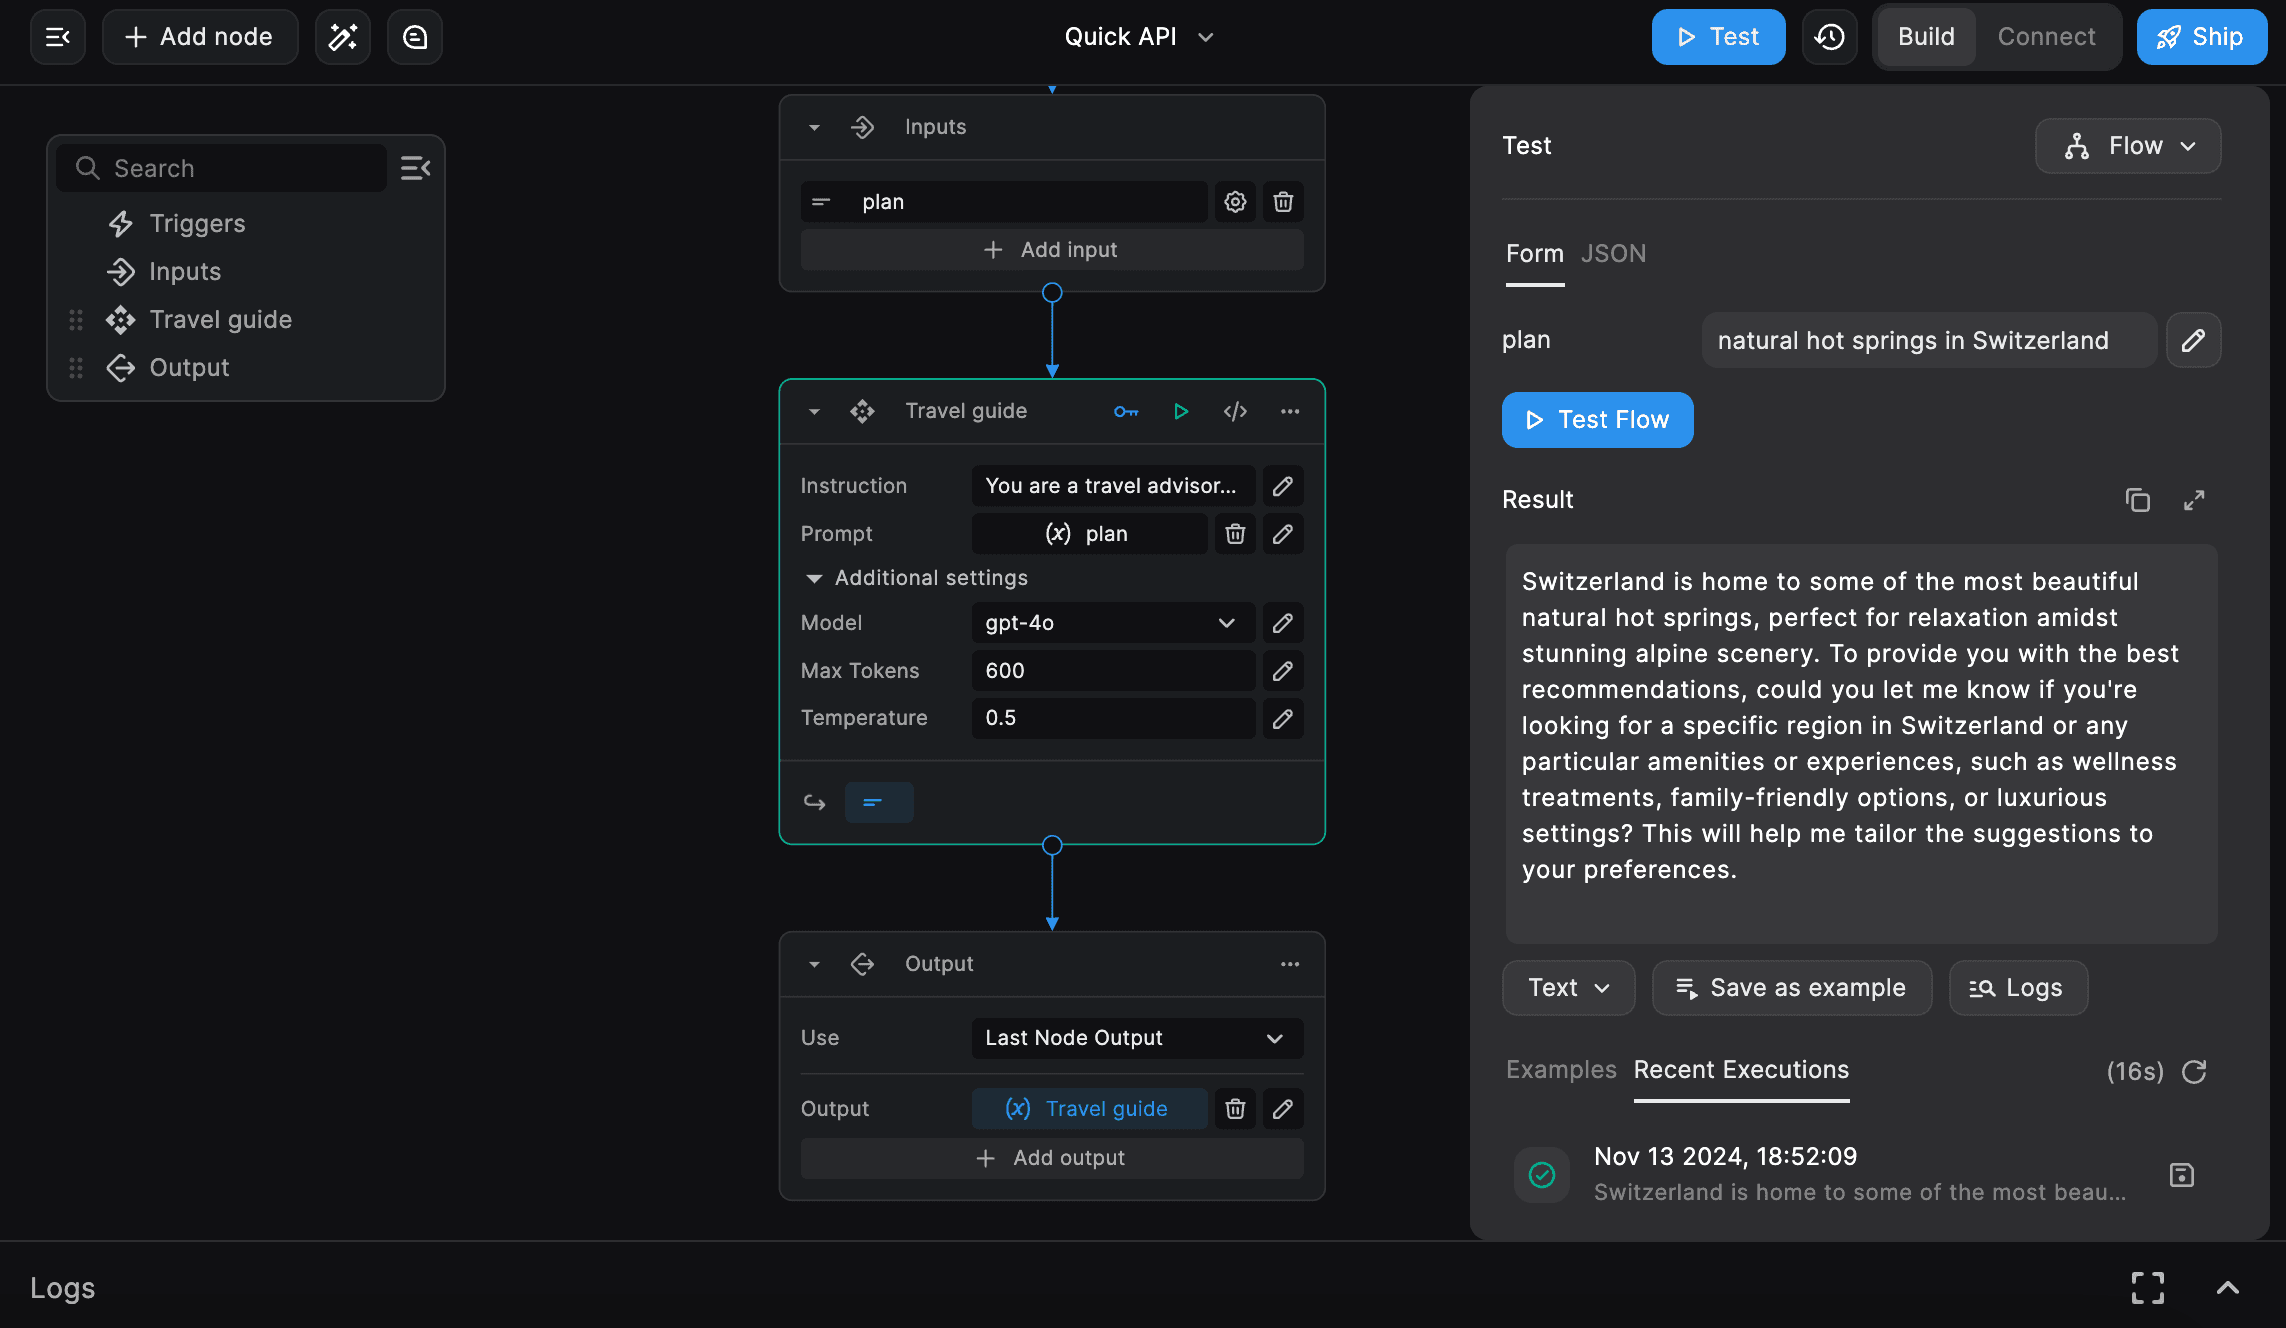
Test your workflow end-to-end without the need to deploy the entire workflow. Learn more about Workflow Testing here.
You can test individual nodes directly from the node on the canvas or right from the Node Editor. Learn more about Node Testing here.
Nodes now also support Unit Testing. Learn more about adding Unit Tests to your nodes using the Tests feature in the node editor here.
We can also save and use examples in the testing feature to preserve specific test cases for future reference and reuse, for both Nodes and Workflows. Learn more.
This functionality is particularly useful for maintaining consistency in your testing process and quickly re-executing tests with the same inputs.
Sticky Notes and Readme Pages
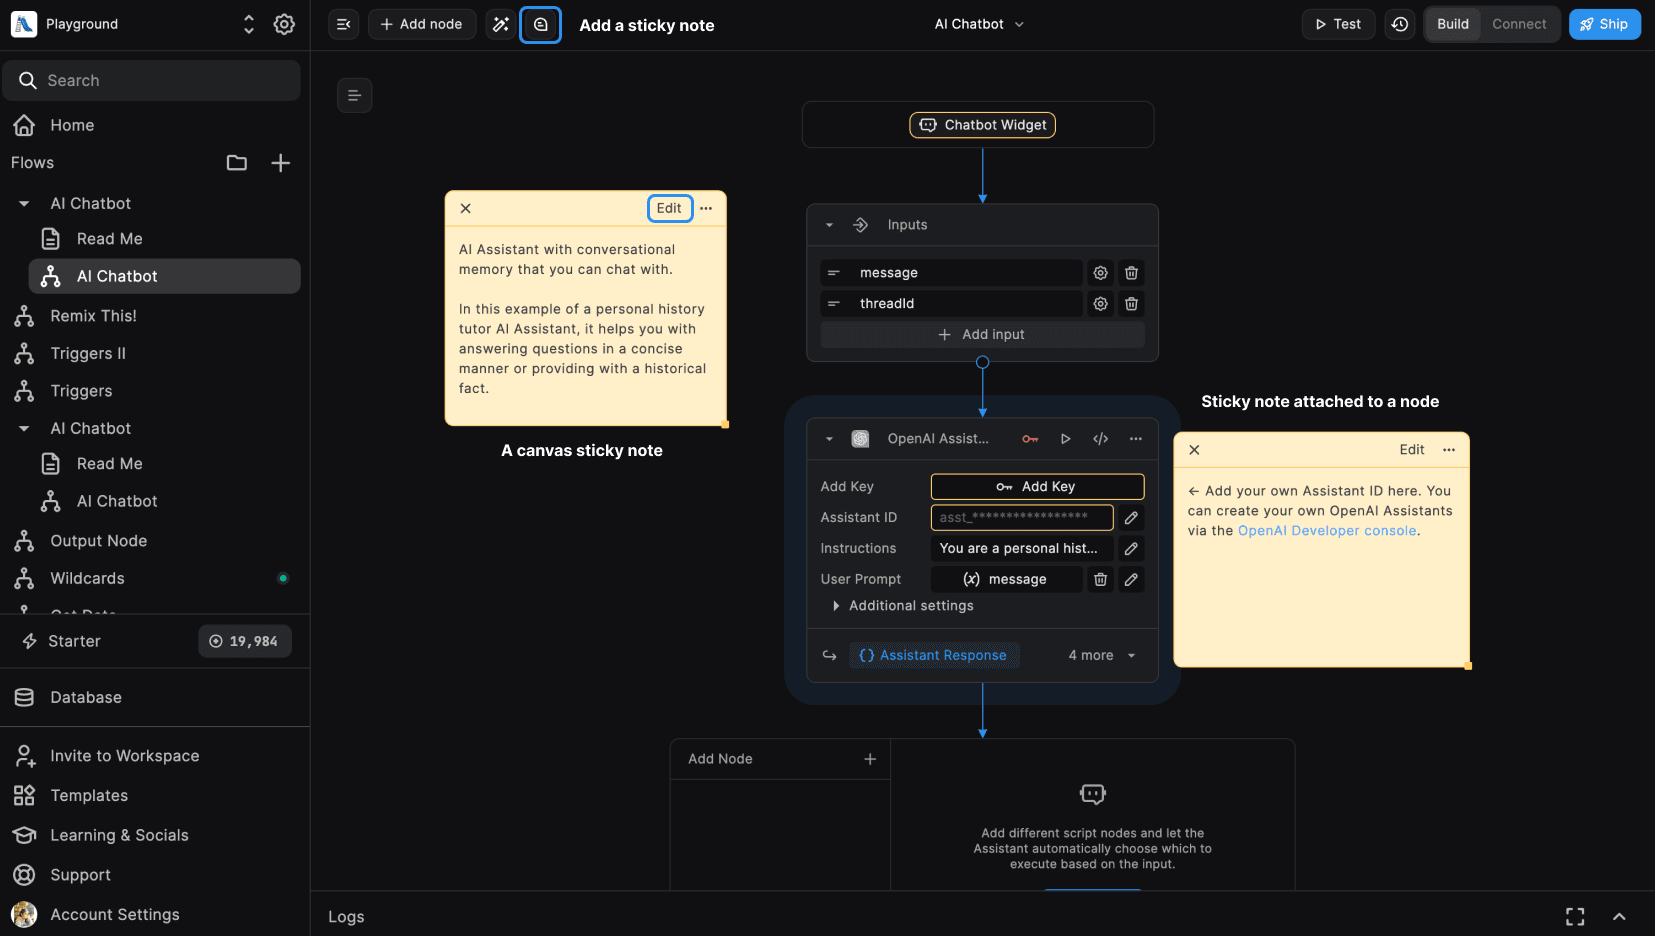
We can now add Sticky Notes to your workflow canvas to add comments or notes to your workflow.
We can also add a Readme pages to your workflows to add detailed documentation about your workflow.
Readme pages are a documentation page, where as Sticky Notes are more like post-it notes for your workflow.
Credits-based Pricing
BuildShip now offers a credits-based pricing model. The projects are allotted a certain number of credits based on the plan you are on. You can use these credits to run your workflows.
If you run out of credits, you can top up your account with more credits. You can also set up auto-renewal for your credits to ensure you never run out of credits.
In every plan, apart from the core features offered, you can now pick any advanced features that you would like for your usecase. This means, you can now have "Custom Domain" in Starter plan along with "No Cold start" - which previously was only possible in the Pro and Enterprise plans.
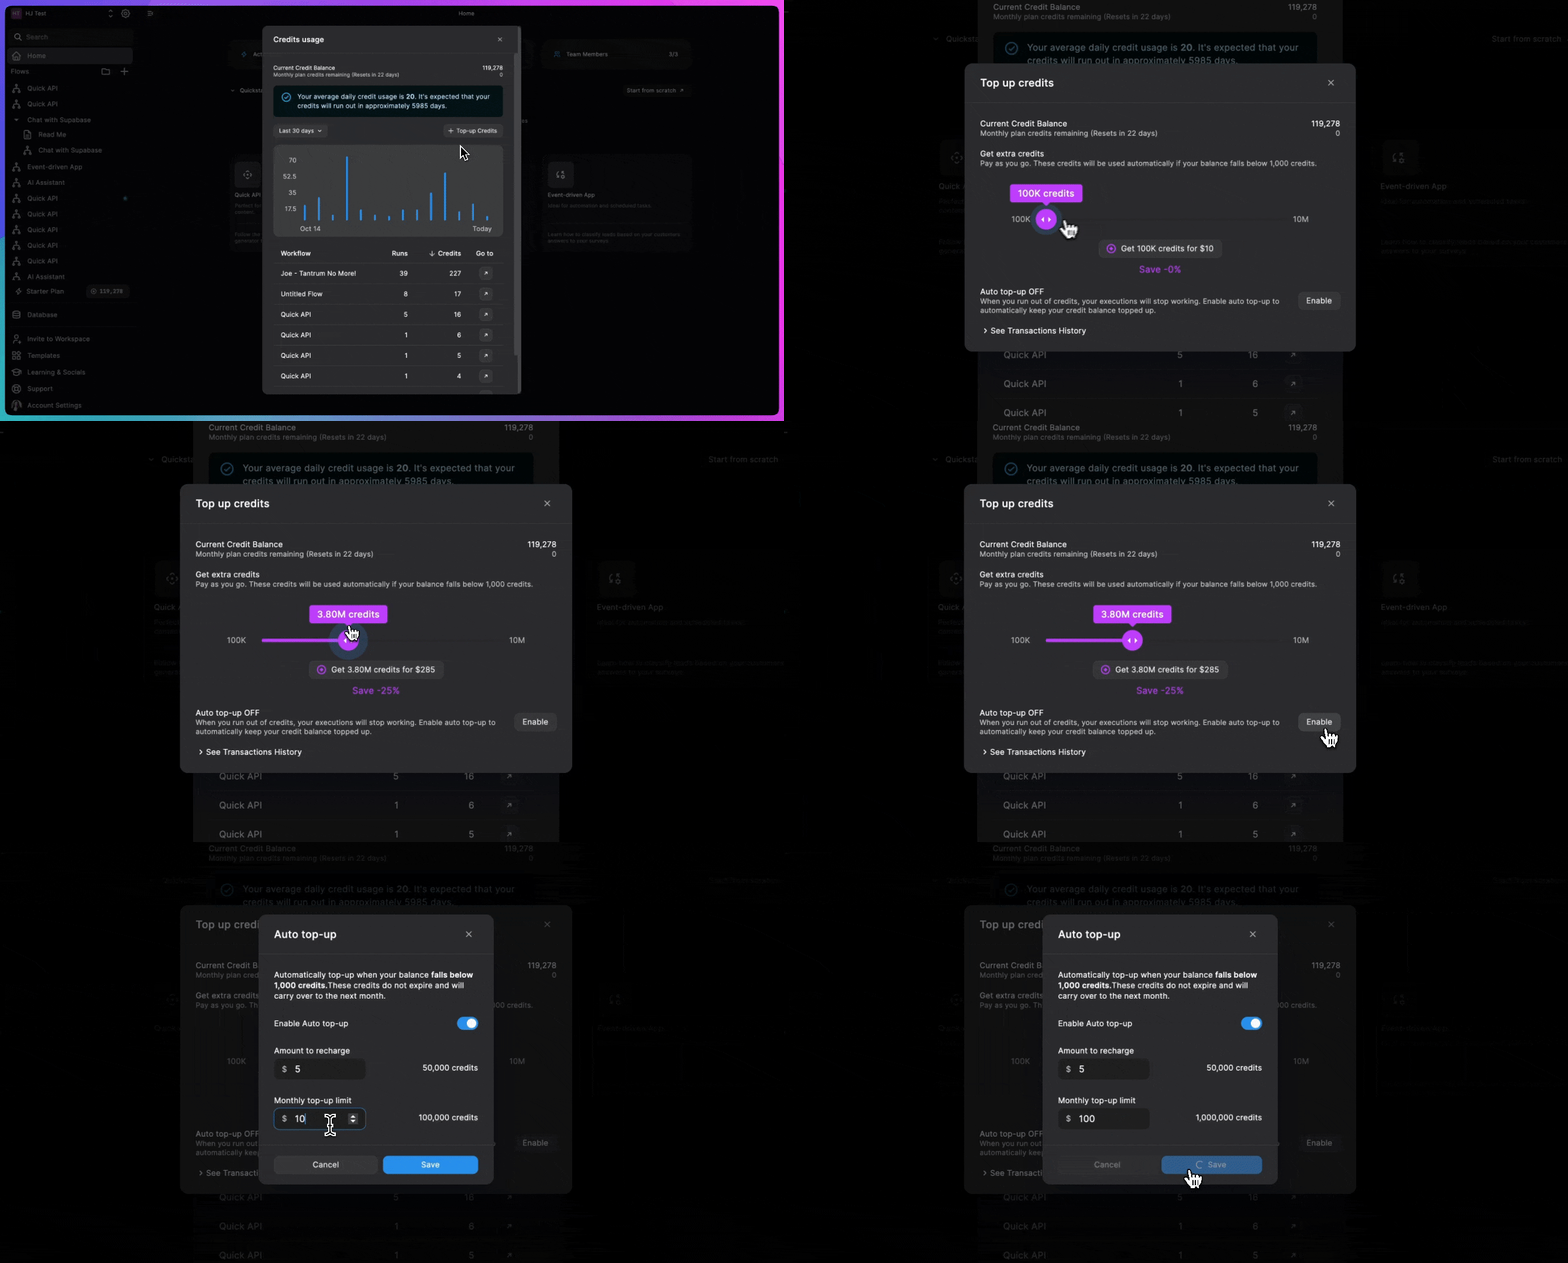
Learn more about the new pricing model here (opens in a new tab).
Connect
Connecting Triggers
Each trigger node serves as a starting point for your workflow, allowing you to automate processes based on specific events or schedules.
We can now connect multiple triggers to a single workflow. This allows you to trigger the same workflow in multiple ways. Learn more
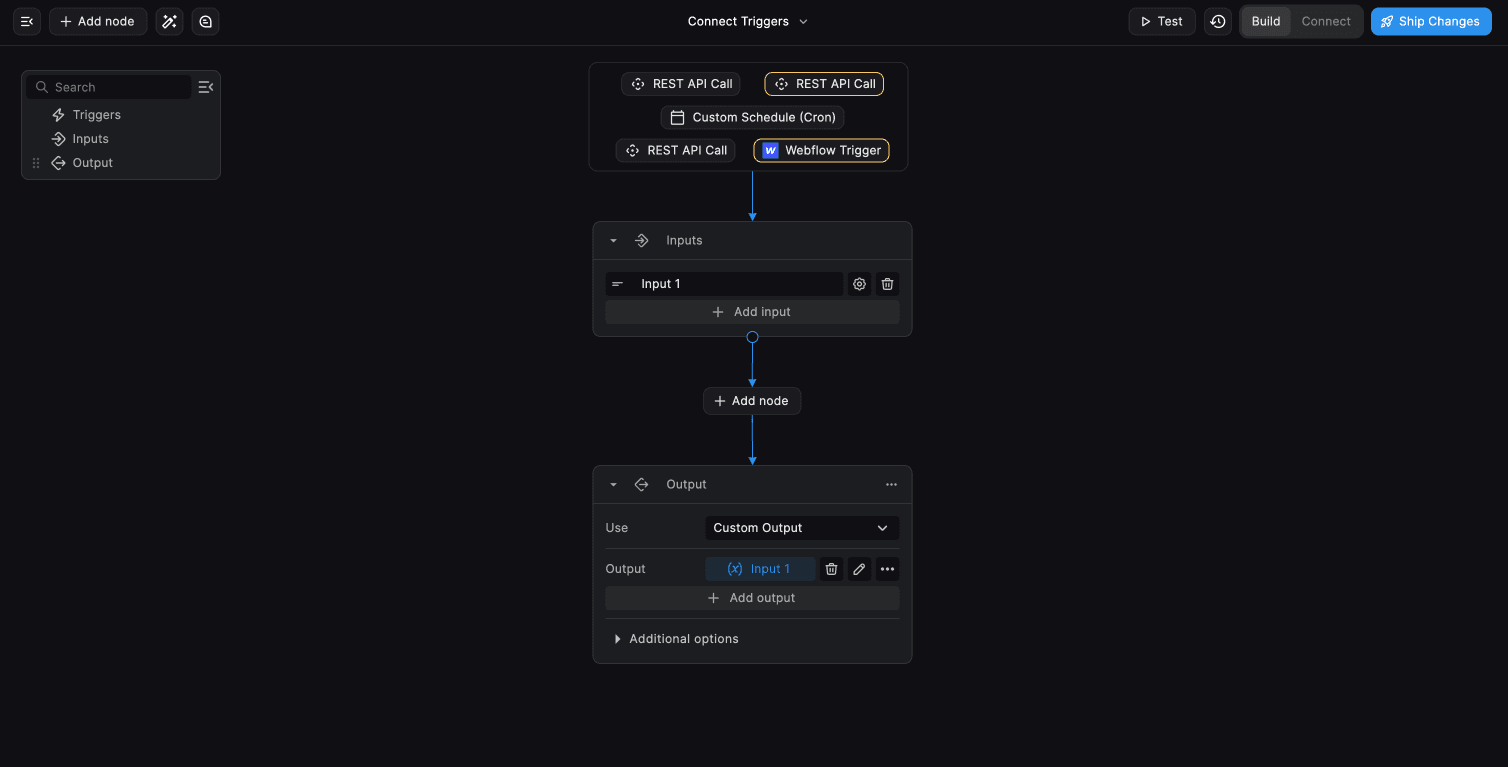
The "Connect" button on a trigger initializes the connection, and sets up any webhooks or listeners required for the trigger to work.
Once the trigger is connected, you can access additional configuration settings. We can then map trigger data as inputs to the workflow & workflow outputs as response to the trigger (if applicable).
Trigger Inputs
The Workflow inputs schema option lists all of your workflow inputs (required/optional). Here's where we'll map the incoming request data from the trigger to the workflow inputs. Learn more
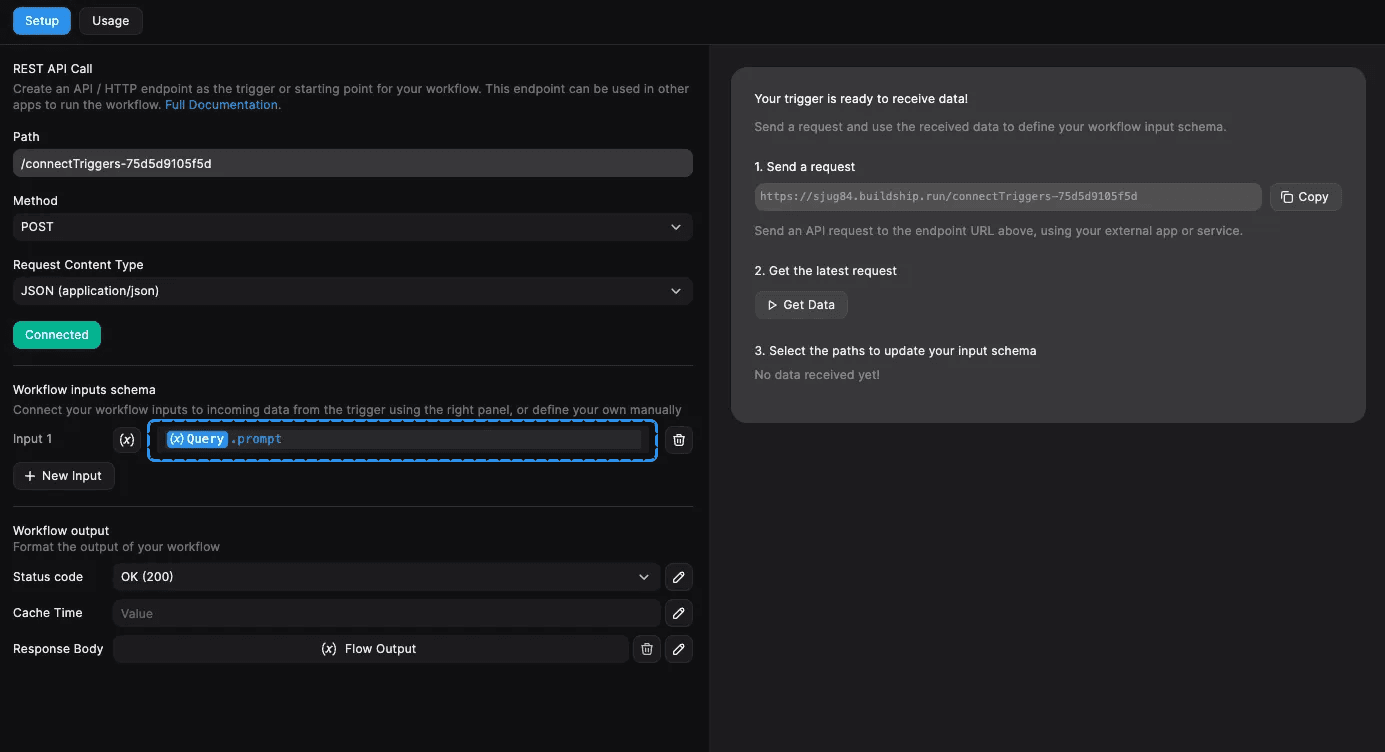
Click on the (x) icon to open the context menu. The Trigger Data object is the output values returned by the trigger you've added.
Each trigger returns a different set of outputs, for example: REST API Call Trigger returns Query, Headers, and Body for each incoming request.
Trigger Outputs
The Workflow output section let's you define the format and values of the response your workflow will return. This would only be applicable if the trigger you are using requires a response. Learn more
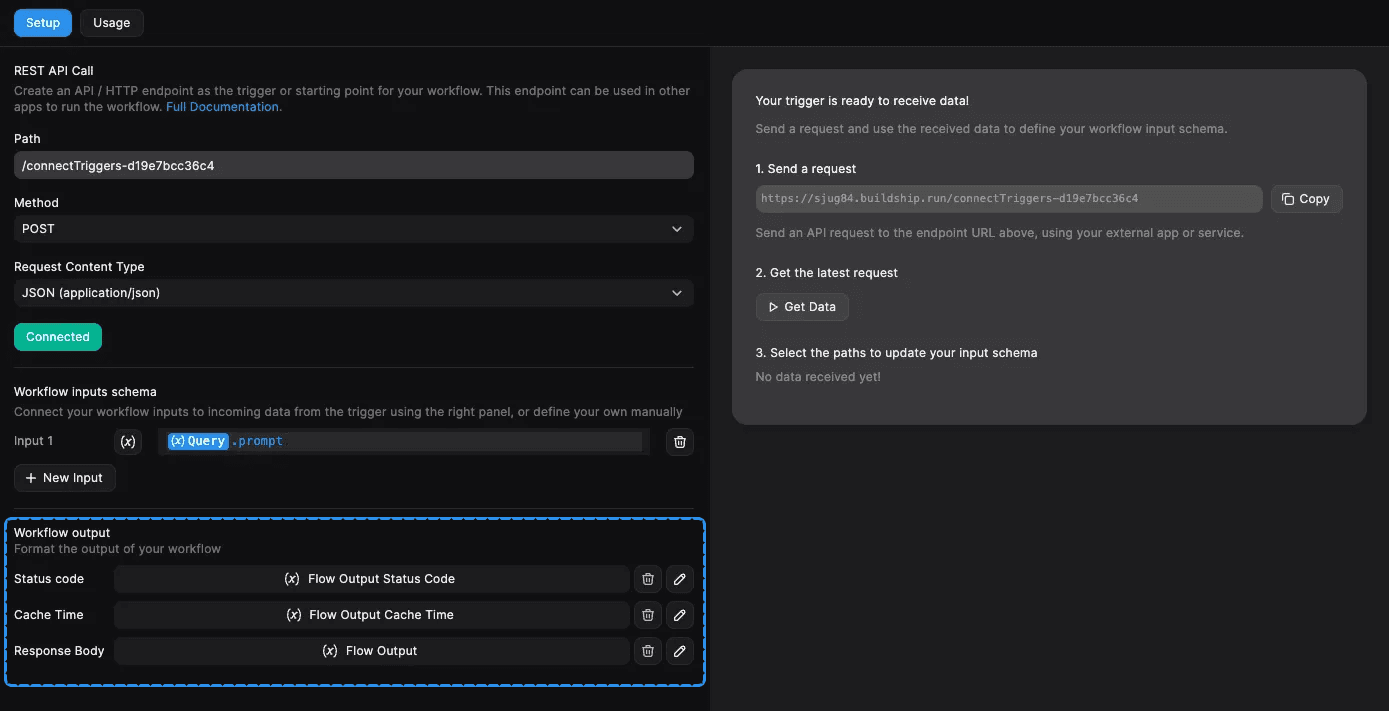
Get Data
The Get Data feature let's you fetch the latest request to the set up endpoint and define your Workflow Input Schema based on the request.
Learn how to use the Get Data feature here.
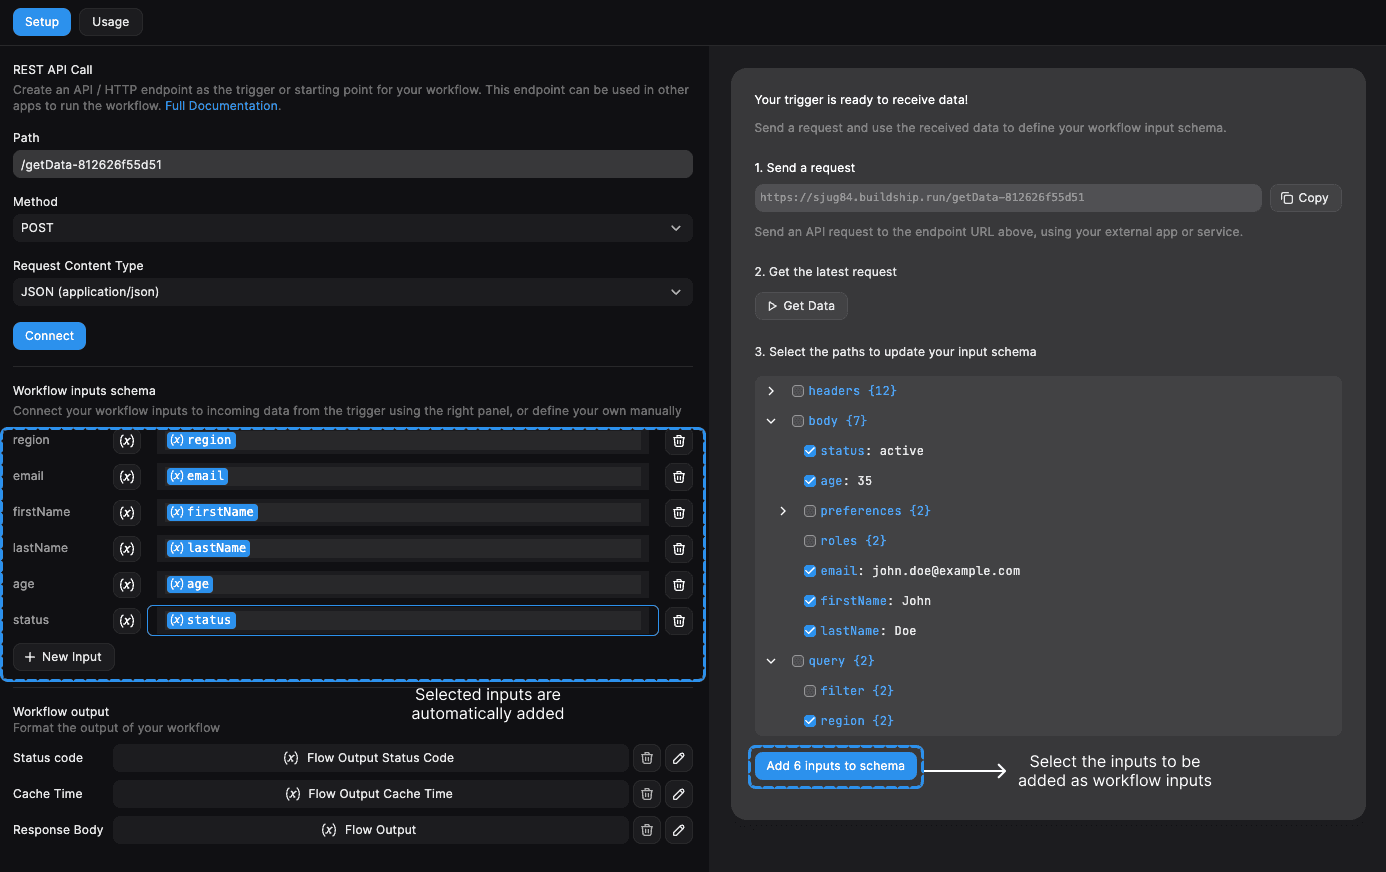
Ship
Once you have set up your workflow, tested it, and connected the triggers, you can click the Ship button on the top right corner to make your flow Active. You can 'Pause' your flow afterwards if you need.
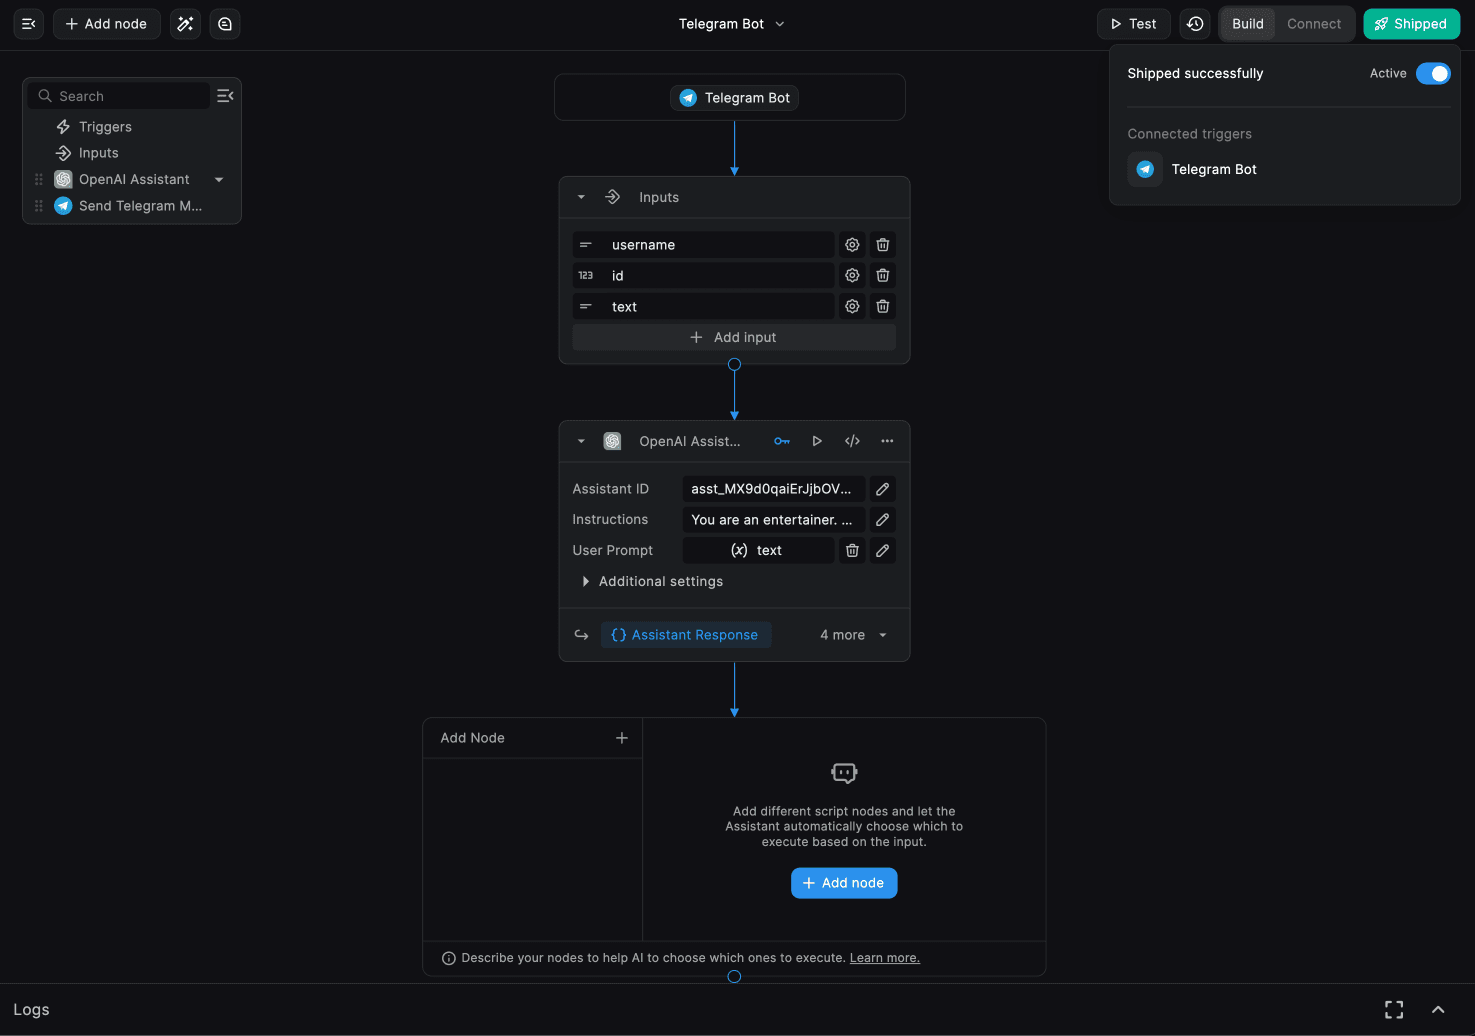
Active and Paused Workflows
Once you have set up your workflow, you can click the Ship button on the top right corner to make your flow Active. You can 'Pause' your flow afterwards if you need.
Pausing workflows is a great way to save execution costs when the workflow is not in use.
Need Help?
- 💬Join BuildShip Community
An active and large community of no-code / low-code builders. Ask questions, share feedback, showcase your project and connect with other BuildShip enthusiasts.
- 🙋Hire a BuildShip Expert
Need personalized help to build your product fast? Browse and hire from a range of independent freelancers, agencies and builders - all well versed with BuildShip.
- 🛟Send a Support Request
Got a specific question on your workflows / project or want to report a bug? Send a us a request using the "Support" button directly from your BuildShip Dashboard.
- ⭐️Feature Request
Something missing in BuildShip for you? Share on the #FeatureRequest channel on Discord. Also browse and cast your votes on other feature requests.