Custom Schedule (Cron) Trigger
The Scheduled Cron Trigger is a powerful tool within BuildShip that enables you to automate workflows based on scheduled time intervals. This trigger allows you to initiate workflows at specific times, or patterns, ensuring timely execution of your automation tasks.

How to Use Scheduled Cron Trigger
The Scheduled Cron Trigger comes with three essential fields that you need to configure:
-
Location: The GCP region where the trigger will be executed. This field is automatically filled based on the GCP region associated with your workspace.
-
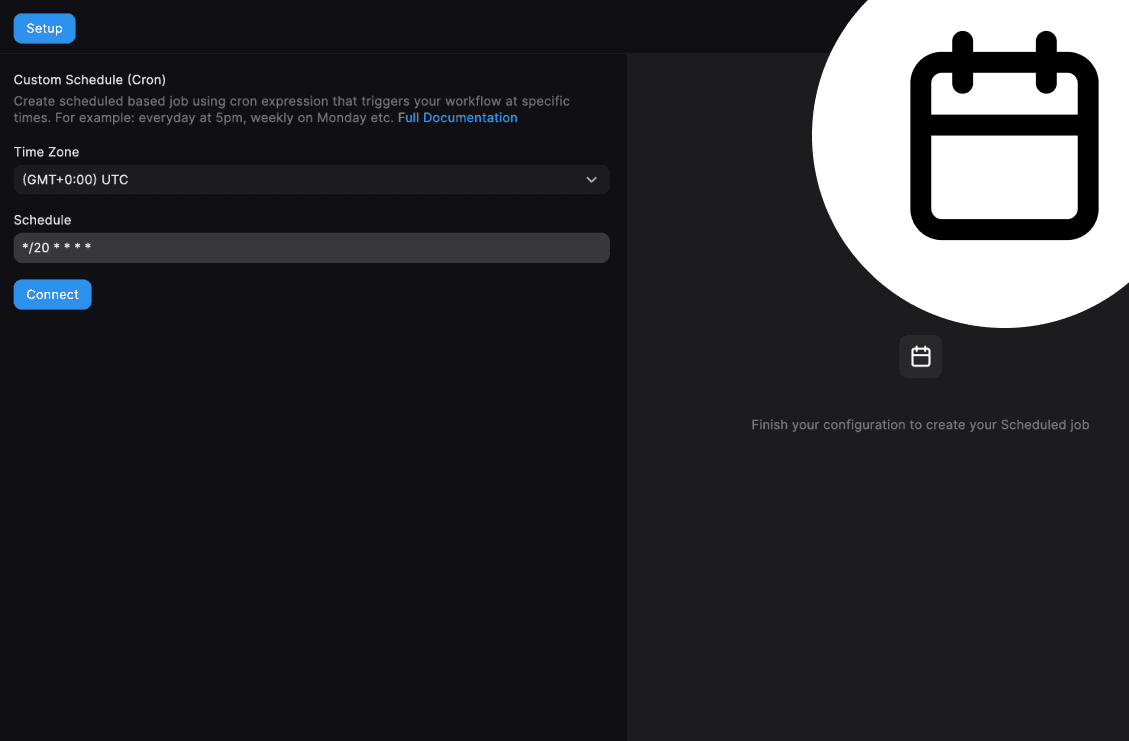
Schedule: Set the schedule pattern using the cron syntax. This field determines the frequency and timing of your workflow execution. For example,
*/20 * * * *specifies an interval of 20 minutes.
Discover additional information about cron syntax and creating custom cron expressions here.
- Time Zone: Choose the desired time zone for your scheduled trigger. You can select from the list of existing time zones.
Understanding the Cron Syntax
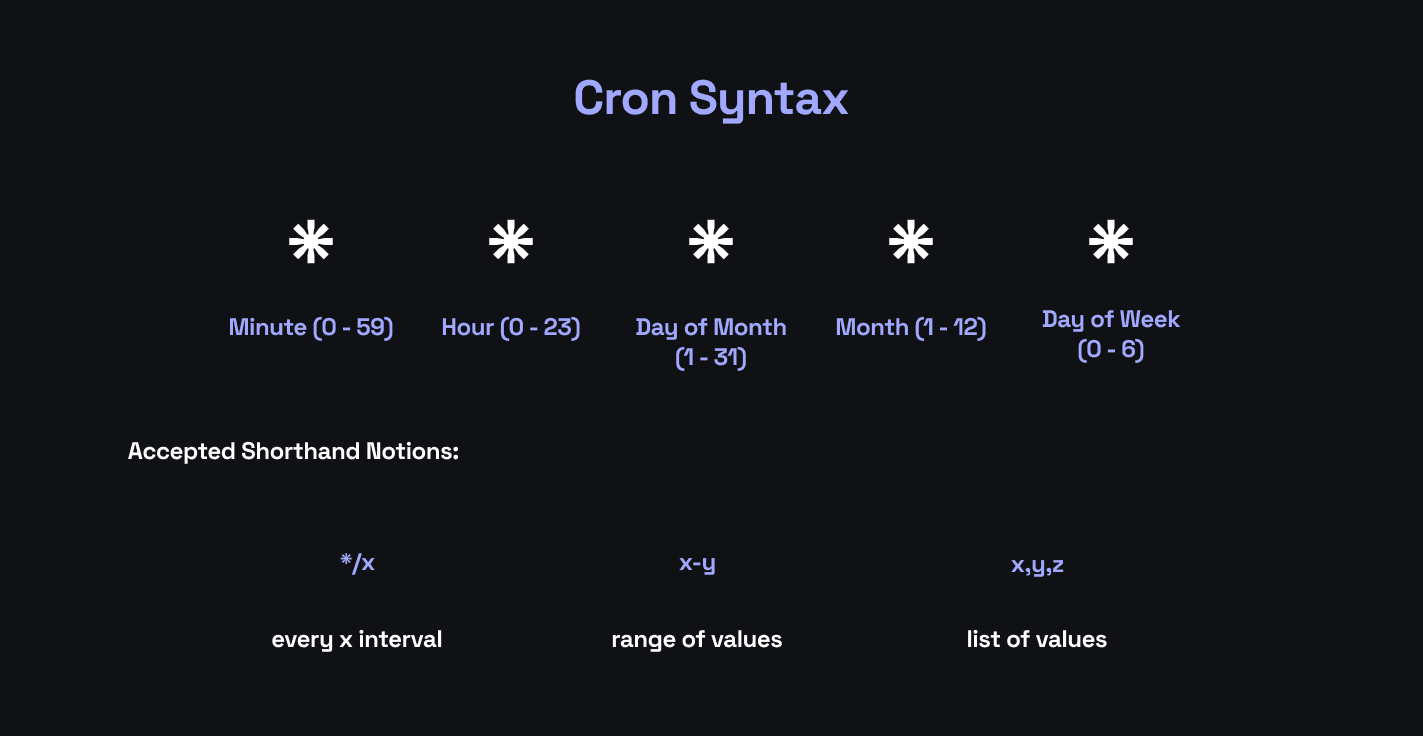
CRON syntax is a widely used standard for scheduling tasks in various Unix-like operating systems. It defines a set of fields that specify when a task should be executed based on time intervals. Each field represents a unit of time, allowing users to define intricate scheduling patterns.

The CRON syntax consists of five fields, each separated by a space:
-
Minute (0 - 59): Specifies the minute at which the task should run. A value of * indicates any minute, while 0 indicates the exact minute.
-
Hour (0 - 23): Specifies the hour at which the task should run. A value of * indicates any hour, while 0 indicates midnight.
-
Day of Month (1 - 31): Specifies the day of the month when the task should run. A value of * indicates any day, while specific numbers represent particular days.
-
Month (1 - 12): Specifies the month when the task should run. A value of * indicates any month, while specific numbers represent particular months.
-
Day of Week (0 - 6): Specifies the day of the week when the task should run. The values 0 and 7 often represent Sunday, 1 represents Monday, and so on.
The CRON syntax also supports special characters and shorthand notations:
*/x: Represents every x interval. For example, */15 in the minutes field means every 15 minutes.x-y: Represents a range of values. For example, 1-5 in the day of week field means Monday to Friday.x,y,z: Represents a list of values. For example, 1,15 in the day of month field means the 1st and 15th day.
EXAMPLE 1: Suppose you want to schedule a task to run every day at 3:30 PM.
The CRON expression for this scenario would be: 30 15 * * *
- Minute (30): The task should run at the 30th minute of the hour.
- Hour (15): The task should run at the 15th hour, which is 3:00 PM in 24-hour format.
- Day of Month (*): The task should run on any day of the month.
- Month (*): The task should run in any month.
- Day of Week (*): The task should run on any day of the week.
EXAMPLE 2: Suppose you want to schedule a task to run every weekday (Monday to Friday) at 9:00 AM.
The CRON expression for this scenario would be: 0 9 * * 1-5
- Minute (0): The task should run at the 0th minute of the hour.
- Hour (9): The task should run at the 9th hour, which is 9:00 AM.
- Day of Month (*): The task should run on any day of the month.
- Month (*): The task should run in any month.
- Day of Week (1-5): The task should run on Monday to Friday.
Setting up the Scheduled Cron Trigger
To set up a Scheduled Cron Trigger within your BuildShip workflow, follow these steps:
-
Go to the Connect tab and pick the Custom Schedule (Cron) trigger.
-
Configure the fields within the Scheduled Cron Trigger node. You can choose your schedule pattern, and time zone for your trigger as given in the above sections.
Use Cases for Scheduled Interval Trigger
Example 1: Daily Backup
CRON Expression: 0 0 * * *
Description: This expression triggers the workflow every day at midnight. It's perfect for automating daily backups of your data.
Example 2: Weekly Reports
CRON Expression: 0 8 * * 1
Description: This expression triggers the workflow every Monday at 8:00 AM. It's great for generating weekly reports at the start of the workweek.
Connection and Testing
Once the basic configuration is done, click on the “Connect” button. If connected successfully, the button shows success.
You can test out your built workflow using the Workflow Testing option in the Build tab. This allows you to simulate the workflow execution and verify the expected outputs.
Input / Output Mapping and Get Data
This trigger does not have any input/ output to mapping as it is a schedule-based trigger.
Get Data is not supported.
Need Help?
- 💬Join BuildShip Community
An active and large community of no-code / low-code builders. Ask questions, share feedback, showcase your project and connect with other BuildShip enthusiasts.
- 🙋Hire a BuildShip Expert
Need personalized help to build your product fast? Browse and hire from a range of independent freelancers, agencies and builders - all well versed with BuildShip.
- 🛟Send a Support Request
Got a specific question on your workflows / project or want to report a bug? Send a us a request using the "Support" button directly from your BuildShip Dashboard.
- ⭐️Feature Request
Something missing in BuildShip for you? Share on the #FeatureRequest channel on Discord. Also browse and cast your votes on other feature requests.