Telegram Bot Trigger
The Telegram Bot Trigger in BuildShip makes it easy to automate and manage Telegram conversations using our intuitive no-code, drag-and-drop workflow builder. Instantly handle incoming messages in Telegram chats and streamline your bot interactions—no programming required.
Key Features
- Effortlessly moderate and respond to telegram chat messages
- Integrate with OpenAI to generate smart, personalized replies
- Build dynamic Telegram bots to enhance user engagement
- Share your bot with users for real-time, automated communication
Whether you're managing a community or running customer support, BuildShip empowers you to create powerful Telegram bots and workflows—visually, quickly, and without writing a single line of code.
Prerequisites
Telegram bot API key - You need a Telegram API key from a Telegram bot that will be responding to the incoming messages. To setup a bot and get the API key, follow the instructions below:
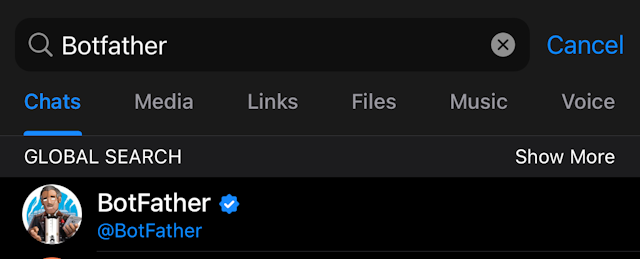
- Go to your Telegram App, and enter @BotFather in the search tab and select the verified bot with tick mark that shows up.
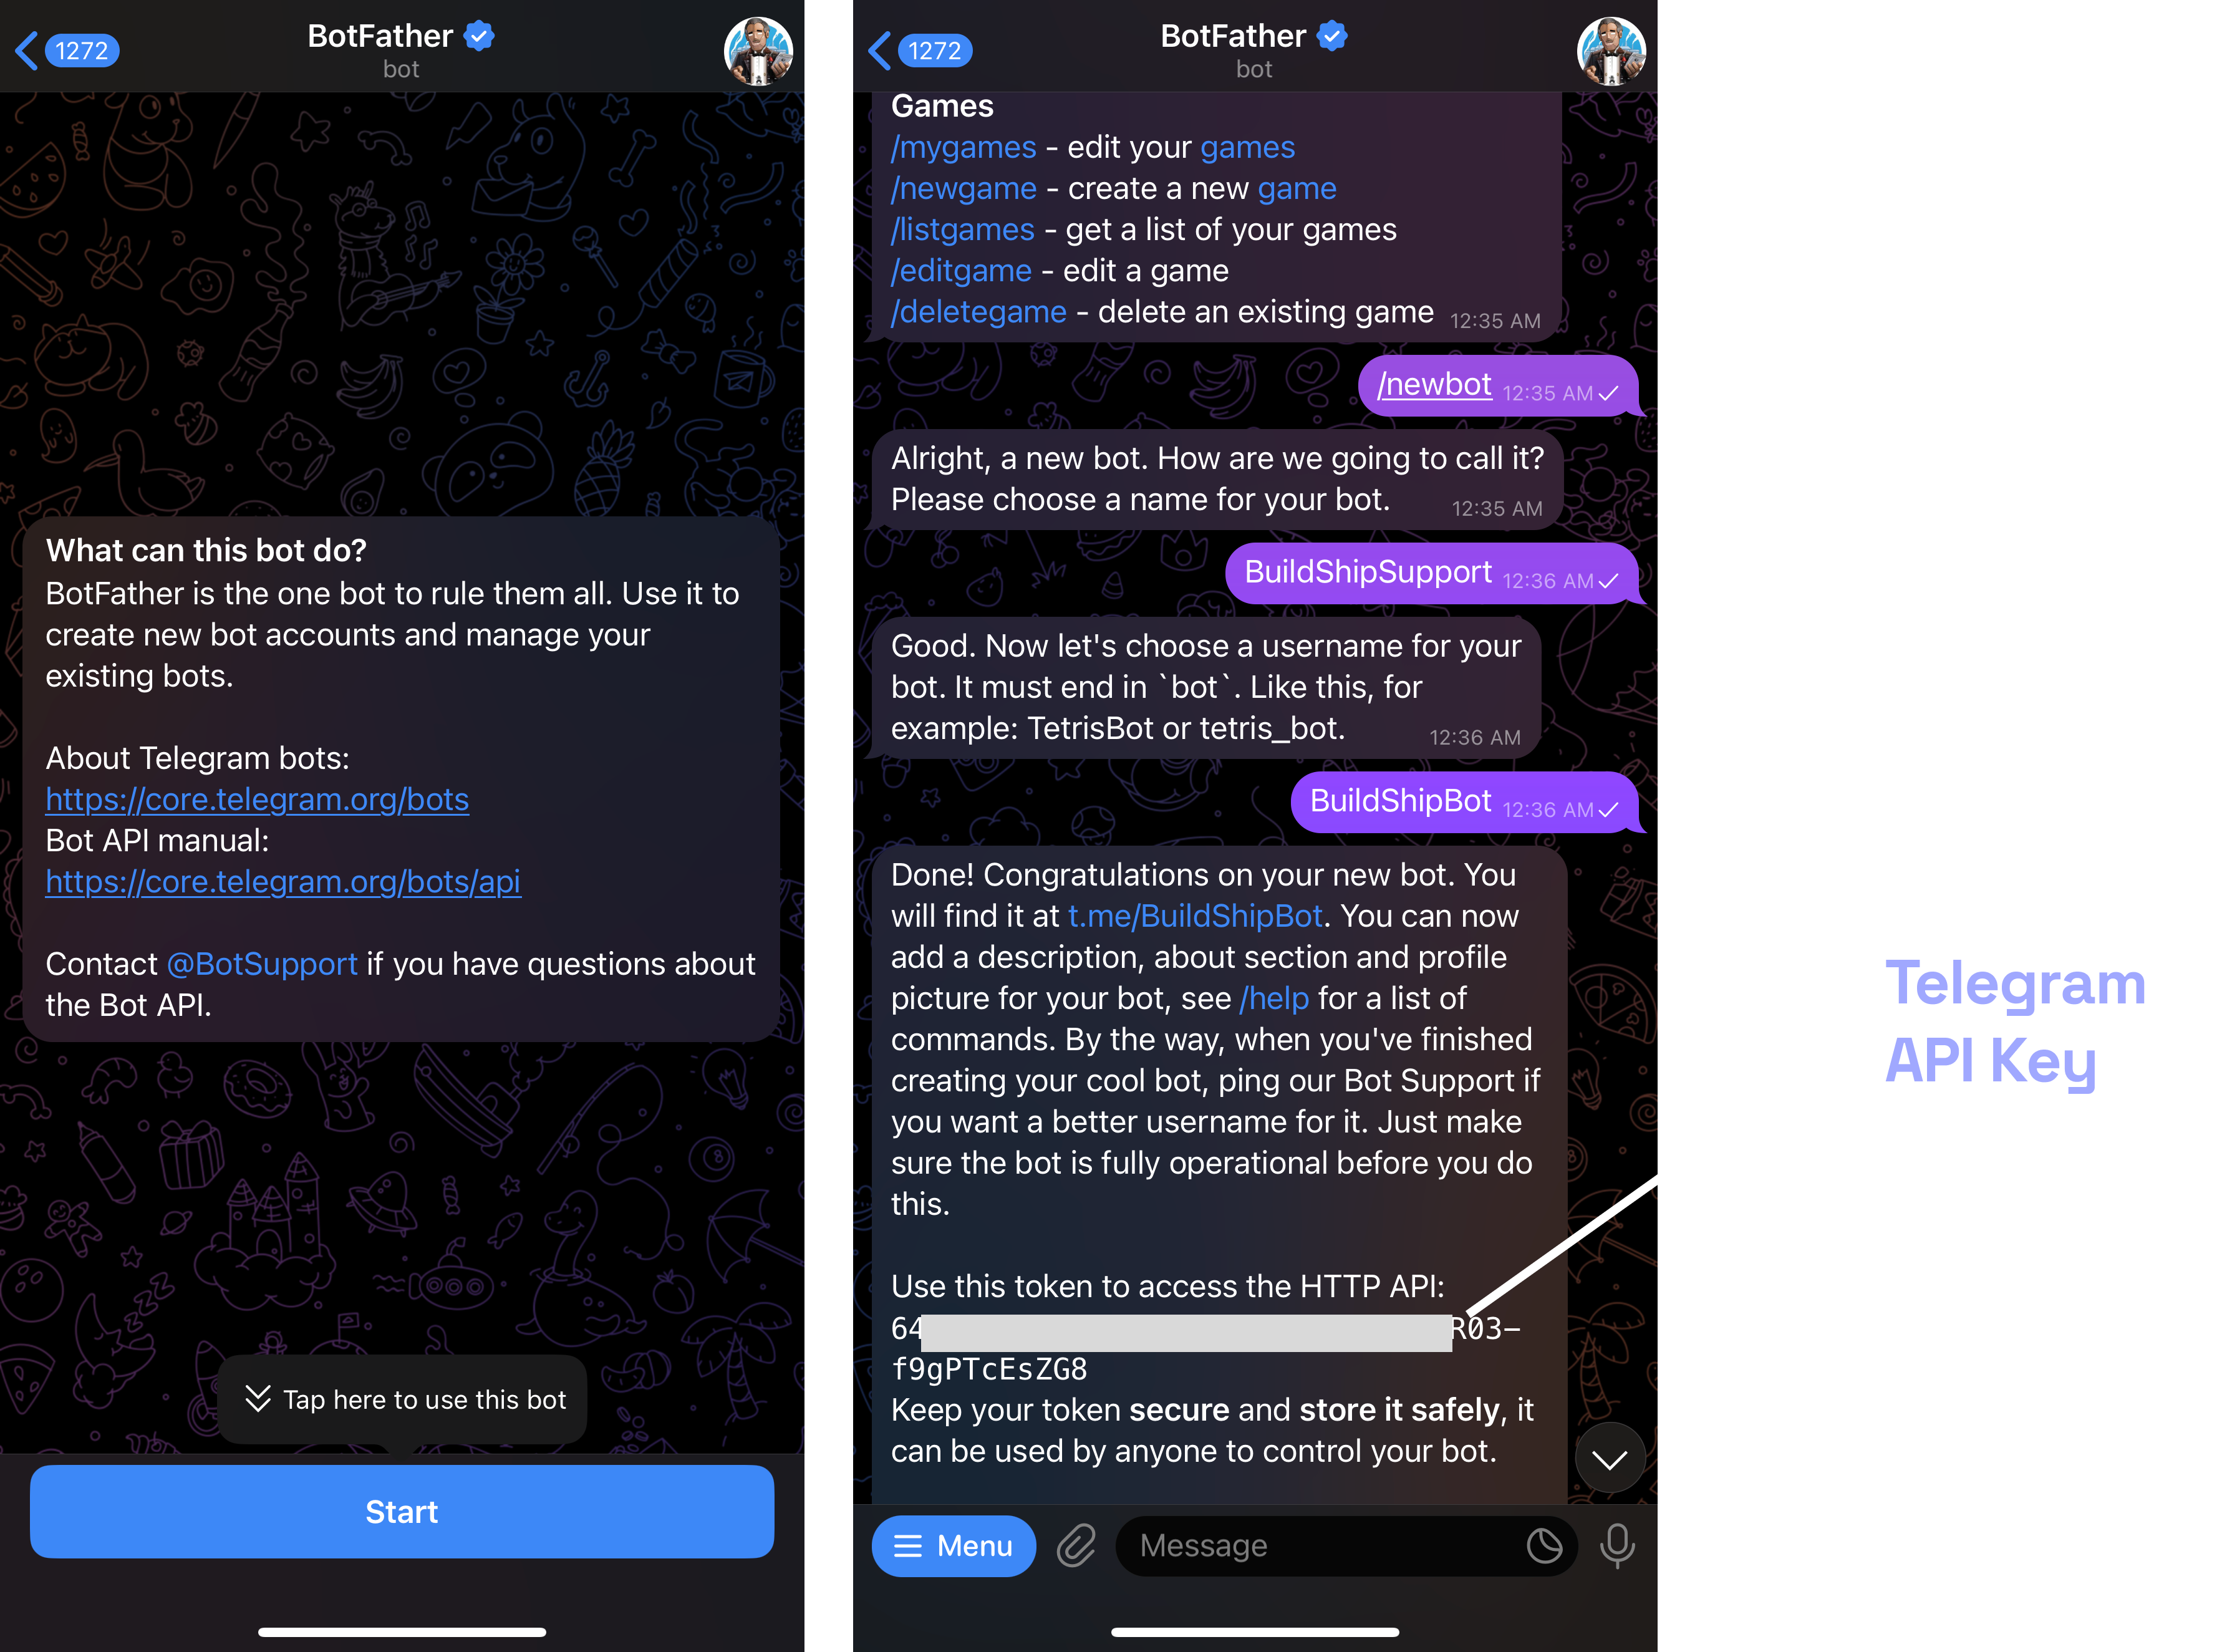
- Click Start to activate the BotFather bot. You will receive a list of commands to manage the bots.
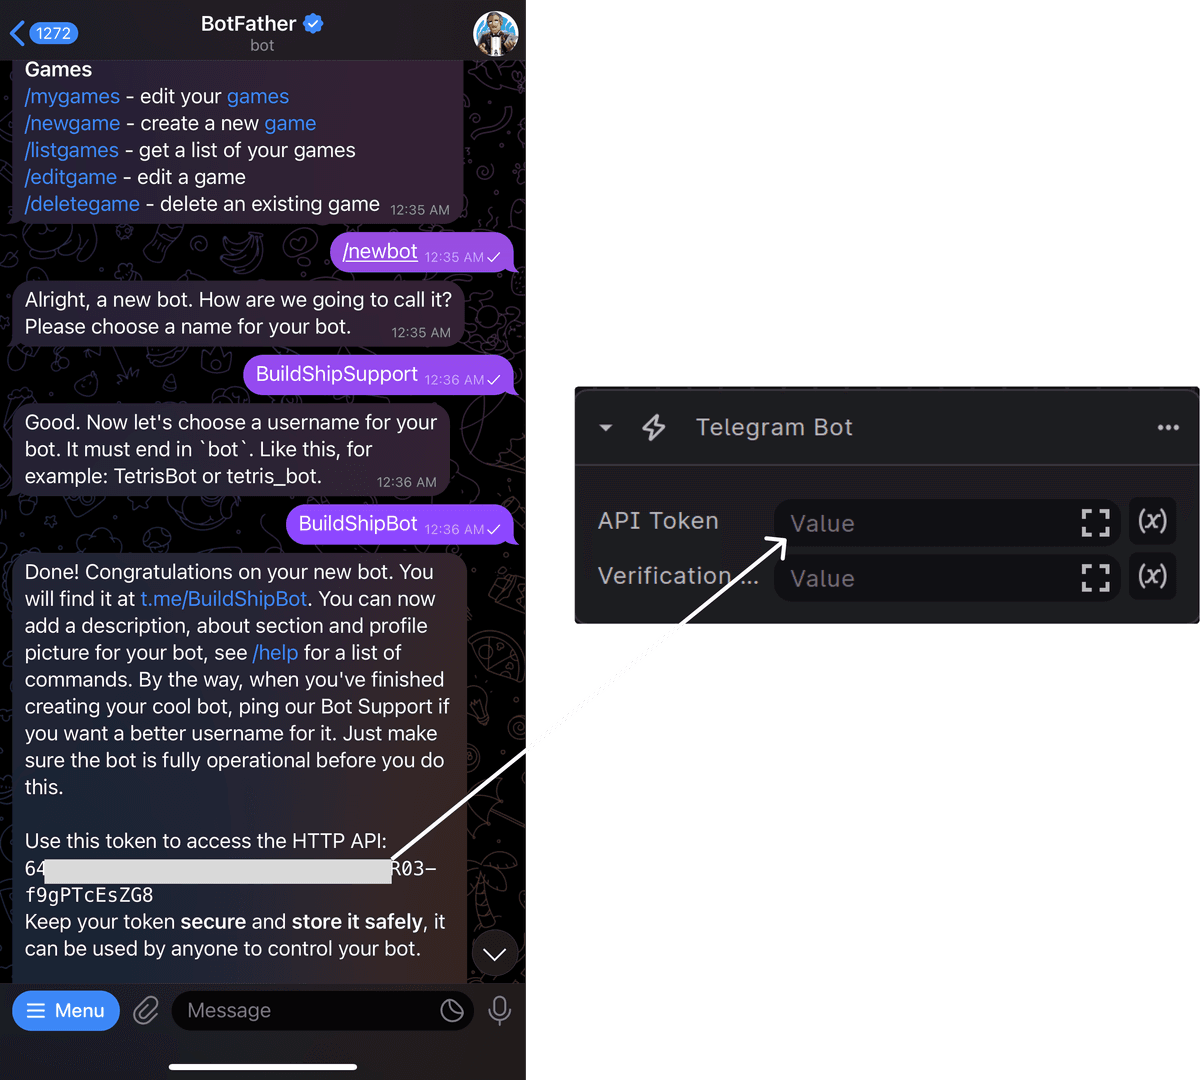
- Choose or type the /newbot command and click Send.
- Choose a name for your bot. Your subscribers will see it in their conversations. Next, choose a username for your bot. The bot can be found by its username in the search bar. The username must be unique and end with the word "bot."
- Once you've made your selection for your bot's name, your bot will be brought to life. Shortly thereafter, you'll receive a message containing a link leading to your bot, which can be accessed at "t.me/[bot_username]" as well as your API key.
- Make note of this API key as this is what you will need to use in the Telegram Trigger node on BuildShip.
How to setup Telegram bot - step by step guide
Quickstart Option - Clone the Telegram Bot Template
Clone Template
Clone this template (opens in a new tab) to get started with the Telegram Bot by just adding your token.
Add personal UID
Search Telegram Bot for @userdetailsbot on telegram to get your personal UID. Add the UID generated by Userinfo | Get id bot in the chat ID of the Send Telegram Messaging Node. (Optional if using
from the template - the ID is passed as variable from the trigger response)
Search and start your bot on Telegram
Search for the bot you created on Telegram and click Start.
Start chatting with your Bot
Start chatting with your bot and test your flow. You can look at the logs on BuildShip and adjust the logic as you need.

Manual Option - Create a Telegram Bot workflow
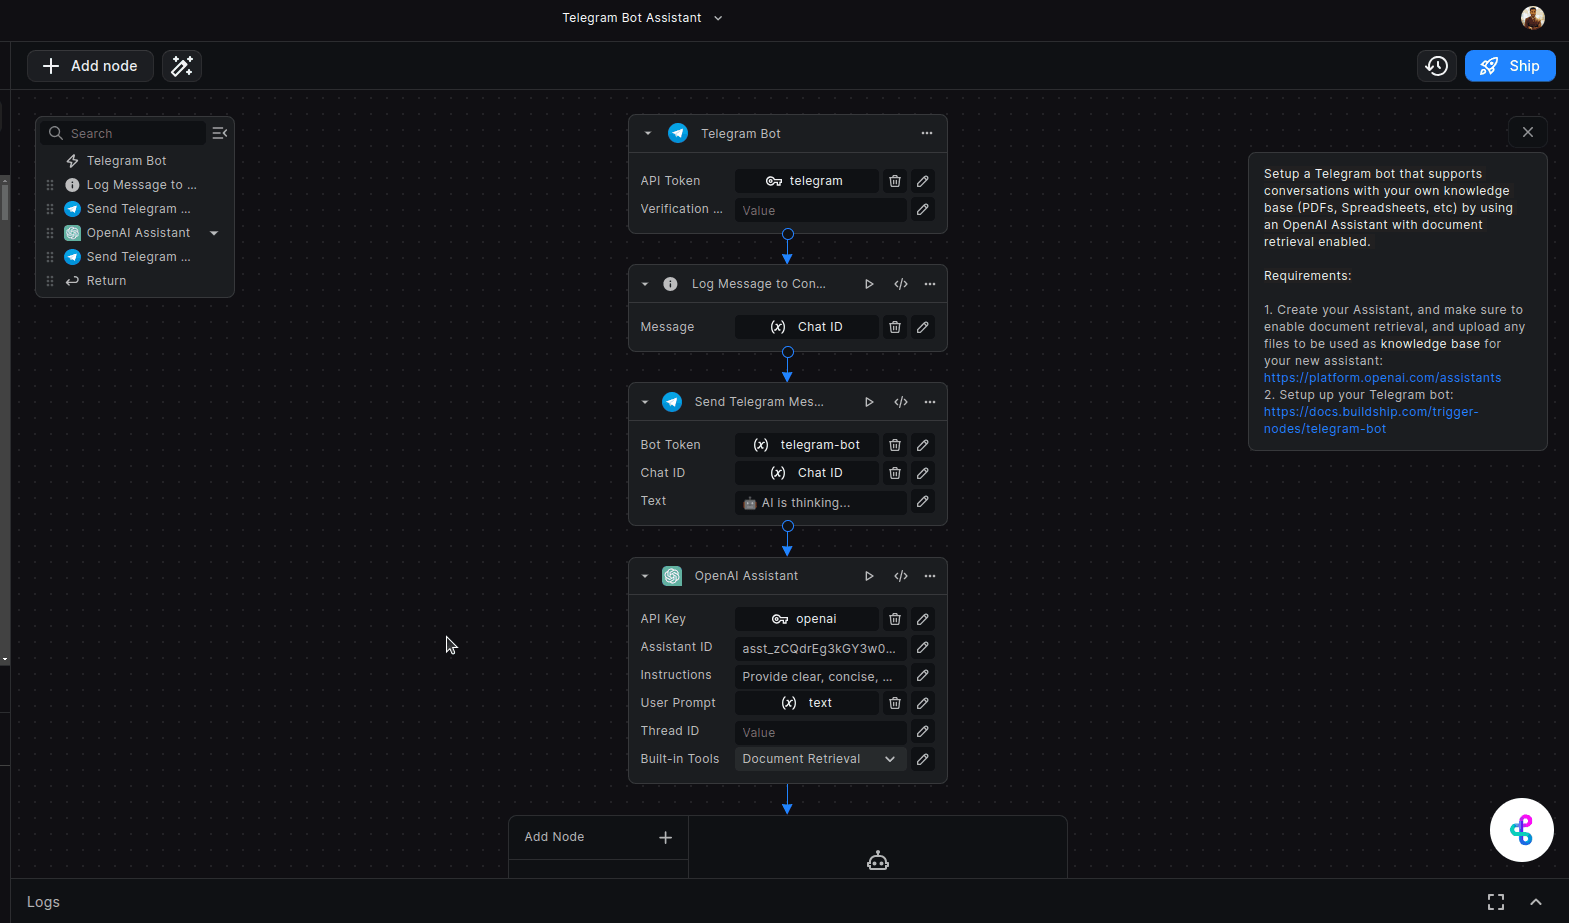
Add the Telegram Bot Trigger
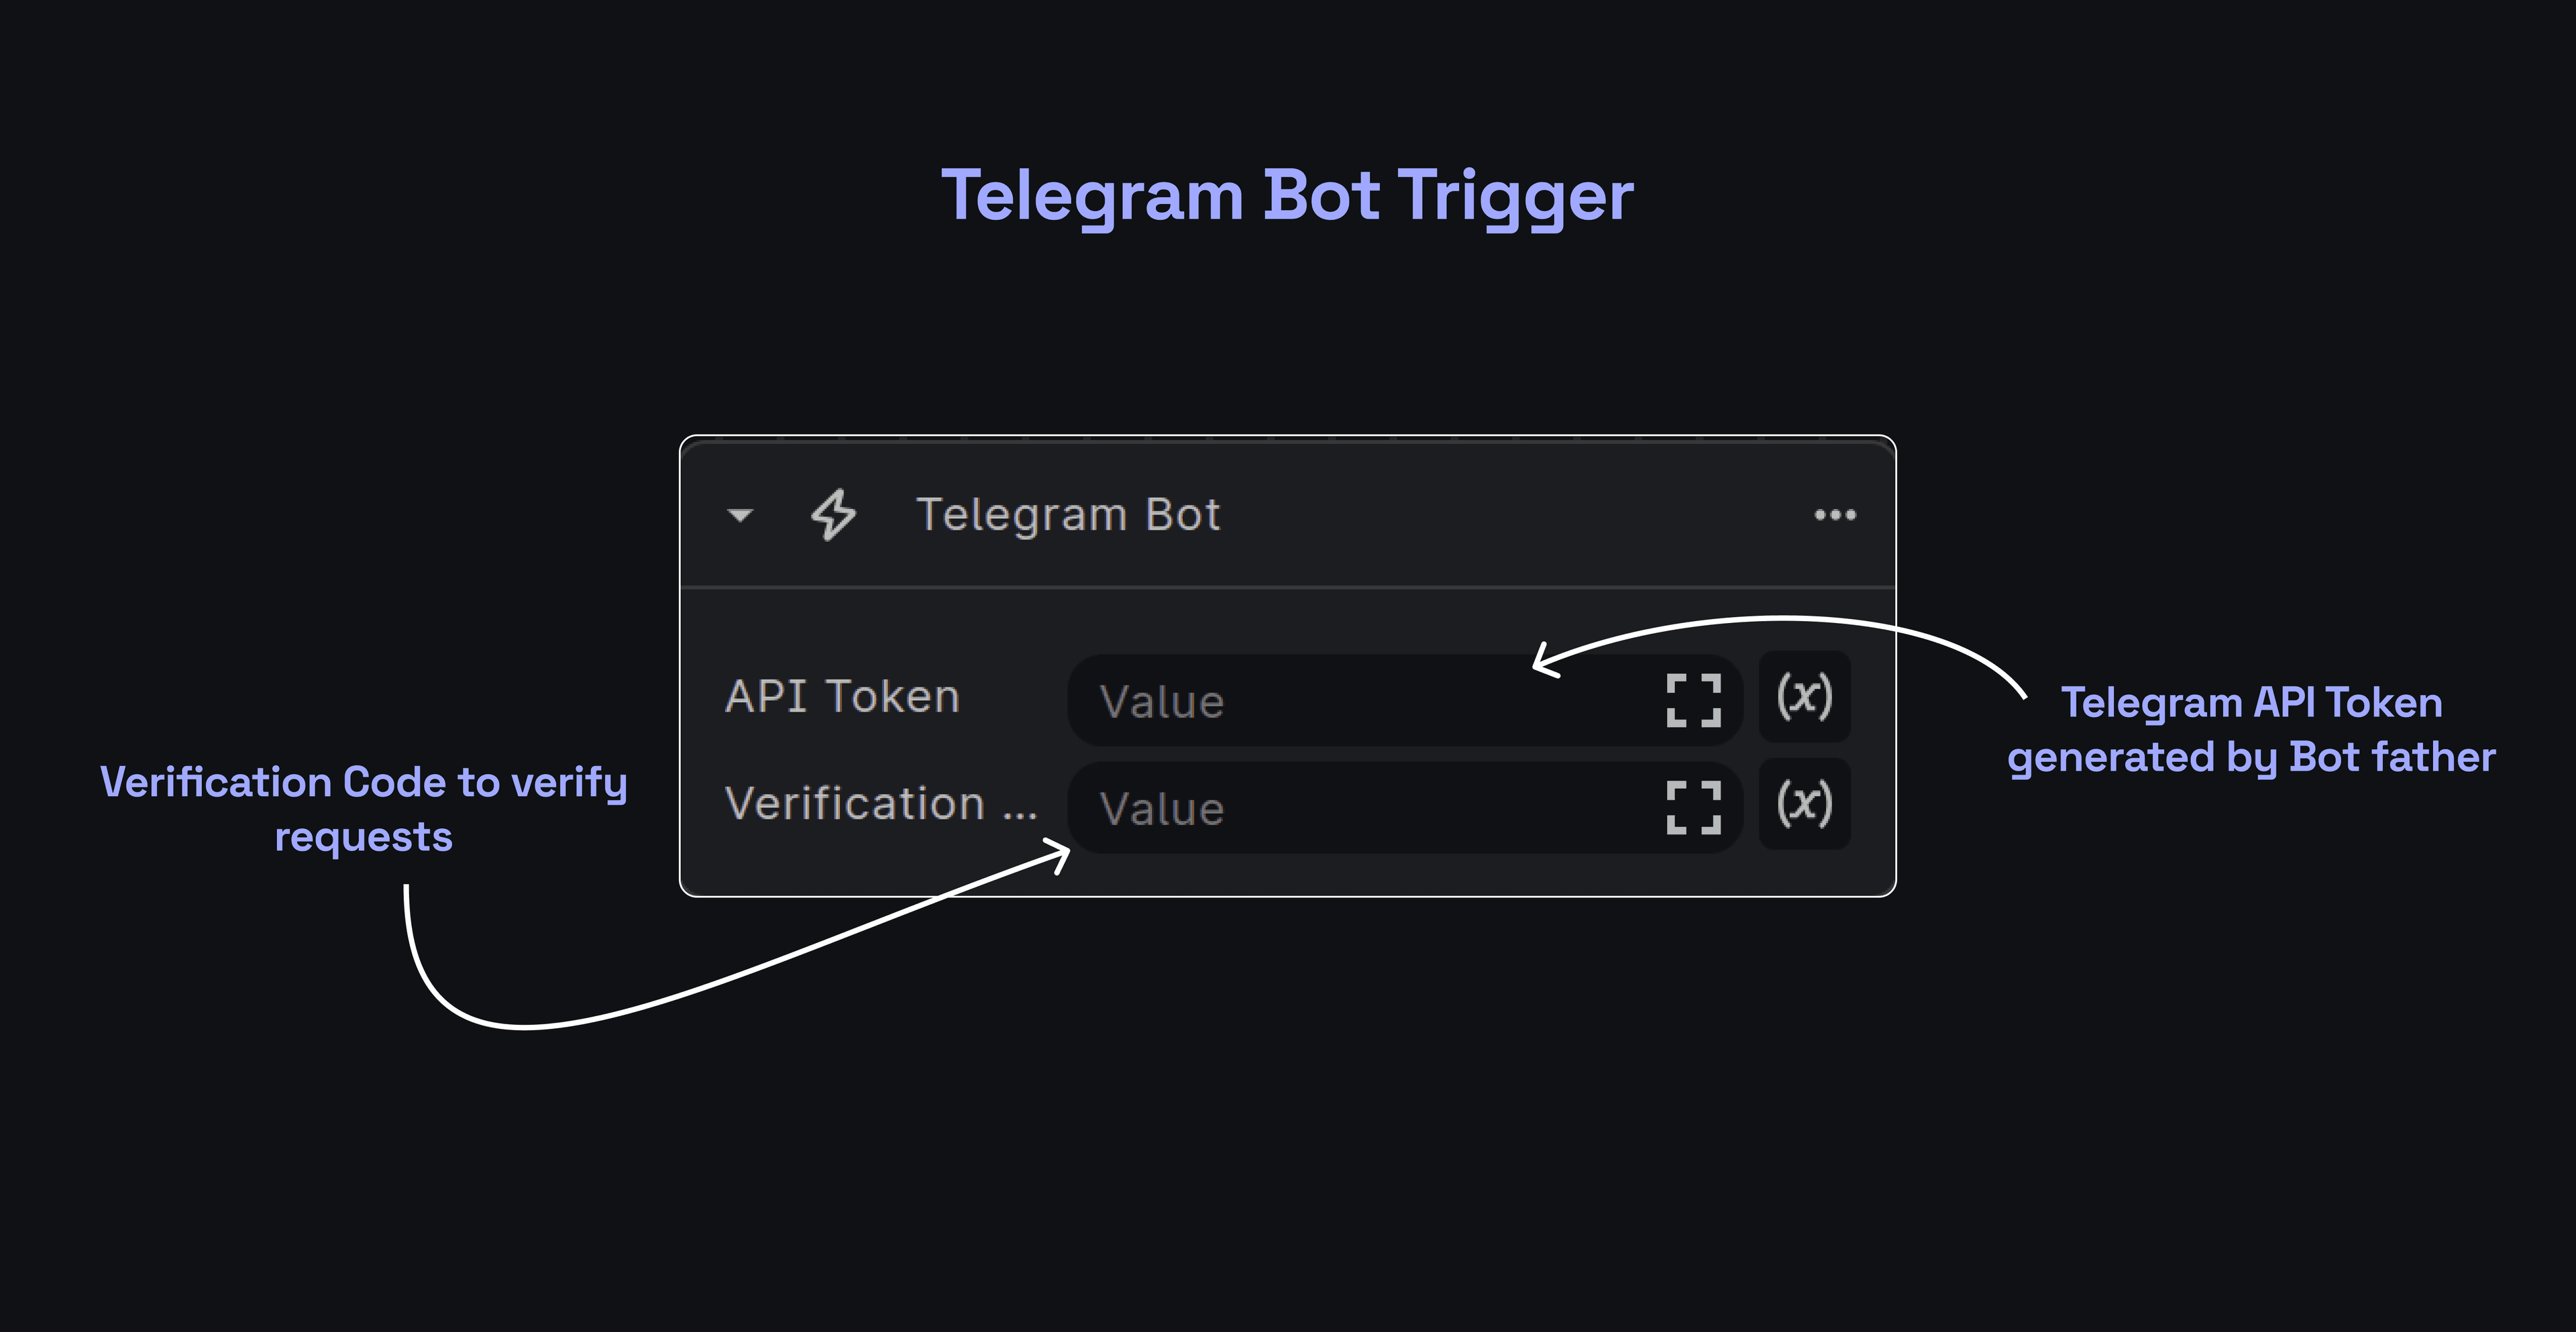
Add the telegram bot's API Key that you obtained in the Prerequisites section. Also, optionally you can add a Verification Code if you want incoming requests to be verified.
Verification Code (optional)
Telegram Bot API provides a verification code to ensure requests to your bot's webhook are coming from Telegram itself.
This code is a random string sent in the X-Telegram-Bot-Api-Secret-Token header with each update request. You can use
this code to verify that the request is coming from Telegram and not from a third-party source. If you want to use this
feature, you can generate a random string and add it to the Verification Code field in the Telegram Bot Trigger node.
This code will be sent in the X-Telegram-Bot-Api-Secret-Token header with each update request to your bot's webhook. You
can then verify this code in your workflow to ensure the request is coming from Telegram.
To set the verification code, you can add the code in the Verification Code field in the Telegram Bot Trigger node and send it to the headers of the incoming request to your webhook. To learn more about Telegram Bot verification code, you can refer to this link (opens in a new tab).
Add "Send Telegram message" Node
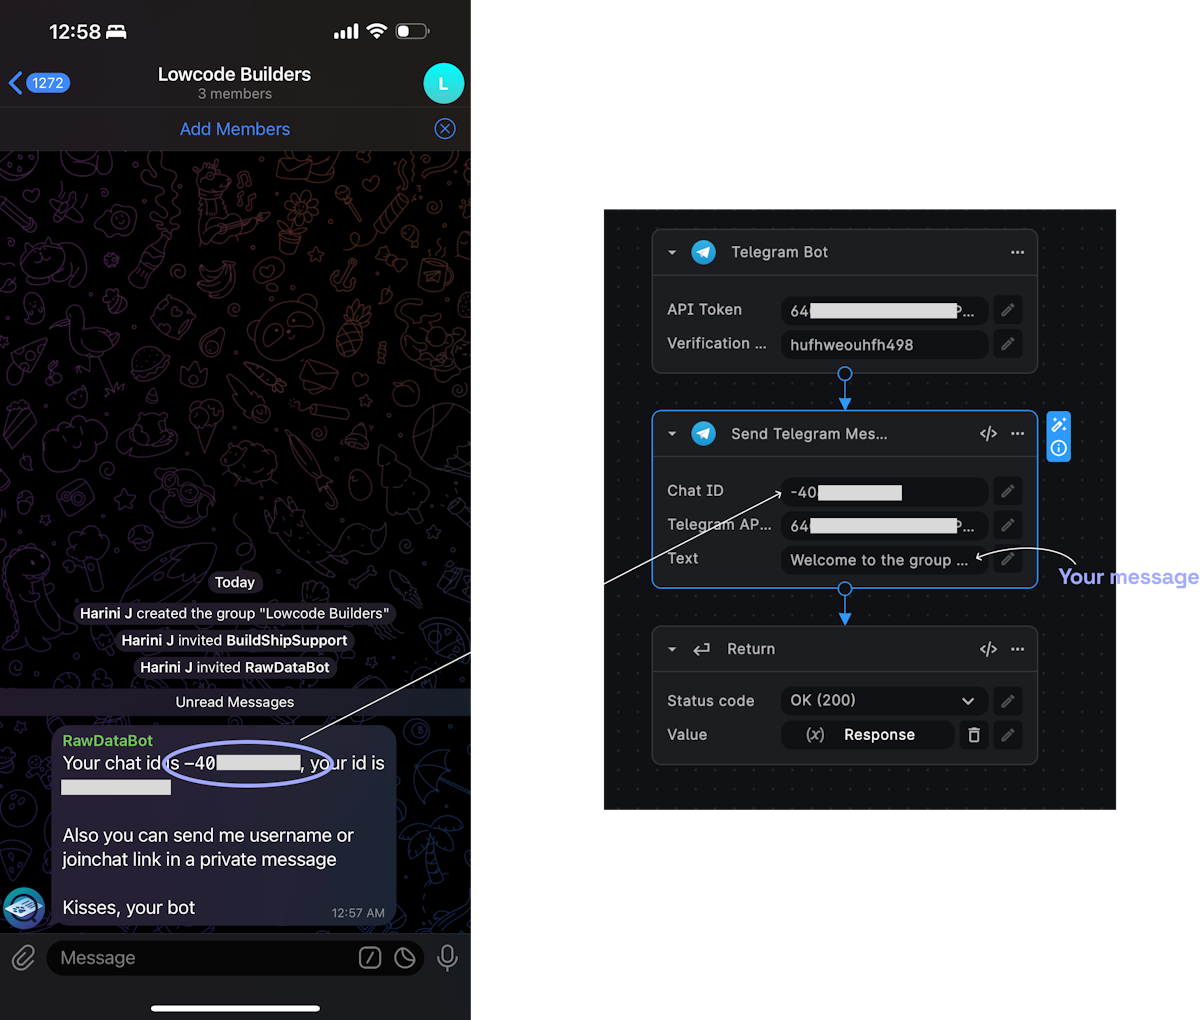
- Next in your workflow, add a node by searching in the node explorer for "Send Telegram message" node to reply to incoming messages.
- Add the "Chat ID" of the group that you want the bot to reply to. (Use the Telegram Assistant Template to skip adding the ChatID and fetch it dynamically from the Trigger Response)
- To this node also add the response "Text" that you want the bot to reply with. We have added here, a generic message of "Welcome to the group..."
- You can however, add nodes like OpenAI text generation to respond with AI, or even verify if the incoming message is from a Stripe paying user before responding
- There is full flexibility to add more nodes and handle what your bot is replying with.
Return success status and click Ship
Finally, add a "Return" node that will respond with a success status. And click the "Ship" button to deploy the workflow.
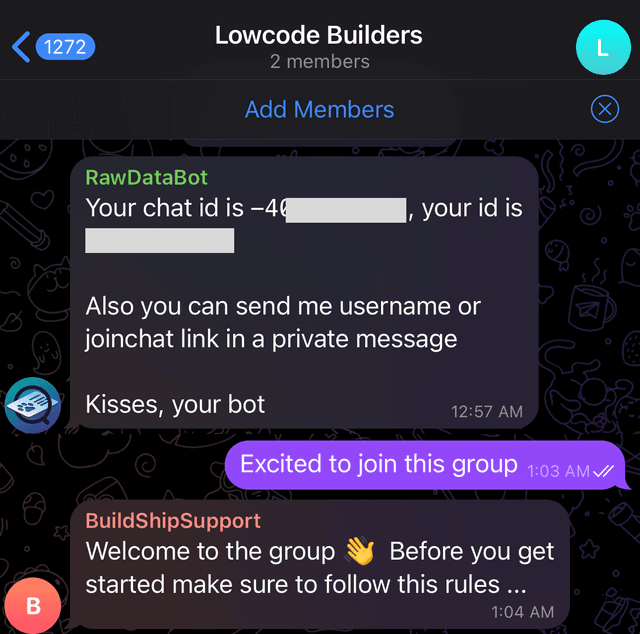
Send a message to Test
Finally, you can send a message and test the response is as expected.
That's it 🎉
Use the Telegram Bot Assistant to create a Telegram Bot workflow without the need to add the Chat ID manually and start by just setting up the bot and passing the access token.
Need Help?
- 💬Join BuildShip Community
An active and large community of no-code / low-code builders. Ask questions, share feedback, showcase your project and connect with other BuildShip enthusiasts.
- 🙋Hire a BuildShip Expert
Need personalized help to build your product fast? Browse and hire from a range of independent freelancers, agencies and builders - all well versed with BuildShip.
- 🛟Send a Support Request
Got a specific question on your workflows / project or want to report a bug? Send a us a request using the "Support" button directly from your BuildShip Dashboard.
- ⭐️Feature Request
Something missing in BuildShip for you? Share on the #FeatureRequest channel on Discord. Also browse and cast your votes on other feature requests.