Branch (If Else)
The Branch node is a conditional node in your workflow, designed to execute different sets of actions based on a specific condition. This node provides a powerful way to control the flow of your workflow, making it flexible and dynamic.
Using the Branch node
The Branch node evaluates a base condition. If the condition evaluates to "true", the node executes the actions in the "Then" block. If the condition evaluates to "false", it proceeds to execute the actions in the "Else" block.
Supported Comparison Operators
To define your conditions, the "Branch" node supports the following comparison operators:
==: Checks whether two values are equal!=: Checks whether two values are not equal.>: Checks whether the first value is greater than the second value.<: Checks whether the first value is less than the second value.>=: Checks whether the first value is greater than or equal to the second value.<=: Checks whether the first value is less than or equal to the second value.
These comparison operators also work on strings. You can use them to compare string values and make decisions based on string conditions.
With these operators, you can construct various conditions to control the flow of your workflow based on specific data or inputs.
Example: Conditional Response Based on Request Body
In this example, we'll create a workflow that receives an HTTP request with a JSON body. The workflow will check the
value of the number key in the request body. If the value is greater than 10, the workflow will return a message
saying that the number is greater than 10. If the value is less than or equal to 10, the workflow will return a message
saying that the number is less than or equal to 10.
HTTP Trigger Node
Create a workflow with an HTTP Request Trigger to receive incoming requests.
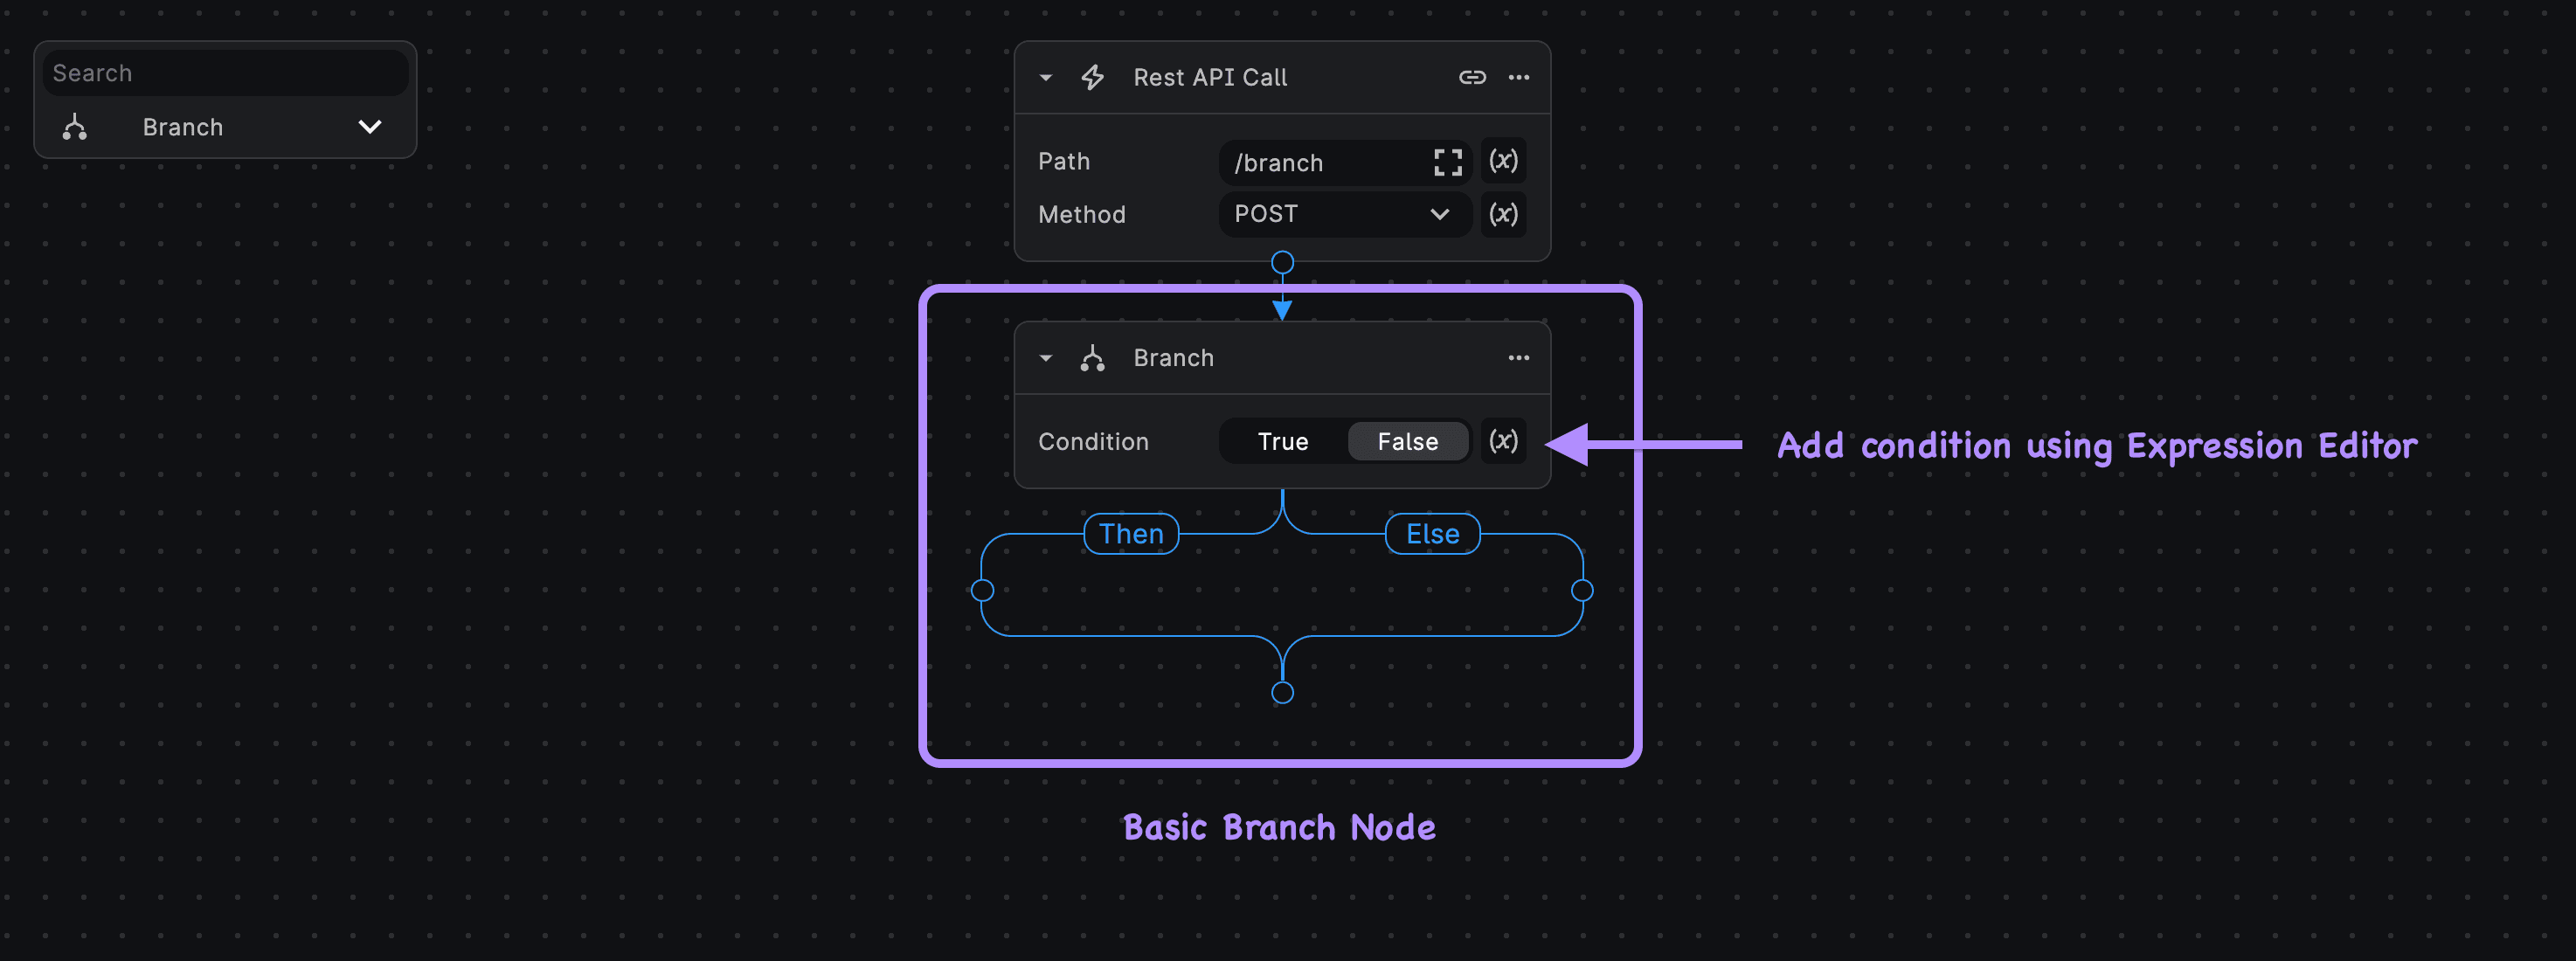
Add Branch Node
Add a Branch (If Else) node to the workflow.
Set Branch Condition
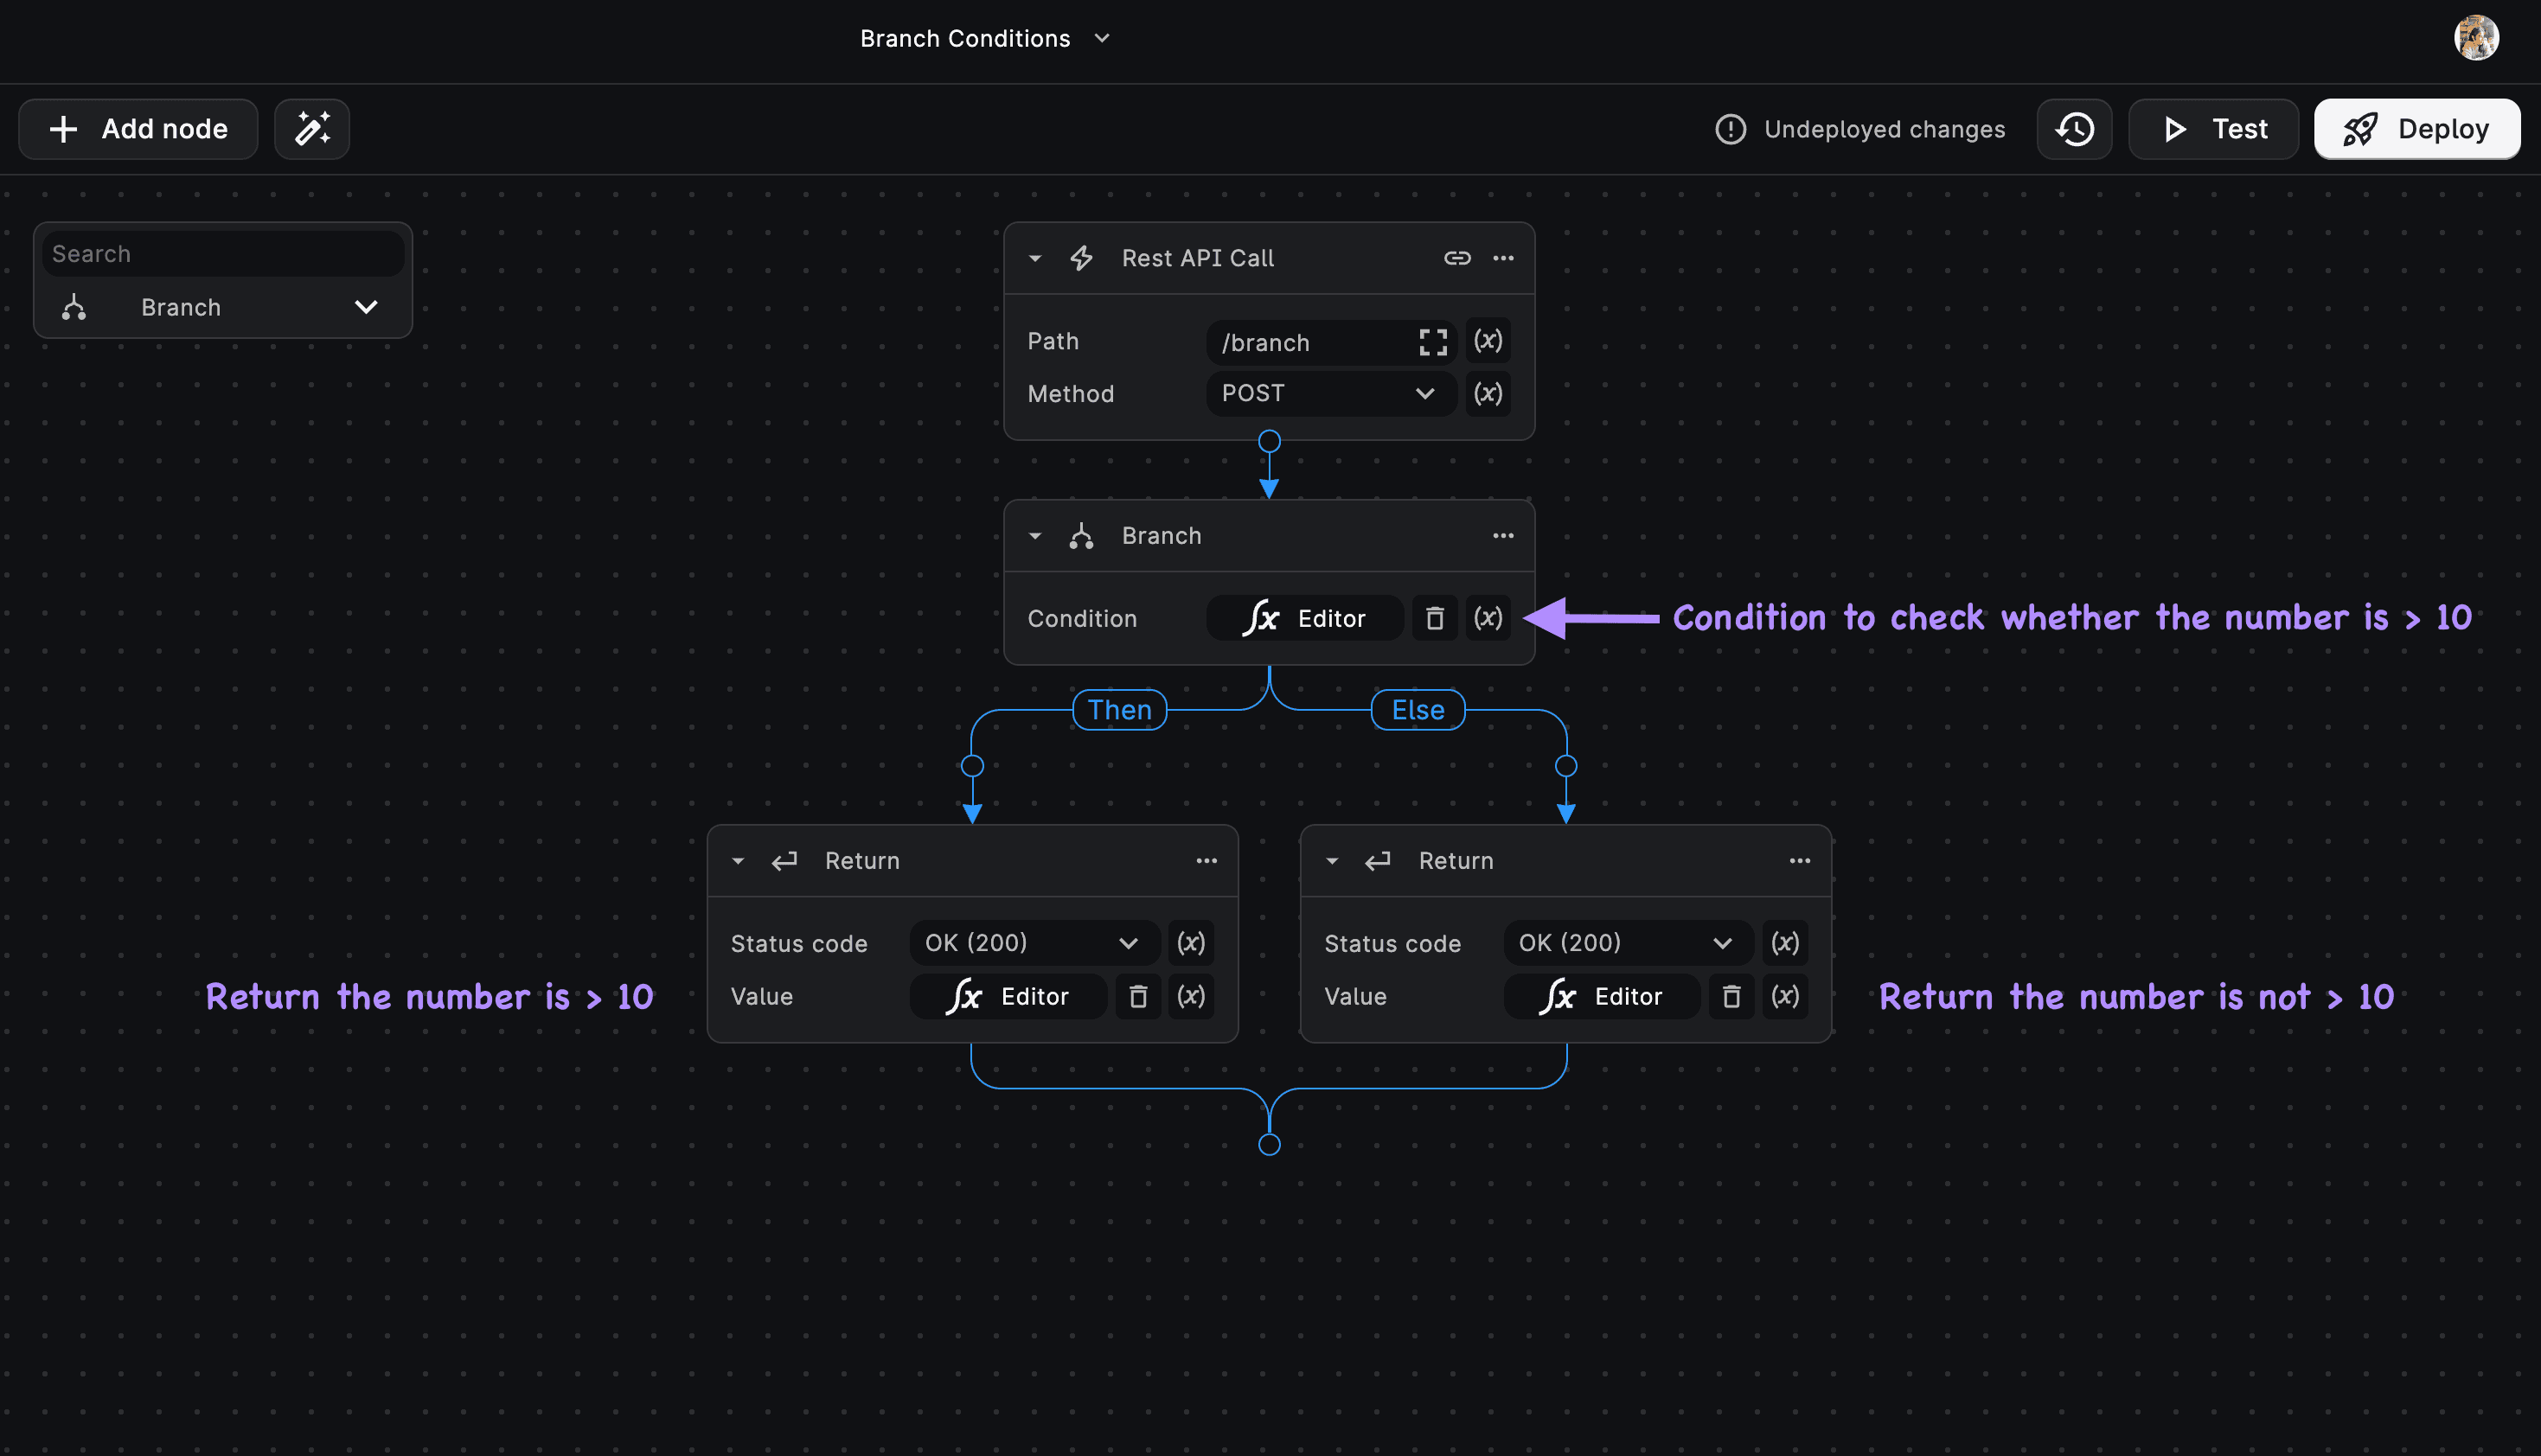
Click on the Expression Menu, select Expression Editor. Set the Branch node's condition as:
ctx["request"]["body"]["number"] > 10Setting Then and Else conditions
- In the "Then" block of the Branch node, add a Return node with the message:
ctx["request"]["body"]["number"] + " is greater than 10".- In the "Else" block of the Branch node, add another Return node with the message:
ctx["request"]["body"]["number"] + " is less than 10".Test the Workflow
Click deploy and send a request to the given endpoint with a JSON body containing the number key. Here's an example body JSON:
{
    "number": 15
}
Execution of the Example
-
If the incoming requests'
numberkey has a value greater than 10 (e.g.,"number": 15), the workflow returns15 is greater than 10. -
If the incoming requests'
numberkey has a value less than or equal to 10 (e.g.,"number": 5), the workflow returns5 is less than or equal to 10.
Nested Branch (Nested If Else)
A Nested Branch or a Nested If Else is a conditional structure within another conditional structure. Using nested branches allows you to create more complex conditional logic in your workflow by combining multiple levels of "if-else" statements. This approach is useful when you need to evaluate multiple conditions sequentially, with each condition leading to a different set of actions.
Nested Branch Example
Let's consider a scenario where we want to categorize incoming numbers into three groups: "Greater than 20," "Between 10 and 20," and "Less than or equal to 10."
HTTP Trigger Node
Create a workflow with an HTTP Request Trigger to receive incoming requests.
Add Branch Node
Add a Branch (If Else) node to the workflow.
Set Branch Condition
Click on the Expression Menu, select Expression Editor. Set the Branch node's condition as:
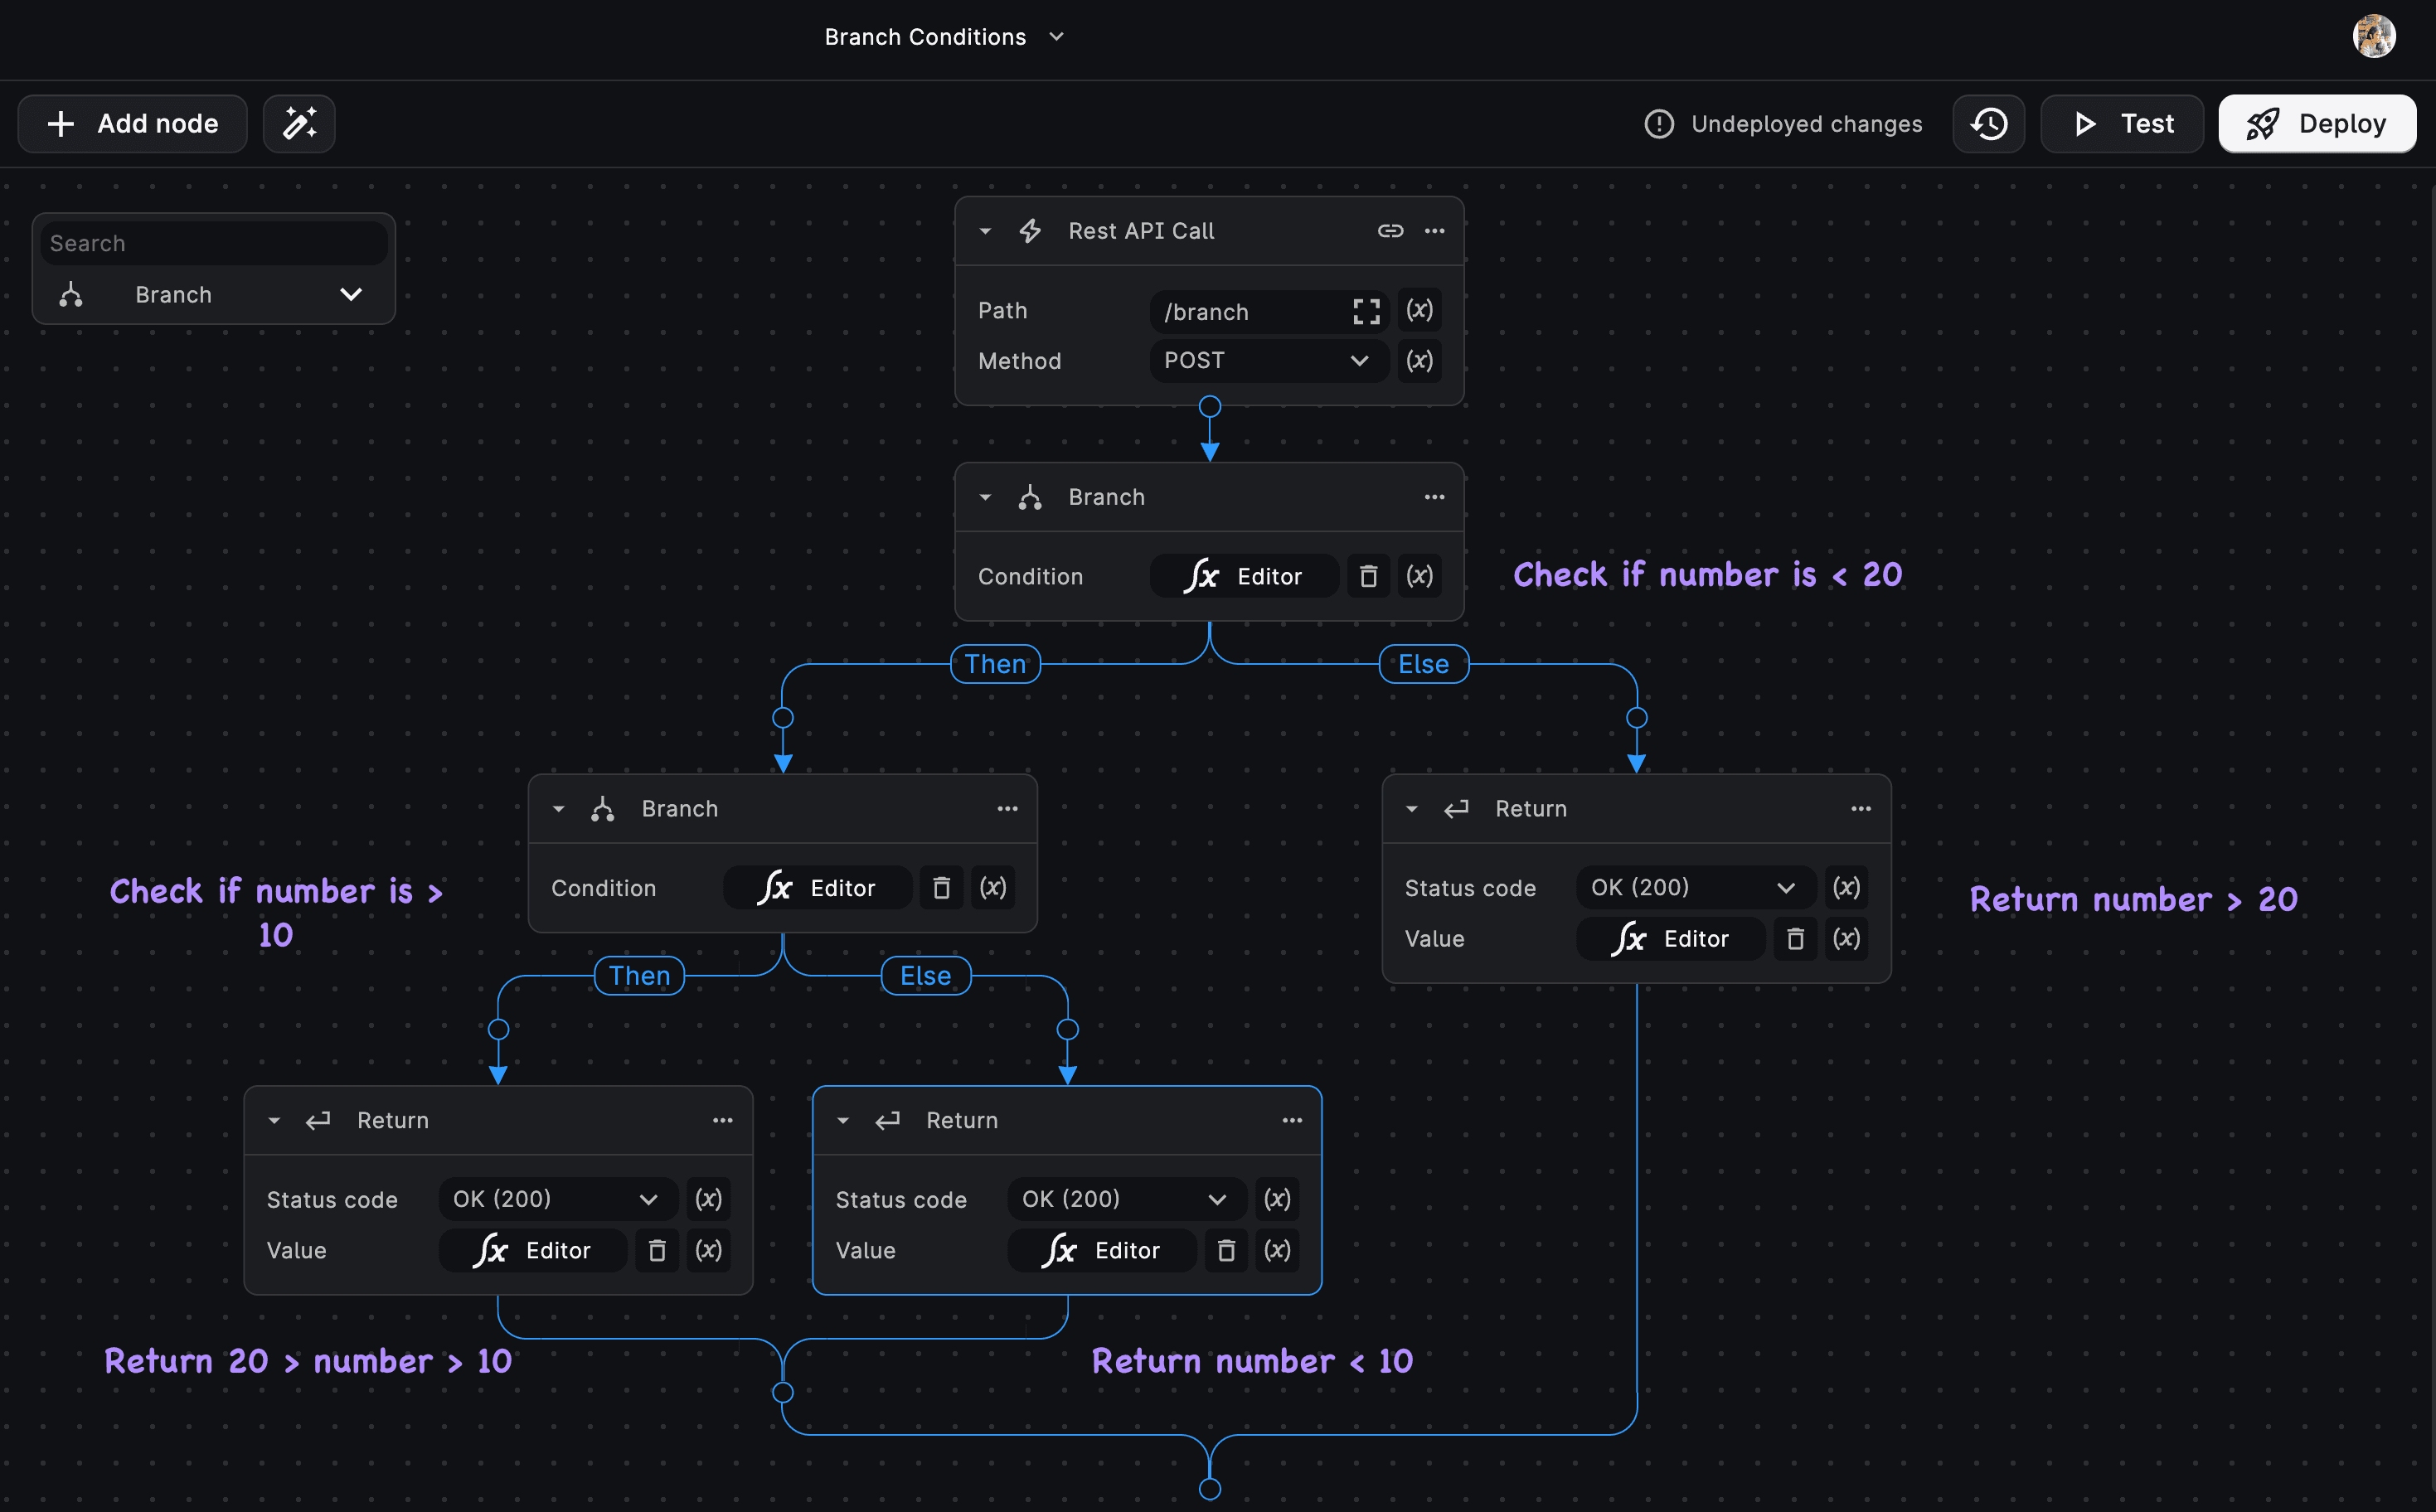
ctx["request"]["body"]["number"] < 20Adding Nested conditions
- In the "Then" block of the first Branch node, add another Branch (If Else) node.
- Set the condition in the second Branch node as
ctx["request"]["body"]["number"] > 10- In the "Then" block of the second Branch node, add a Return node with the expression:
ctx["request"]["body"]["number"] + " is between 10 and 20"- In the "Else" block of the second Branch node, add another Return node with the message:
ctx["request"]["body"]["number"] + " is less than or equal to 10"- In the "Else" block of the first Branch node (i.e., if the number is not greater than 20), add a Return node with the message:
ctx["request"]["body"]["number"] + " is greater than 20"Test the Workflow
Click deploy and send a request to the given endpoint with a JSON body containing the number key. Here's an example body JSON:
{
    "number": 15
}
Need Help?
- 💬Join BuildShip Community
An active and large community of no-code / low-code builders. Ask questions, share feedback, showcase your project and connect with other BuildShip enthusiasts.
- 🙋Hire a BuildShip Expert
Need personalized help to build your product fast? Browse and hire from a range of independent freelancers, agencies and builders - all well versed with BuildShip.
- 🛟Send a Support Request
Got a specific question on your workflows / project or want to report a bug? Send a us a request using the "Support" button directly from your BuildShip Dashboard.
- ⭐️Feature Request
Something missing in BuildShip for you? Share on the #FeatureRequest channel on Discord. Also browse and cast your votes on other feature requests.