Chatbot Widget Trigger
The Chatbot Widget Trigger allows us to connect the BuildShip Chat Widget to your BuildShip Workflow. The trigger comes with a widget simulator that allows you to test the trigger without embedding the widget on your website.

BuildShip Chat Widget
The BuildShip Chat Widget is an open source AI chatbot that can be embedded on your website. The chatbot can be customized to suit your needs and can be integrated with your BuildShip Workflow using the Chatbot Widget Trigger.
Read more about the BuildShip Chat Widget here (opens in a new tab).
Building the Workflow

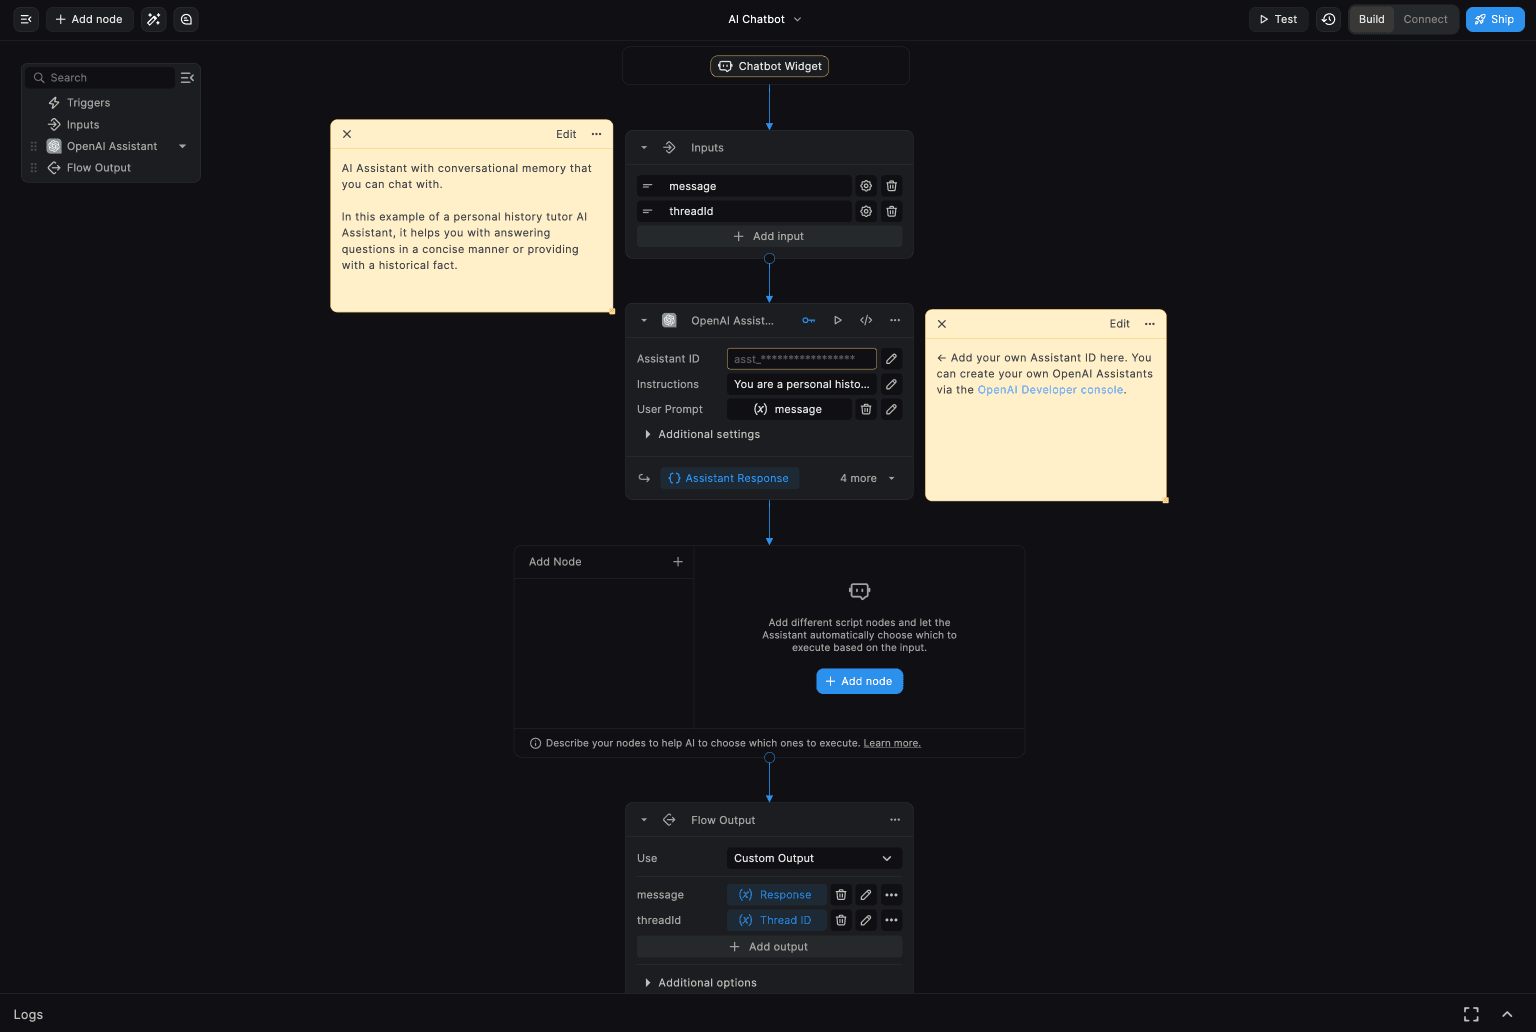
- For the workflow, we require two inputs - the (incoming) message, and the thread ID (which would be used to maintain the context for the chat experience)
For a basic setup, we could get a headstart and directly clone the AI Chatbot Template by BuildShip. We can access this on the new flows screen or the template section. Just search for “AI Chatbot” or click here (opens in a new tab)
-
To get started manually, we could simply add one of AI Assistant node variants available in the Node Library. Configure the assistant node add Instructions. Pass in the Message input as the prompt, and the thread ID input into the thread ID field.
-
The output configuration of the workflow, to make it compatible with the chatbot widget, needs to return an output in the following format:
- message:
the response from the AI Assistant node - threadId:
the threadId from the AI Assistant node
- message:
-
We can build out the workflow however we like customizing how we wish to respond to the user via the chatbot
This guide works for both streaming and non-streaming assistants. Check out the Configure a Streaming Chatbot section for more information.
Chatbot Trigger Configuration

-
Go to the “Connect” tab and select the Chatbot Widget trigger to add to your workflow.
-
Click “Connect” to start configuring.
-
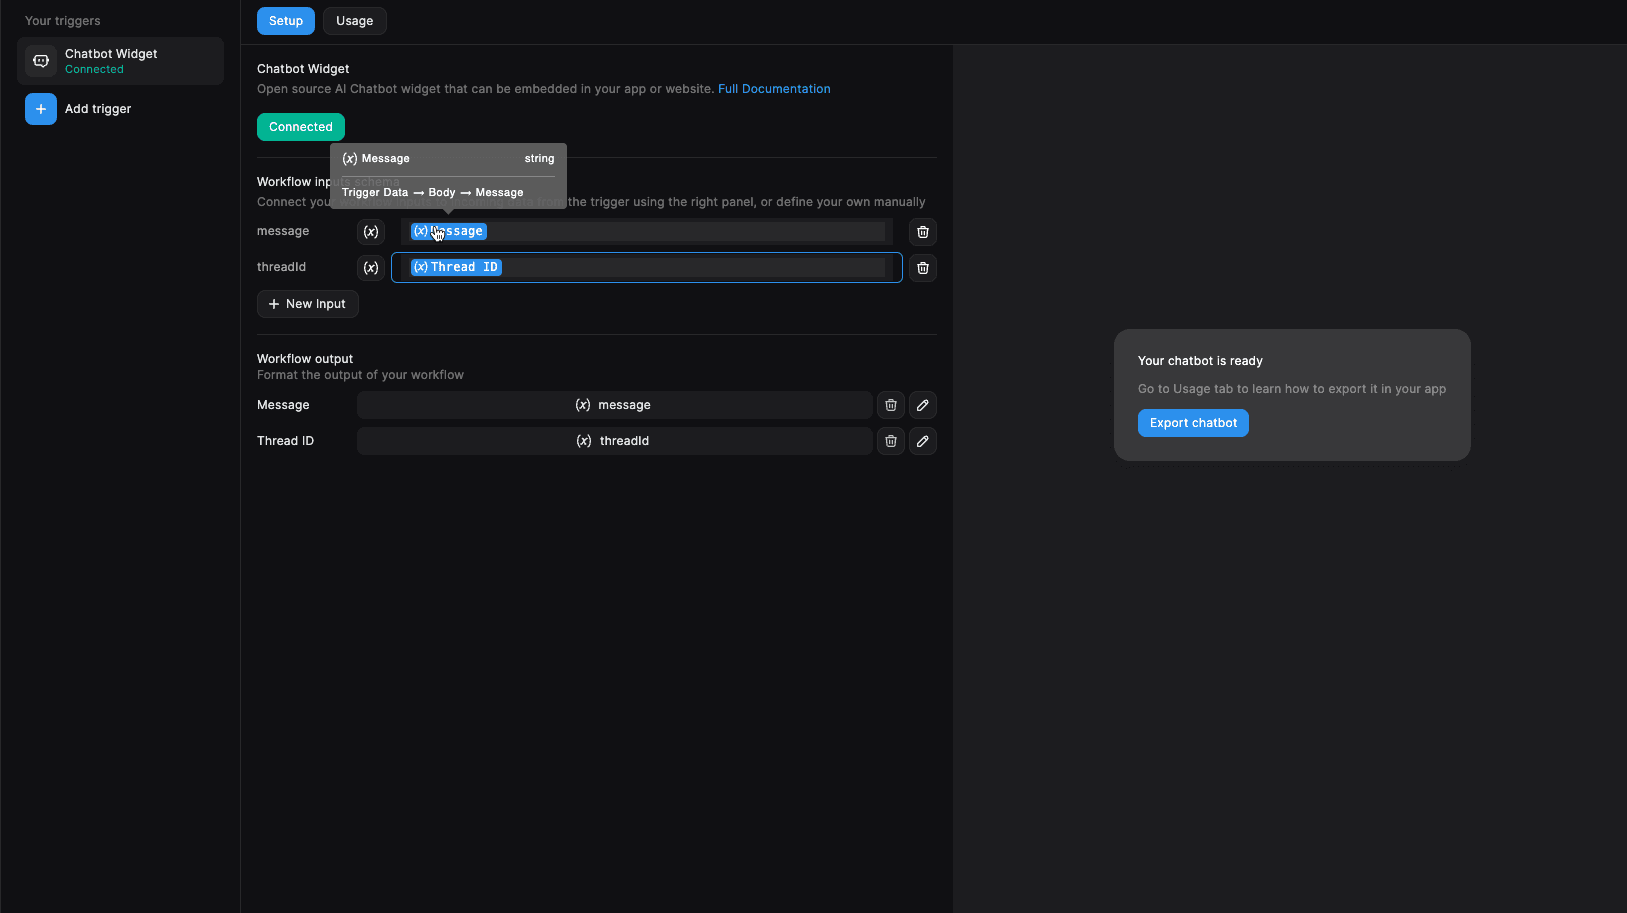
This enables additional settings for configuring the workflow inputs and outputs to the trigger data.
Workflow Inputs Schema
Configure the inputs as follows:
-
message: Click on the(x)button to access the context menu. Use the Trigger Data object and selectTrigger Data>Body>Message -
threadId: Use the Trigger Data > Body > Thread ID as the value for this input.
Workflow Outputs
Configure the outputs of the Workflow as:
-
Message: Using the context menu, access the
Flow Outputobject. Use the valueFlow Output>Message -
Thread ID: Use the value
Flow Output>Thread ID -
Click on the “Export Chatbot” button to check out the Chat Widget.
Testing via the Widget Simulator
The Chatbot Widget uses the underlying workflow to generate responses. Make sure the workflow has been shipped before testing the workflow with the Chatbot Widget Simulator.
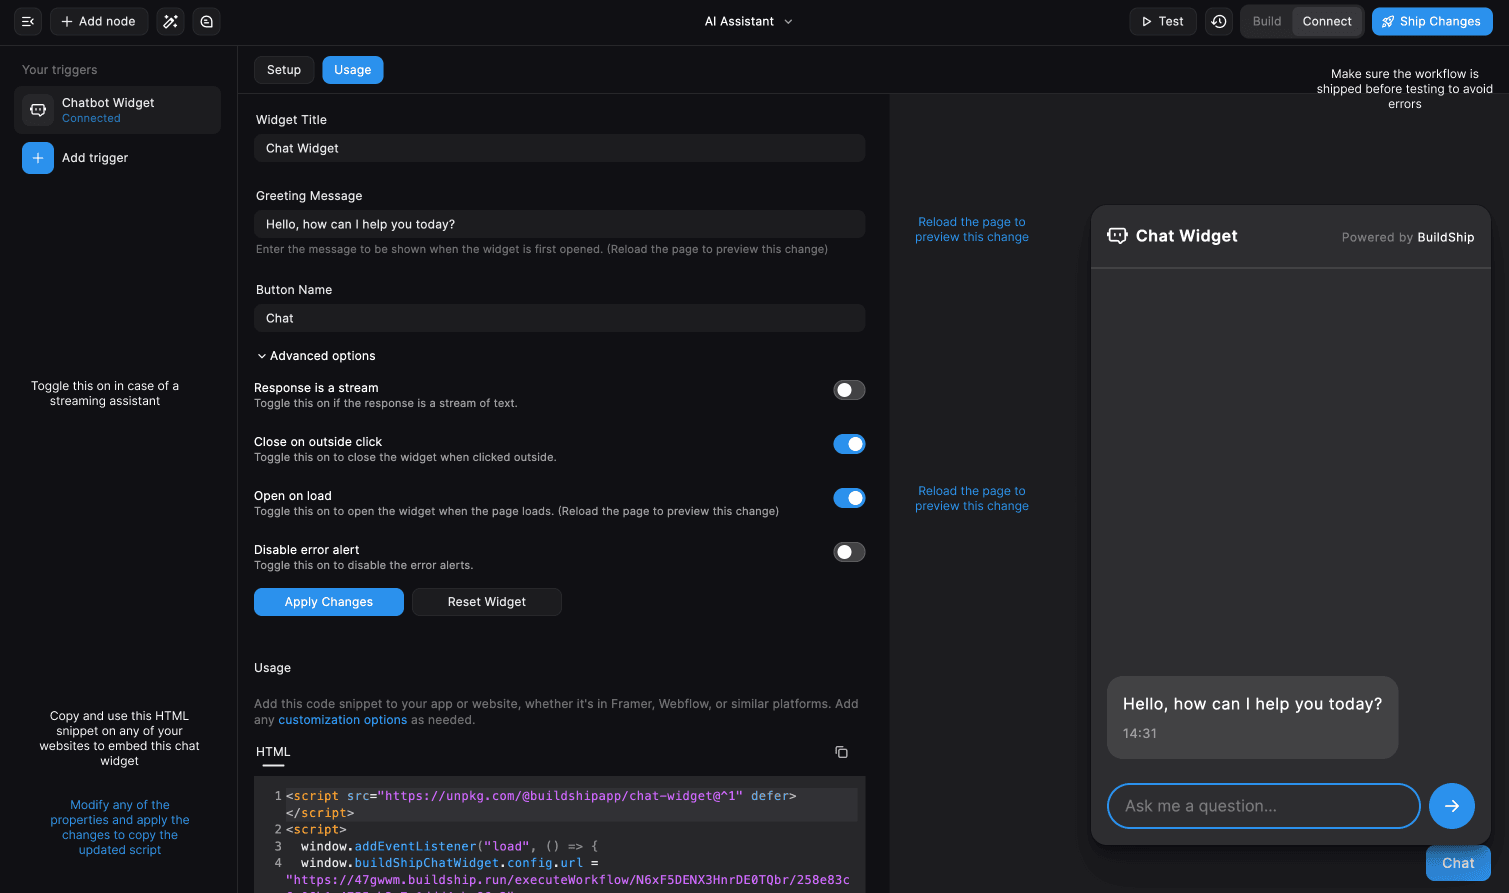
Under the Usage section, we see the configuration options for the Chatbot Widget. The widget simulator allows us to test the chat widget without embedding it on our website.
We can see the configuration settings for the Chatbot Widget. Modify any of these properties to customize the chat widget for your website and hit "Apply changes" to apply these changes to your widget simulator.
The "Reset Widget" button resets the widget to the default settings.
The "Usage" section at the bottom of the page provides the code snippet to embed the chat widget on your website. This code snippet can be copied and pasted into the HTML of your website to embed the chat widget. This snippet changes based on the configuration settings of the chat widget you have set.

The configuration options include:
- Chat Widget Title: The title of the chat widget that appears on the widget.
- Greeting Message: The message that appears when the chat widget is opened. To update this property, you would be required to refresh the page once to see the refected changes. The code snippet gets updated with the new greeting message in real-time.
- Button Name: The name of the button that appears on the chat widget.
Click on the Advanced options drop down to see more configuration options.
- Response is a stream: If the response from the workflow is a stream, enable this option. The chat widget will display each message in the stream one by one. If this option is disabled, the chat widget will display the entire response at once.
The Response is a stream option is what we need to enable if we are using a streaming assistant in our workflow. This option is disabled by default. Learn more
-
Close on outside click: If enabled, the chat widget will close when the user clicks outside the widget. If disabled, the user will have to click on the chat button to close the widget.
-
Open on load: If enabled, the chat widget will open automatically when the page loads. If disabled, the user will have to click on the chat button to open the widget. To update this property, you would be required to refresh the page once to see the refected changes. The code snippet gets updated with the updated property in real-time.
-
Disable error alert: If enabled, the chat widget will not display an alert when an error occurs. If disabled, the chat widget will display an alert when an error occurs.
Configure a Streaming Chatbot

If you are using a streaming assistant in your workflow, all you need to do to enable streaming on your chat widget is to enable the Response is a stream option in the Chatbot Widget configuration.
The input and output configuration of the workflow should be the same as the regular chatbot workflow outputs, just the message value should be the Response Stream object from the Assistant (Stream Response) node.
For a basic setup, we could get a headstart and directly clone the Streaming AI Chatbot Template by BuildShip. We can access this on the new flows screen or the template section. Just search for "Streaming AI Chatbot” or click here (opens in a new tab)
Need Help?
- 💬Join BuildShip Community
An active and large community of no-code / low-code builders. Ask questions, share feedback, showcase your project and connect with other BuildShip enthusiasts.
- 🙋Hire a BuildShip Expert
Need personalized help to build your product fast? Browse and hire from a range of independent freelancers, agencies and builders - all well versed with BuildShip.
- 🛟Send a Support Request
Got a specific question on your workflows / project or want to report a bug? Send a us a request using the "Support" button directly from your BuildShip Dashboard.
- ⭐️Feature Request
Something missing in BuildShip for you? Share on the #FeatureRequest channel on Discord. Also browse and cast your votes on other feature requests.