Testing
The Testing feature in BuildShip's Node Editor empowers users to rigorously test their node logic without the need to deploy the entire workflow. This functionality offers a dedicated space to validate your node's behavior, ensuring that it handles various scenarios, including edge cases, effectively.
Testing now has new key features to facilitate a seamless testing experience:
- Access Test Logs - View detailed logs of your test runs to identify and debug issues efficiently right from the test panel and navigate to logs
- Save as example - Save your test cases as examples for reference and use to execute again with the same inputs.
- View Recent Executions - Access the history of your test runs to track testing history and results.
Testing Individual Nodes
During the development of your workflows, you have the ability to test individual nodes directly from the node on the Canvas or right from the Node Editor. This streamlined approach allows you to validate the functionality of your nodes without the necessity of deploying the entire workflow.
Learn more about adding Unit Tests to your nodes using the Tests feature in the node editor in our Unit Testing guide.
Here's how you can test individual nodes:
Create or Select a Node
Begin by creating a custom node using our AI Node Generator or selecting a node from the Nodeverse that aligns with your workflow requirements.
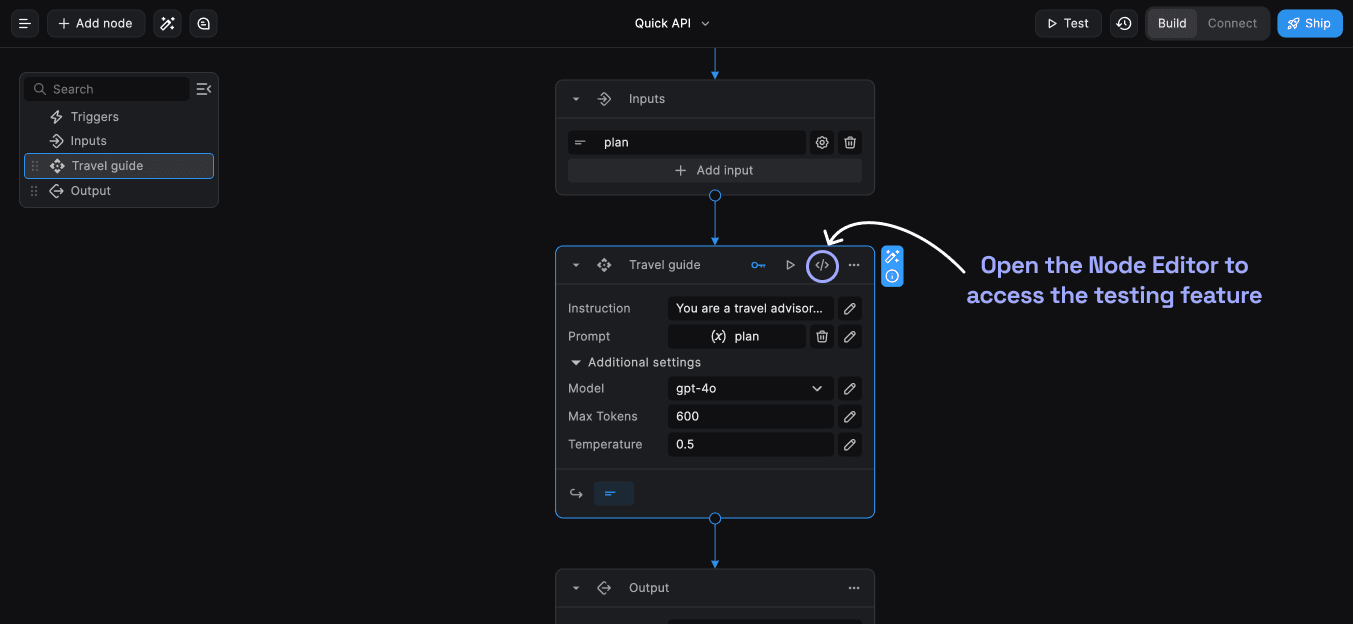
Open the Node Editor
Access the Node Editor </> to view and modify the configuration of your chosen node. You can even customize nodes
using JavaScript or TypeScript to meet your specific needs. (For more information on editing nodes, refer to our
guide on node customization.)
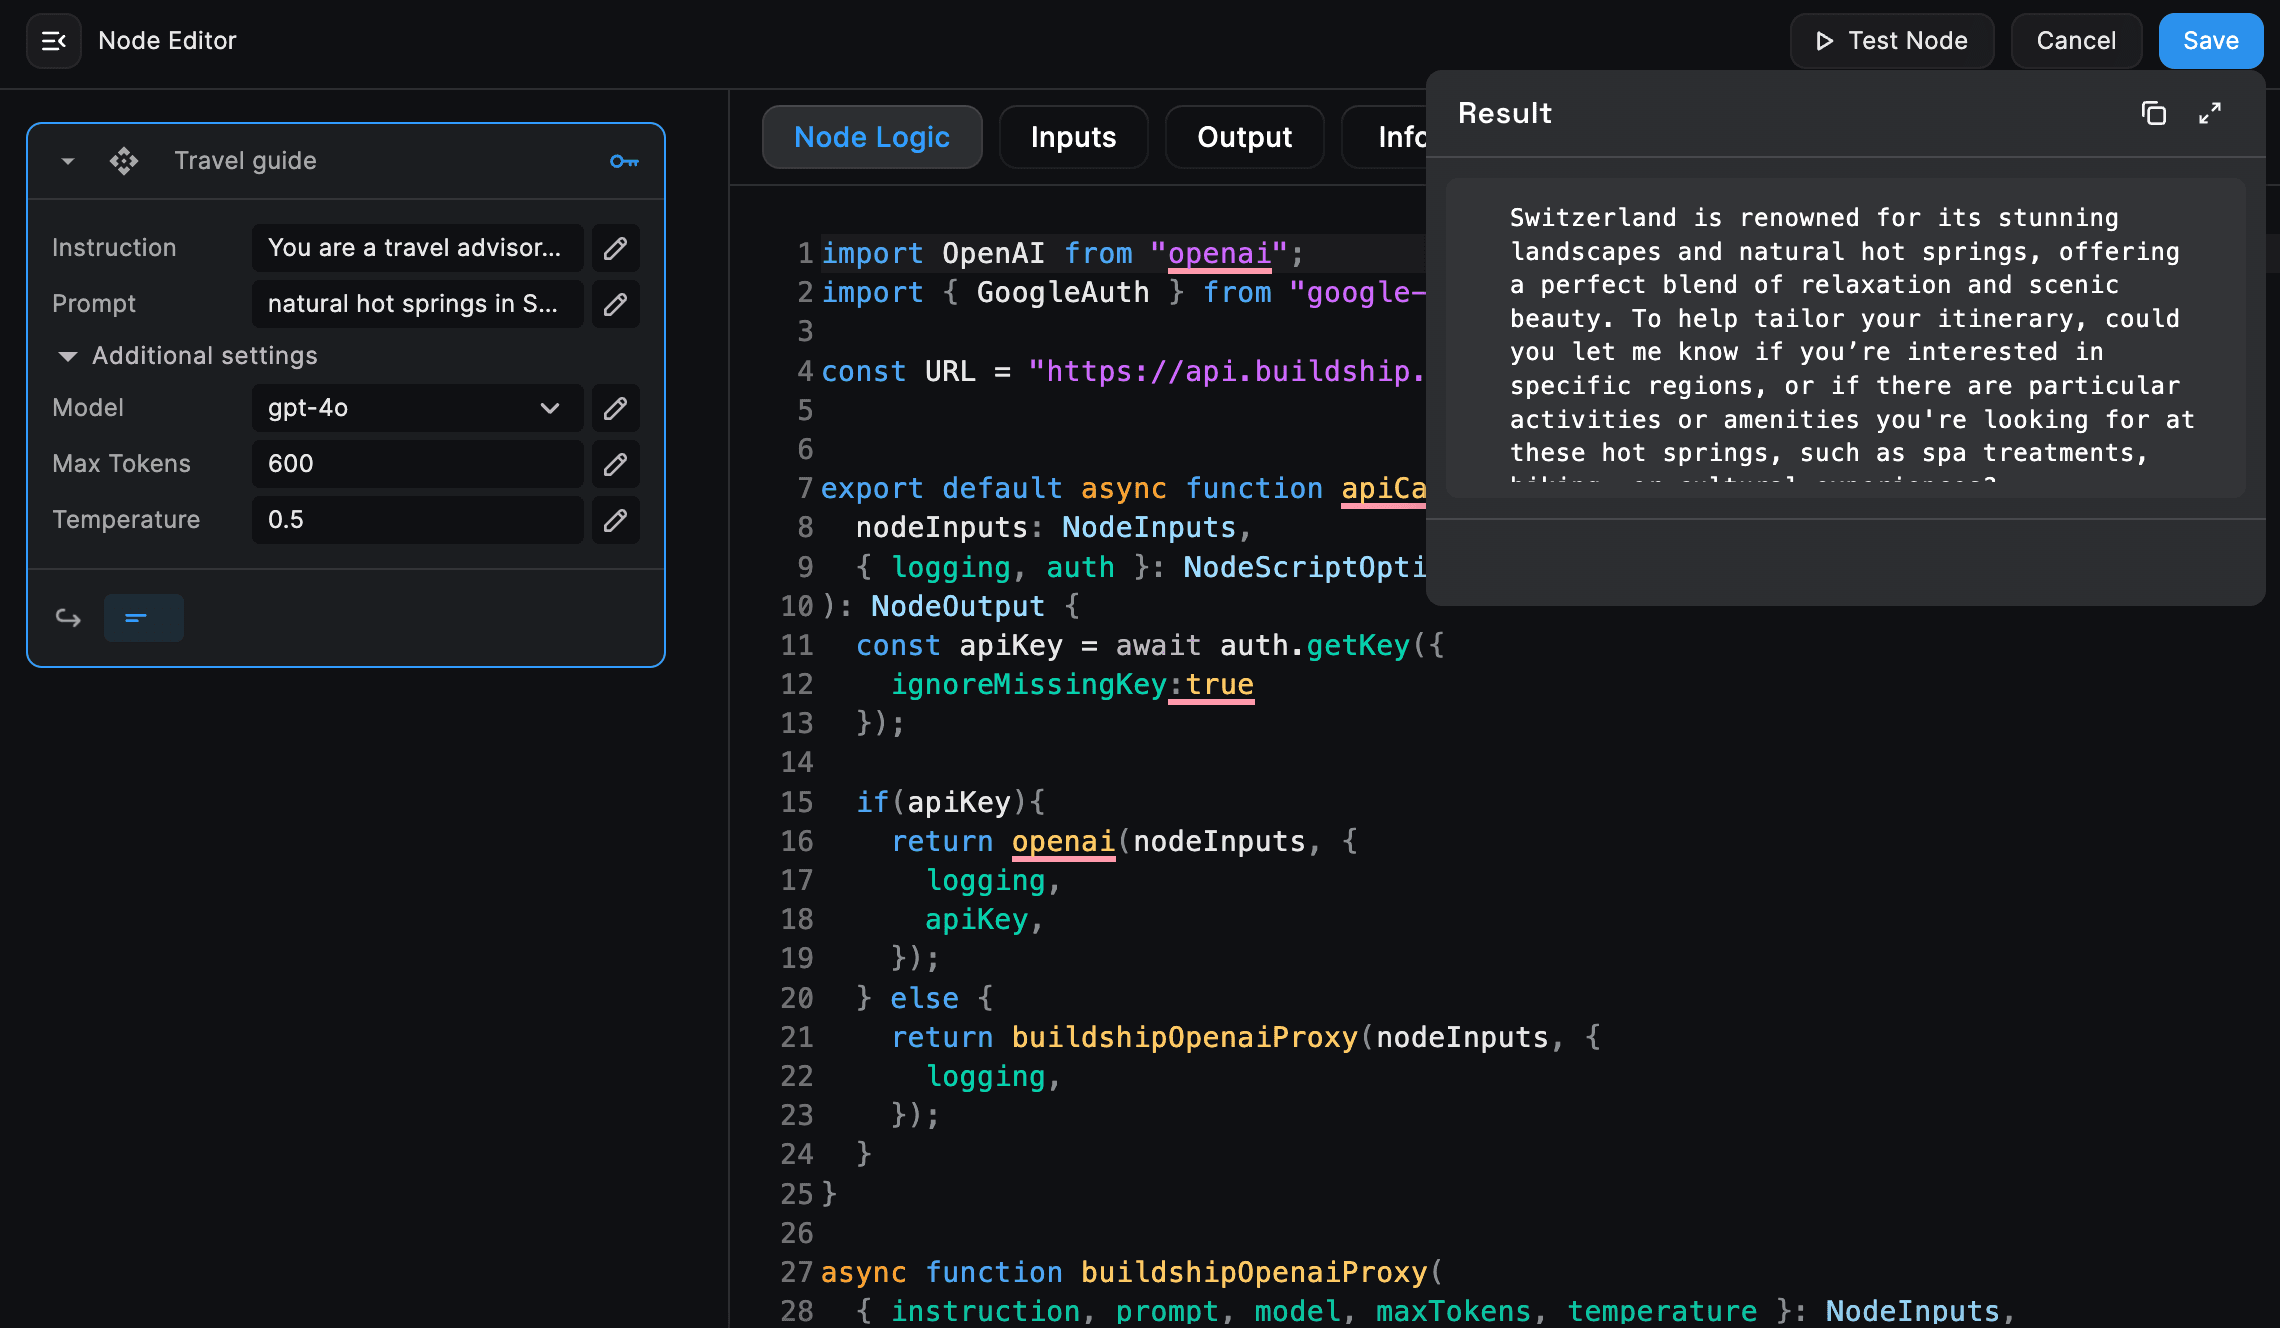
Testing Nodes
On the left side of the Node Editor, you'll find the Testing Node. This feature allows you to manually input values that correspond to the inputs of the node you're testing. This way, you can ensure that your node's logic effectively covers various edge-case scenarios.
Test Node Logic
Once you've input the test values, click the "Test Node" button. This action evaluates your node's logic against the provided test case without requiring you to save or deploy the entire workflow. In case of any errors, you'll receive a detailed error message, once you click on the exclamation mark, that you can use to debug your node's logic.
Testing Entire Workflows
Beyond testing individual nodes, BuildShip enables you to validate the functionality of your entire workflow, including triggers and logic nodes, before deploying it.
Workflow Testing is now available for all use cases, irrespective of the trigger being used.
Follow the steps below to test your workflow:
Build Your Workflow
Create your workflow by adding triggers and logic nodes that define the sequence of actions to achieve your goals. (Or pick up a pre-built template or a set of pre-built nodes via the Nodeverse)
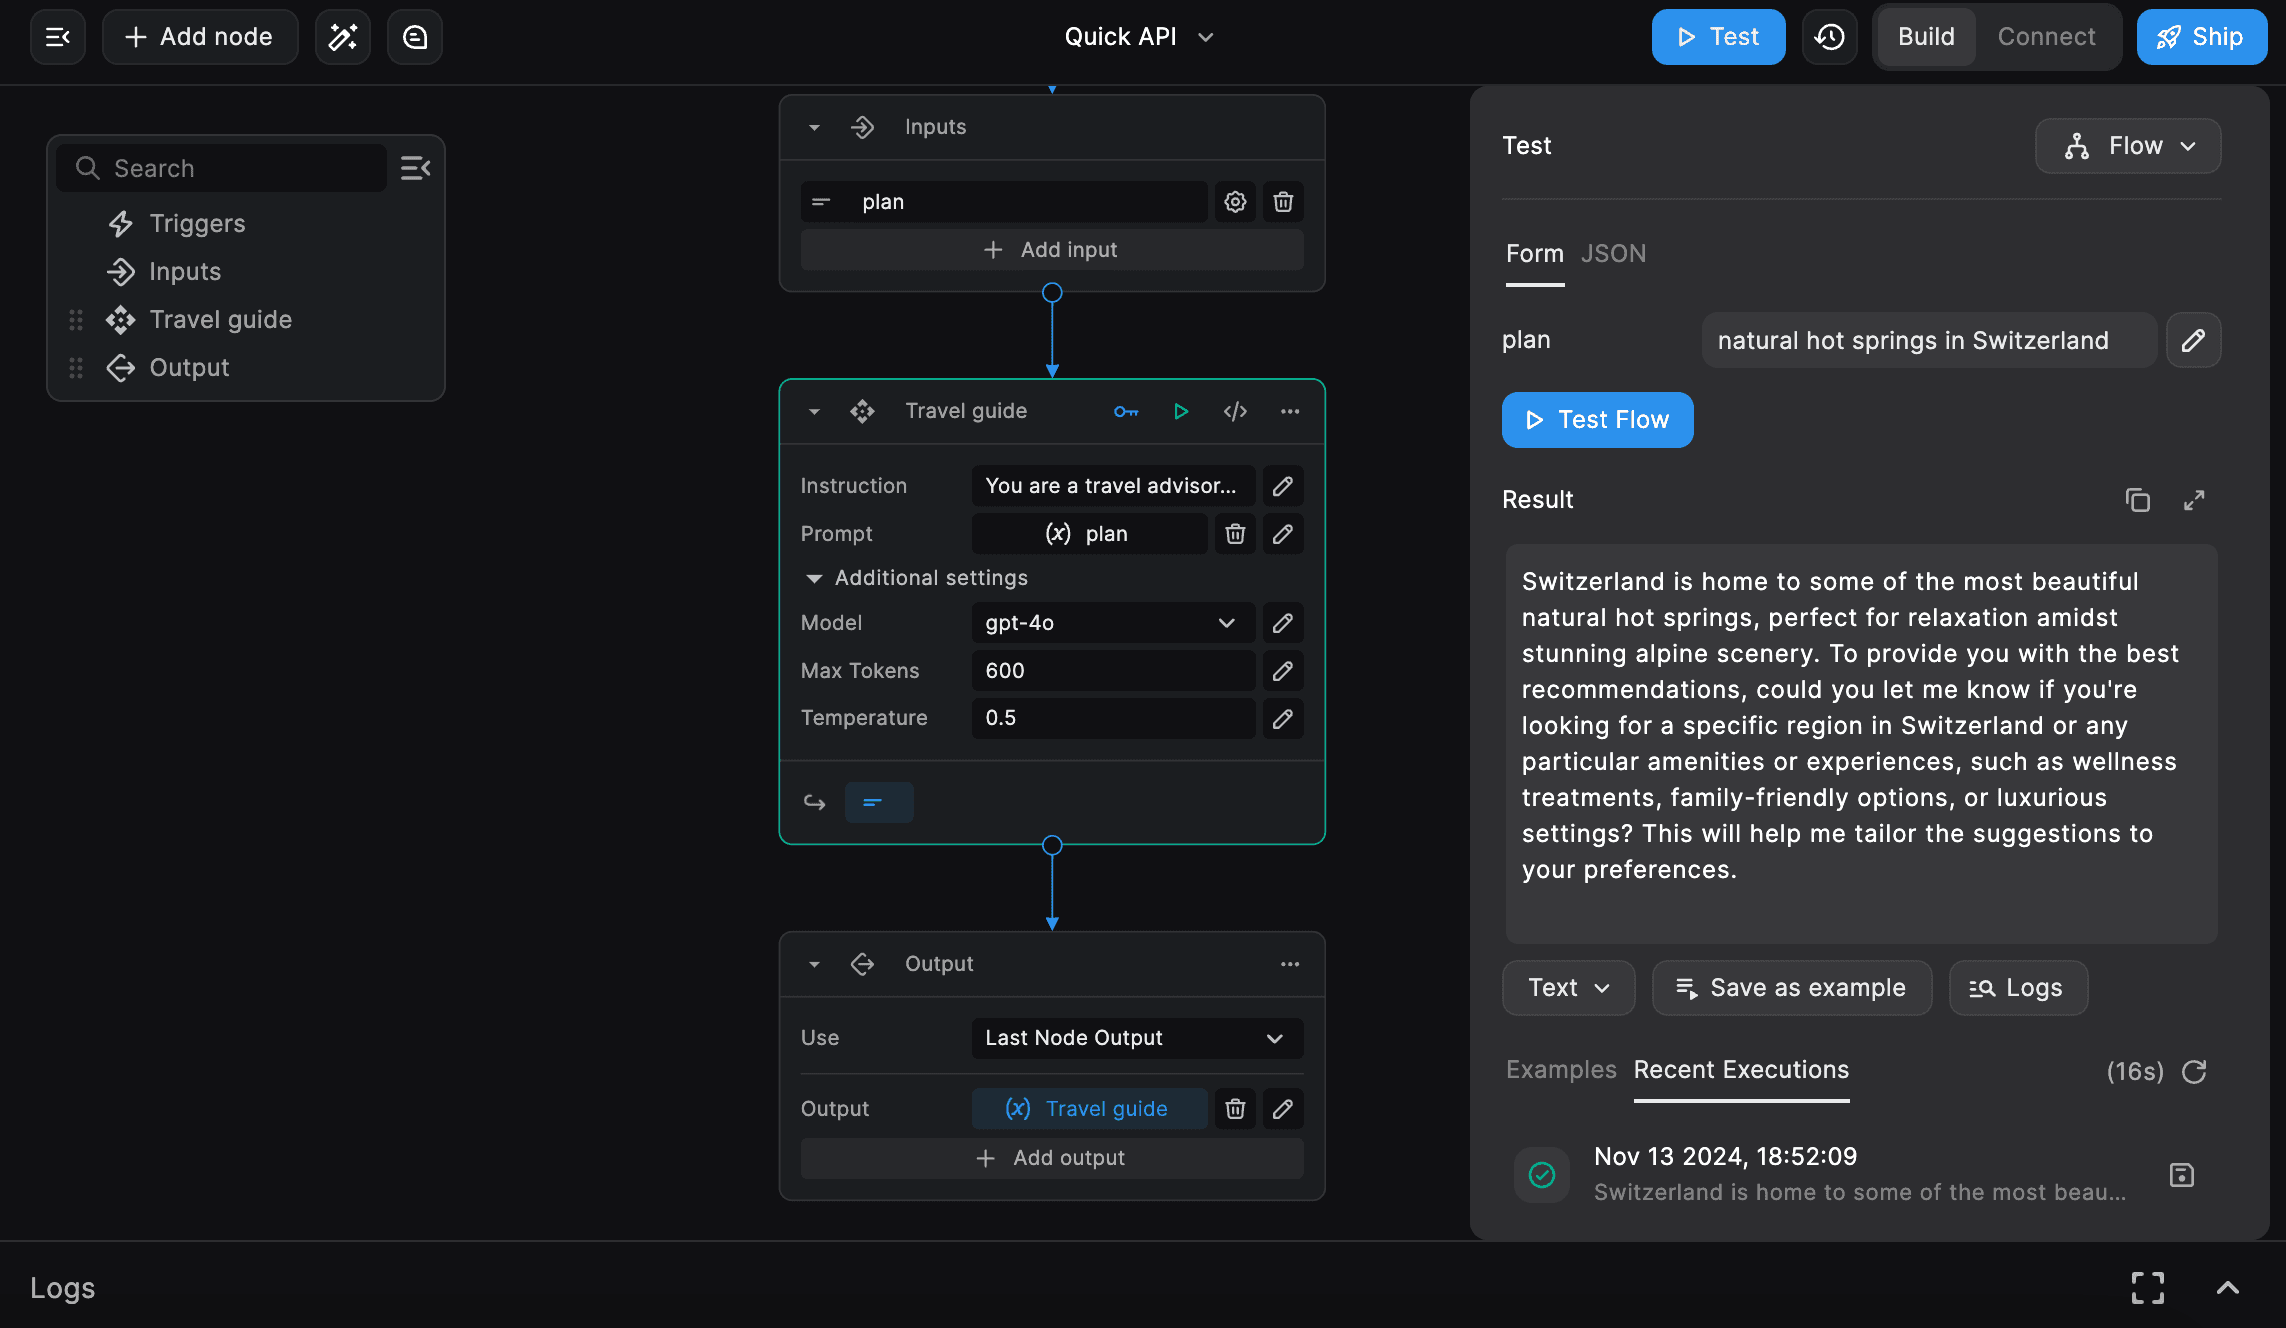
Access the Testing Mode
At any point in your workflow-building process, click on the "Test" button located in the top-right menu.
Configure Parameters
Before running the test, provide any necessary parameters. For instance, in the case of an HTTP Trigger, you can specify the request body that your trigger will receive.
Run the Test
Click "Run" to initiate the test. Your logic nodes will execute one after another, validating their functionality. Successfully executed nodes will display a green checkmark ✅, while any failing nodes will be marked with a red exclamation mark ❗️.
Debugging
In case of node failures, the testing mode reveals the exact node responsible for the error ocurred. Clicking on the exclamation mark reveals the error code and message, helping you pinpoint and address issues efficiently.
Need Help?
- 💬Join BuildShip Community
An active and large community of no-code / low-code builders. Ask questions, share feedback, showcase your project and connect with other BuildShip enthusiasts.
- 🙋Hire a BuildShip Expert
Need personalized help to build your product fast? Browse and hire from a range of independent freelancers, agencies and builders - all well versed with BuildShip.
- 🛟Send a Support Request
Got a specific question on your workflows / project or want to report a bug? Send a us a request using the "Support" button directly from your BuildShip Dashboard.
- ⭐️Feature Request
Something missing in BuildShip for you? Share on the #FeatureRequest channel on Discord. Also browse and cast your votes on other feature requests.