REST API Call Trigger
The Rest API Call Trigger lets us initiate a BuildShip Workflow by sending HTTP requests to specified URL endpoint. This is generally used for cases where a you have a client, a no-code frontend platform, or a third-party service that can send HTTP requests to a URL.
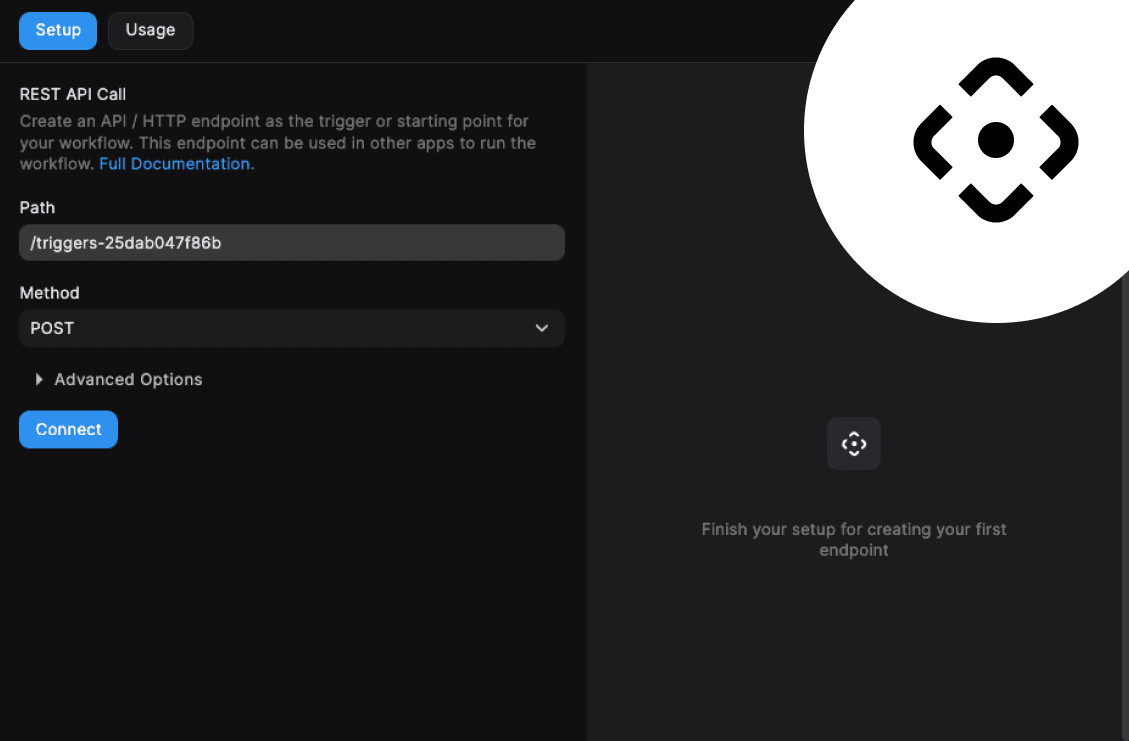
Configuring the Trigger
- Go to the connect tab, and search for the “Rest API Call”. Pick the trigger to configure.
- To set up the Rest API Call trigger, we need to add an Endpoint Path. The output path is pre-filled by default. We can modify this to be anything we prefer.
Tip: The Rest API Path also supports Wildcards (or Path Variables). Learn more
- We can also set up the Request Method for the Rest API Endpoint. The trigger is set to accept a POST request by default.

Advanced Options
We have the option to set the Request Content-Type header for the incoming API Request. Generally, most of the requests have the application/json content type, which is selected for your request by default.
We can pick from application/x-www-form-urlencoded and text/plain content types as well.
Setting up the Trigger
Once the trigger is all set up, click on the Connect button to connect the trigger to the workflow.
This will generate an Endpoint URL that you can use to make API calls to trigger the workflow.
Now, we'll be able to access additional settings to configure our workflow inputs and outputs. Since the workflow logic is independent of the connected triggers, we would have to map the incoming request data to the workflow inputs, and the workflow outputs to the response.
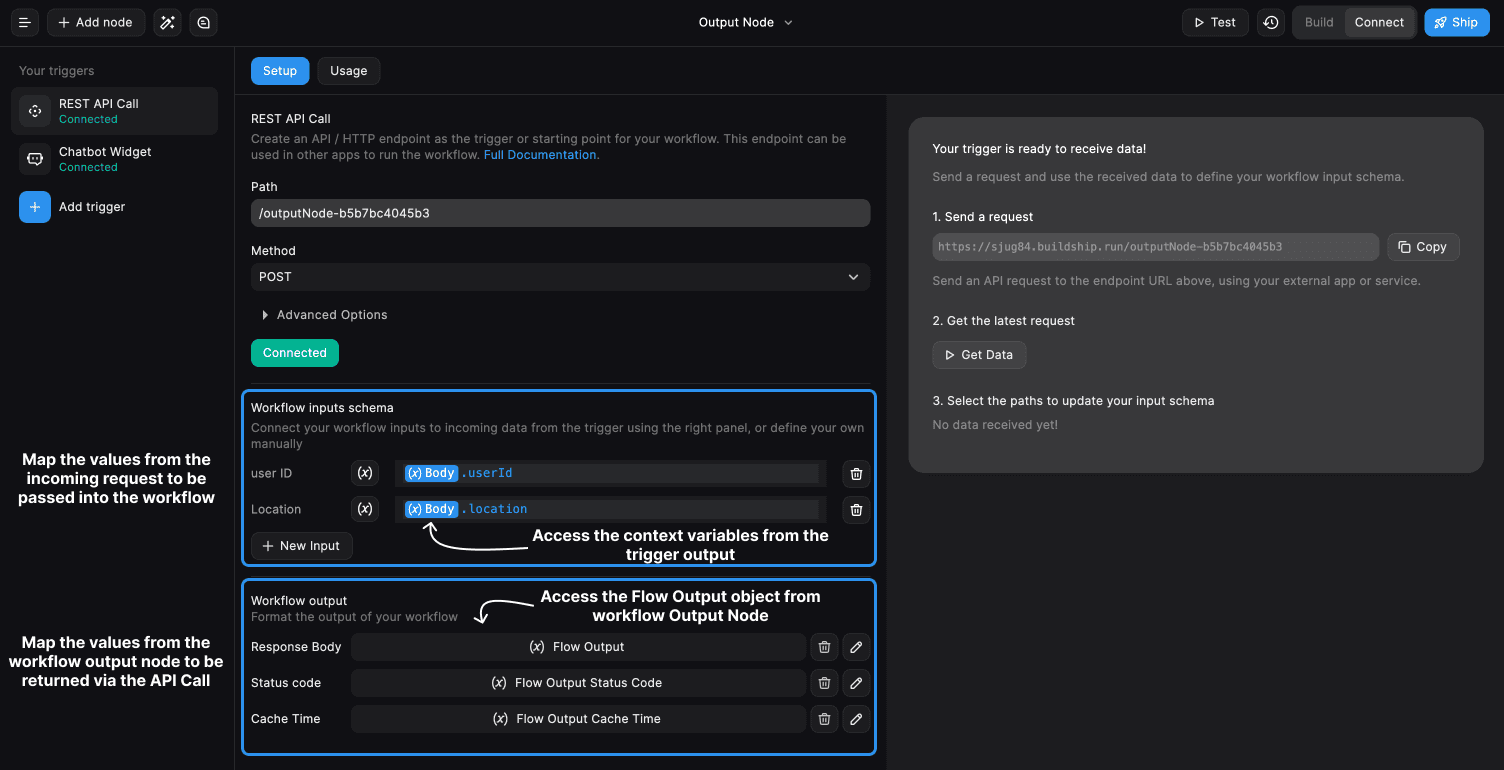
Check out the Triggers overview page to find an example. Learn more
Get Data
Imagine you have a trigger set up, but you're not sure what the incoming request looks like to map it to the inputs in your workflow. To make things easier, we can make use of the Get Data feature in the post-setup preview screen.
The Get Data feature let's you fetch the latest request to the set up endpoint and define your Workflow Input Schema based on the request.
How to use Get Data?
-
Make sure to Connect your Trigger
-
Just copy over the endpoint in the to your front-end client or API Testing Platform like Postman, or Hoppscotch. Send a request to the given endpoint.
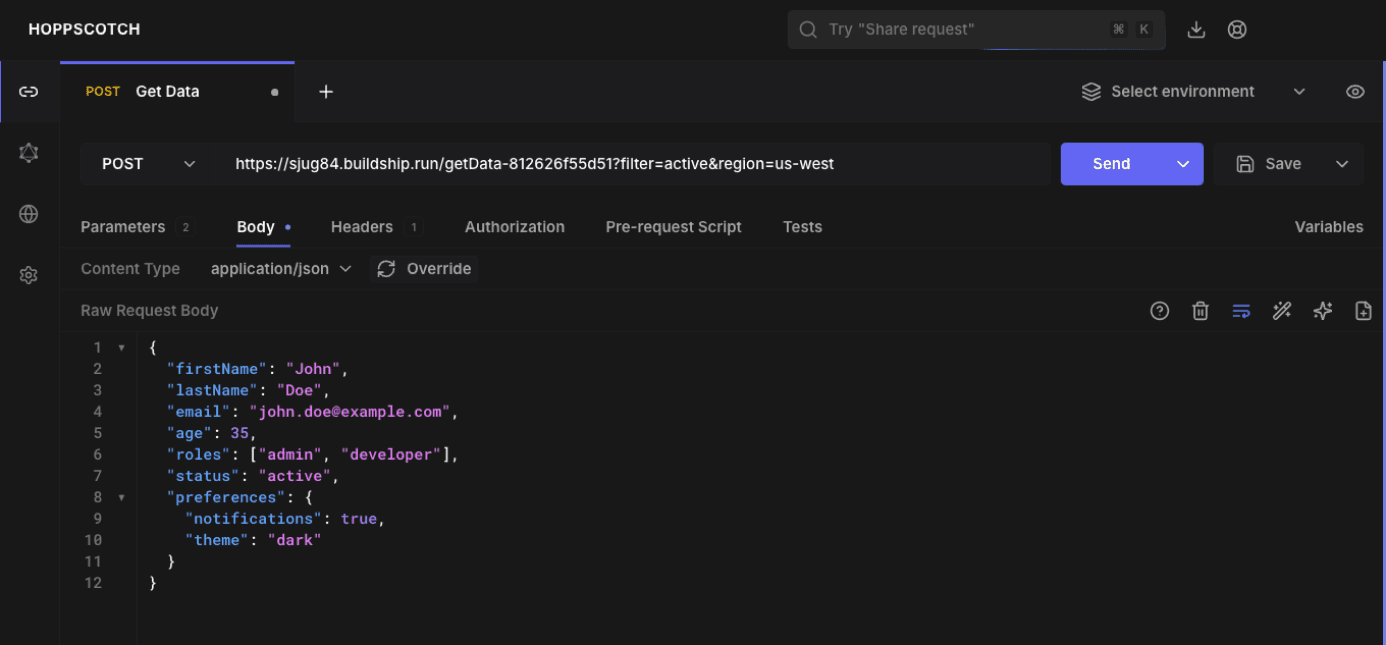
The Get Data fetches the last request sent to the endpoint. You can run this anytime you have a request previously sent to the endpoint, and isn't required to be in real-time.
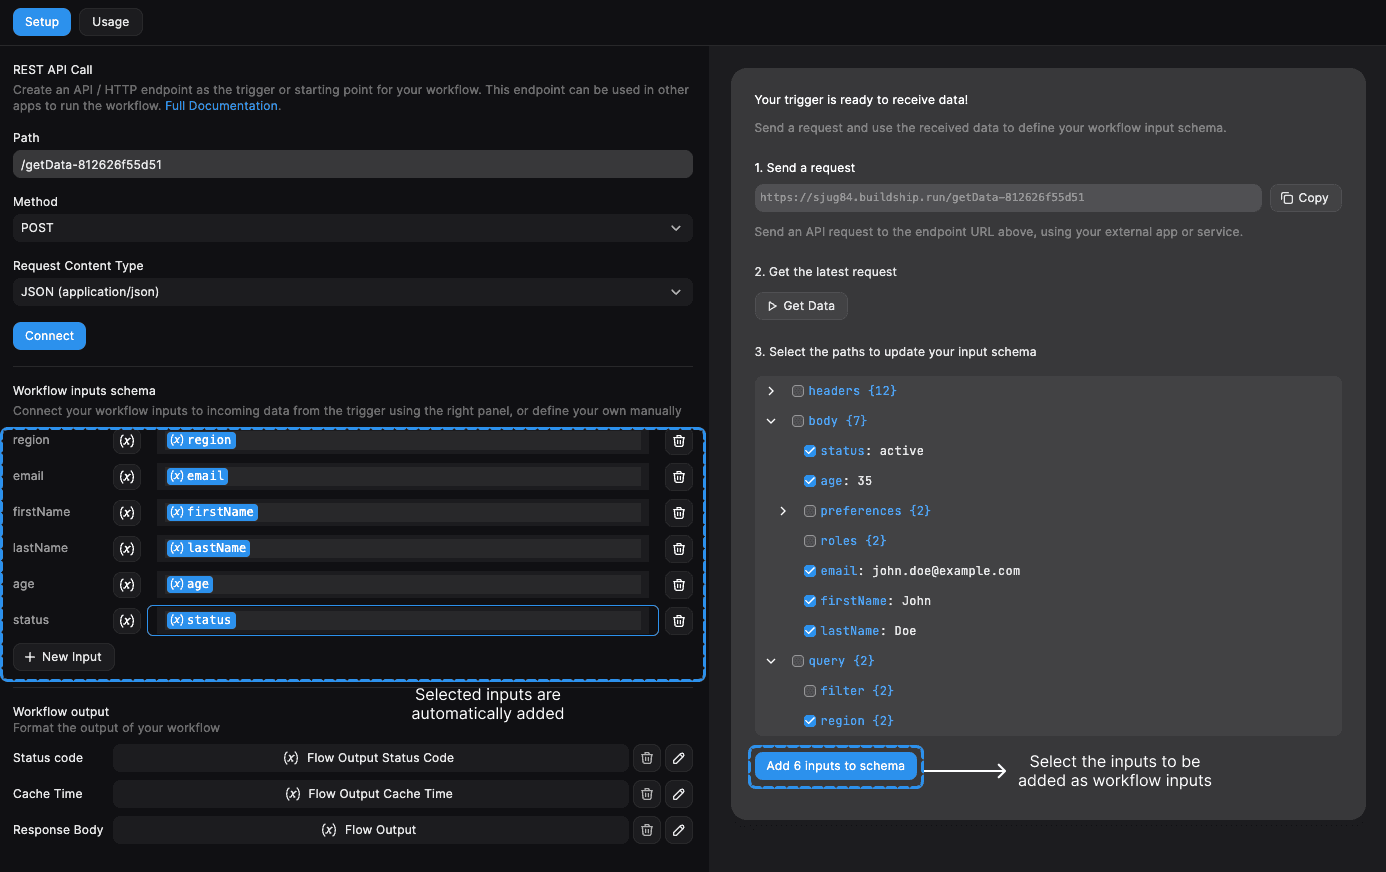
Once a request is found delivered to the endpoint, you'll be displayed a tree structure of the properties received in the request. Select the required inputs for your workflow and click on “Add inputs to schema”. This would automatically add the selected properties as inputs to your workflow auto-mapped.

Testing the Trigger
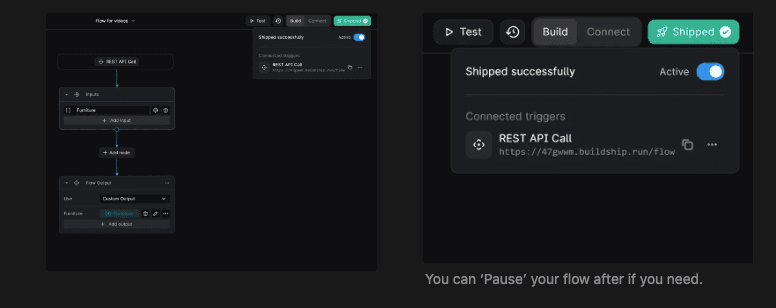
Click the Ship button on the top right corner to make your flow Active. Copy the URL and make an API call.
You can 'Pause' your flow afterwards if you need.
You can use a tool like Hoppscotch (opens in a new tab) or Postman (opens in a new tab) to make an API Call to your flow and test it!
Once you do the API Call, you can check the Logs to verify the data you are sending is being received.

Testing the Workflow
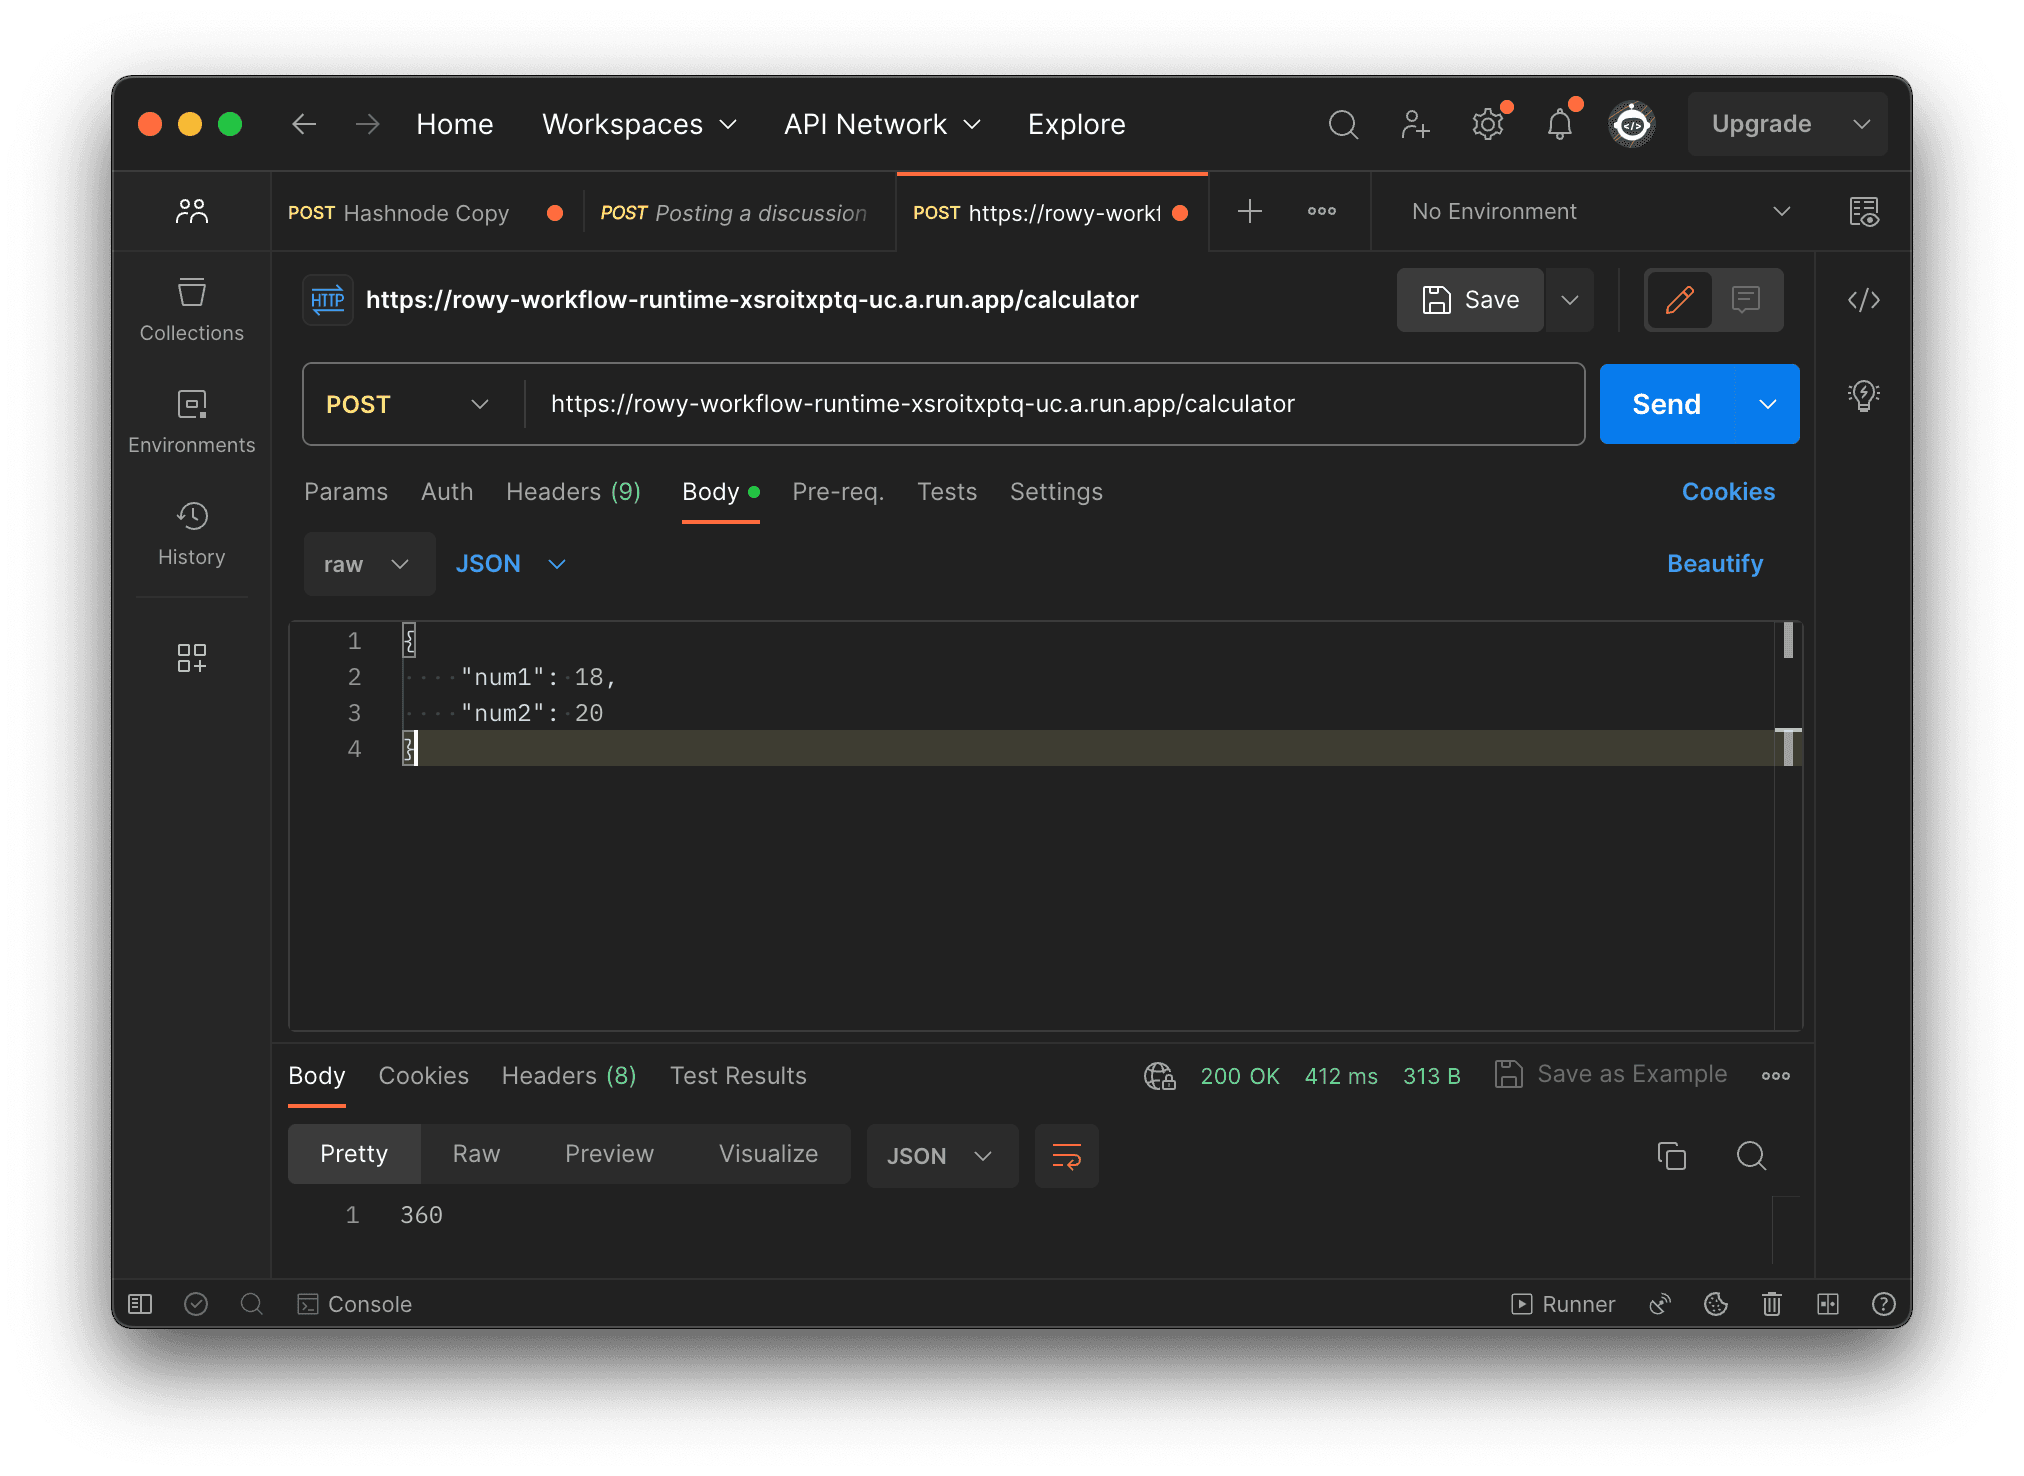
To test our our Workflow, let's go to Postman. Add in the copied Endpoint URL and set the request method to POST. (Same as we had set up in the Trigger Node)
Add in the body and click Send! 🚀
Need Help?
- 💬Join BuildShip Community
An active and large community of no-code / low-code builders. Ask questions, share feedback, showcase your project and connect with other BuildShip enthusiasts.
- 🙋Hire a BuildShip Expert
Need personalized help to build your product fast? Browse and hire from a range of independent freelancers, agencies and builders - all well versed with BuildShip.
- 🛟Send a Support Request
Got a specific question on your workflows / project or want to report a bug? Send a us a request using the "Support" button directly from your BuildShip Dashboard.
- ⭐️Feature Request
Something missing in BuildShip for you? Share on the #FeatureRequest channel on Discord. Also browse and cast your votes on other feature requests.