WhatsApp Bot
The WhatsApp Bot trigger enables seamless integration and creation of interactive chatbots on WhatsApp by leveraging Meta's WhatsApp Business API. It verifies and parses messaging payloads from the WhatsApp Webhook, empowering developers to build context-aware, multimedia-rich conversational experiences efficiently.
Checkout the full video tutorial 🍿:
Prerequisites
Before you can create a chatbot on WhatsApp, you need to have the following:
- A Meta developer account. Sign up for a Meta Developer Account here (opens in a new tab).
- A business app. Learn how to create a business app here (opens in a new tab).
- A verified business on Facebook. Click here (opens in a new tab) to learn how to verify your business.
- A registered WhatsApp business phone number.
- Access to the official WhatsApp Business API.
1. Setting up a Business App
-
Sign up for a Meta Developer Account: Go to https://developers.facebook.com (opens in a new tab) and click the "Login" button. You can use your Facebook account associated with your company or create a new account.

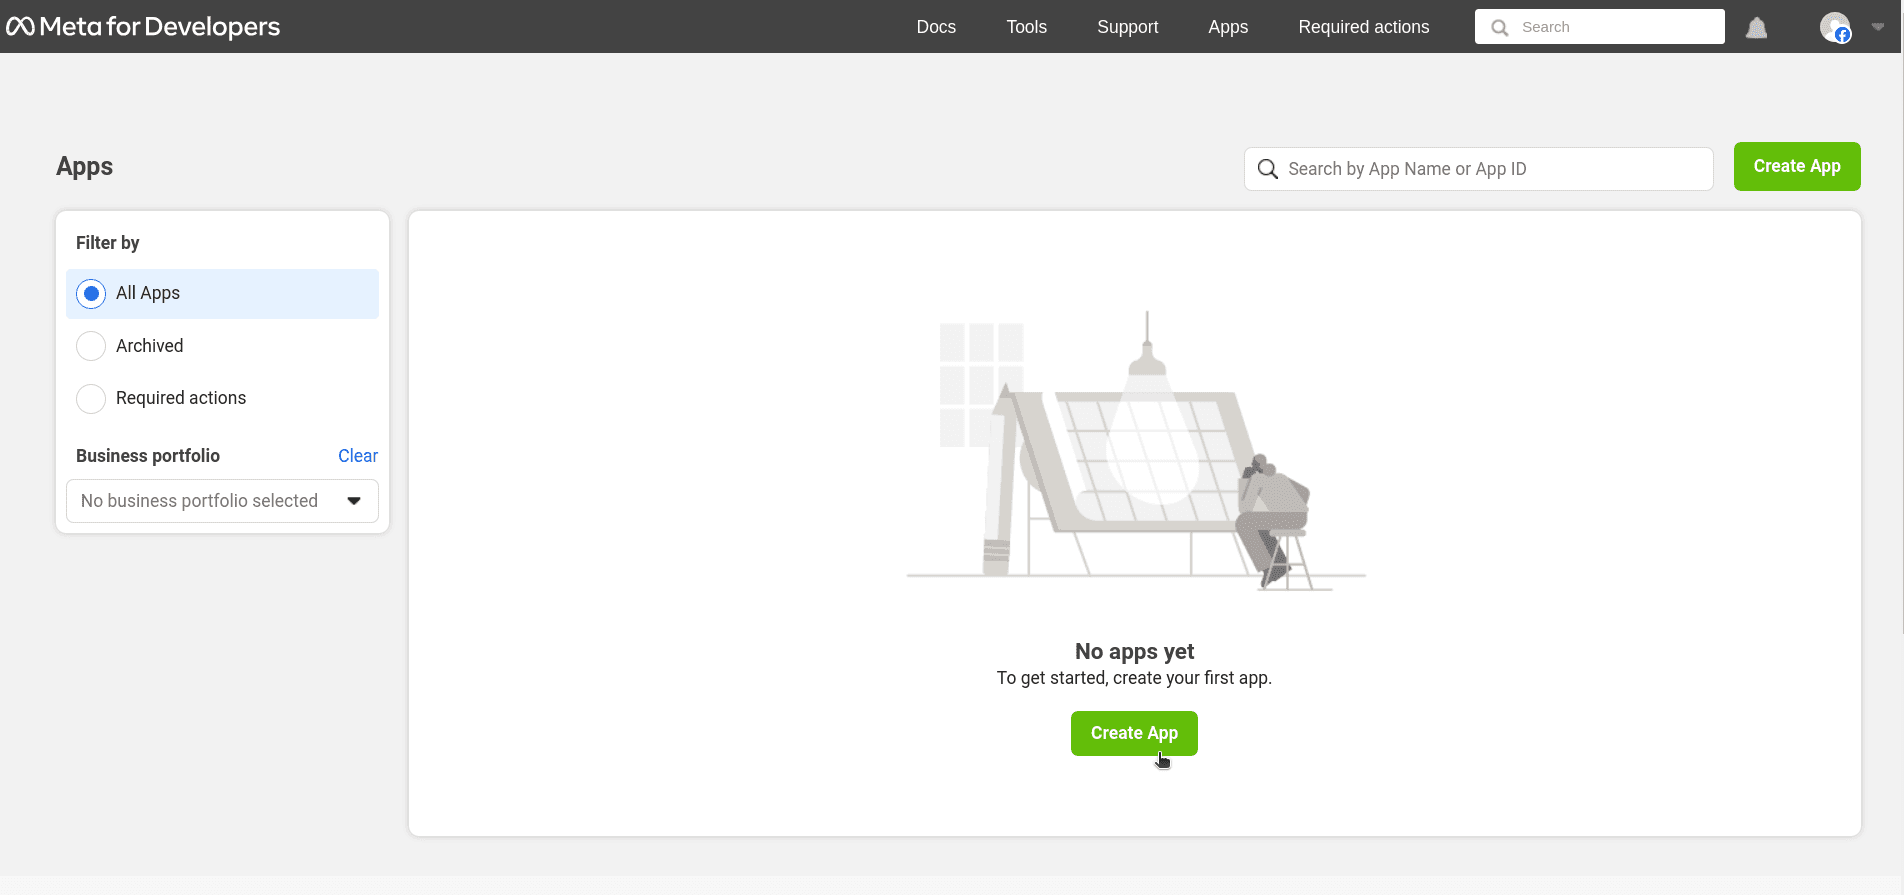
Create a new app
After creating your Meta Developer Account, select "My App >> Create an app".
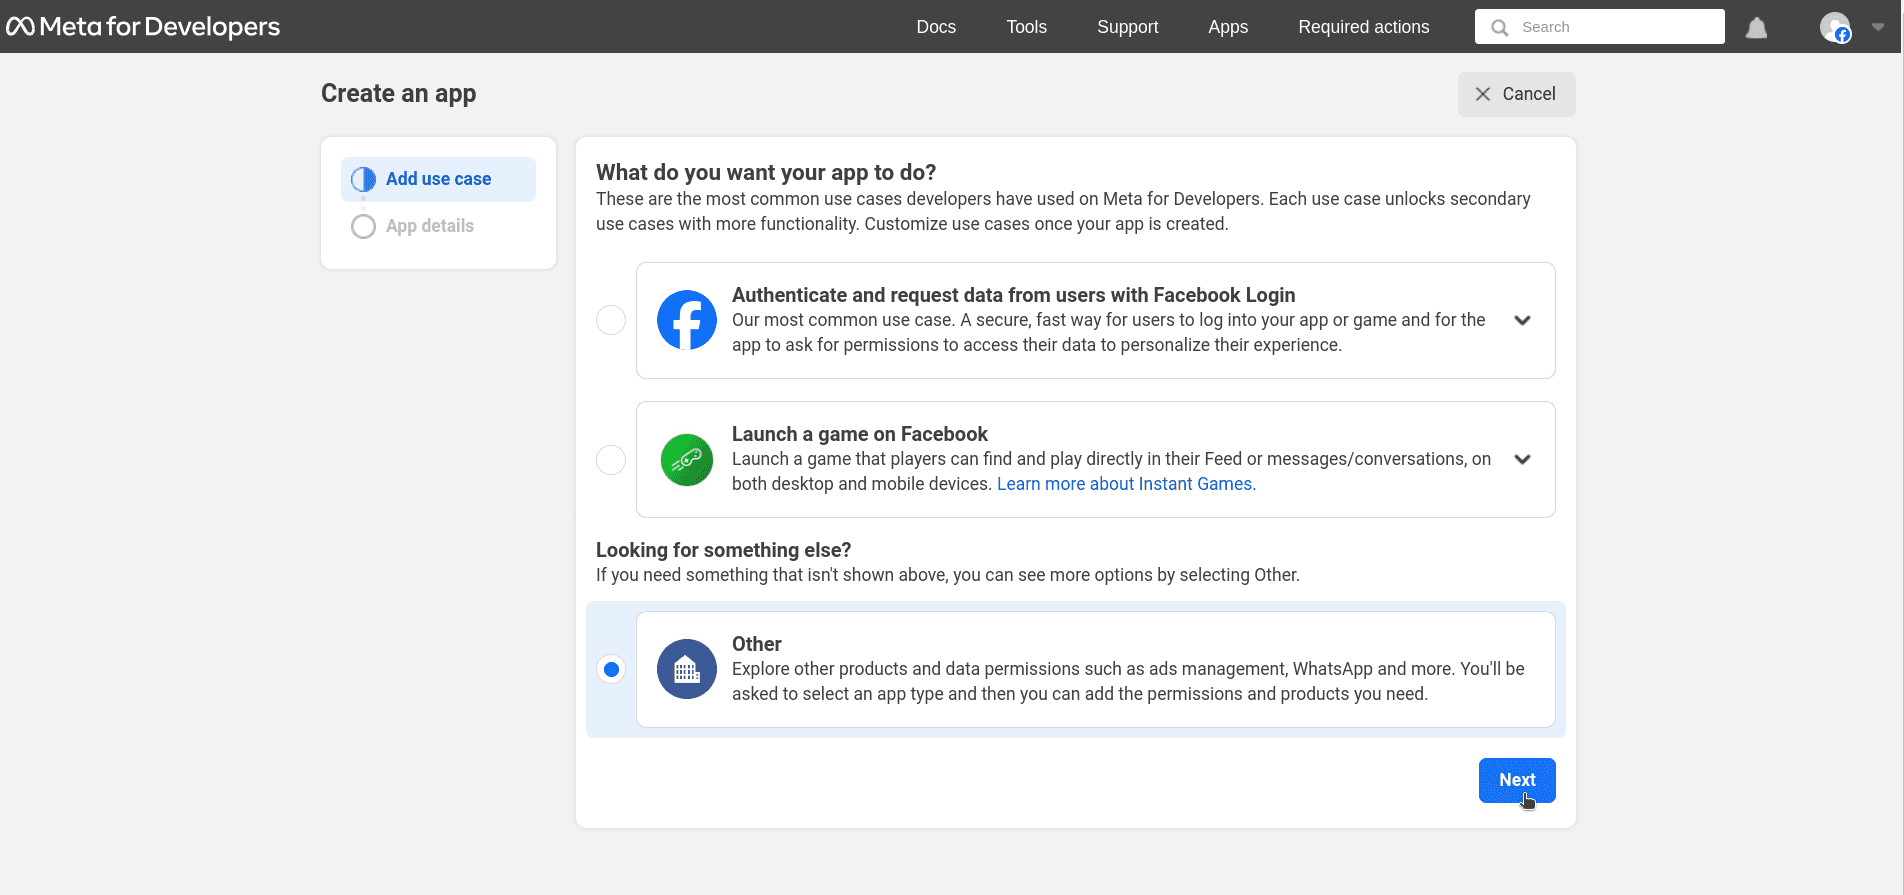
Select Other in "What do you want your app to do" section.
"Select Other" on What do you want your app to do section.
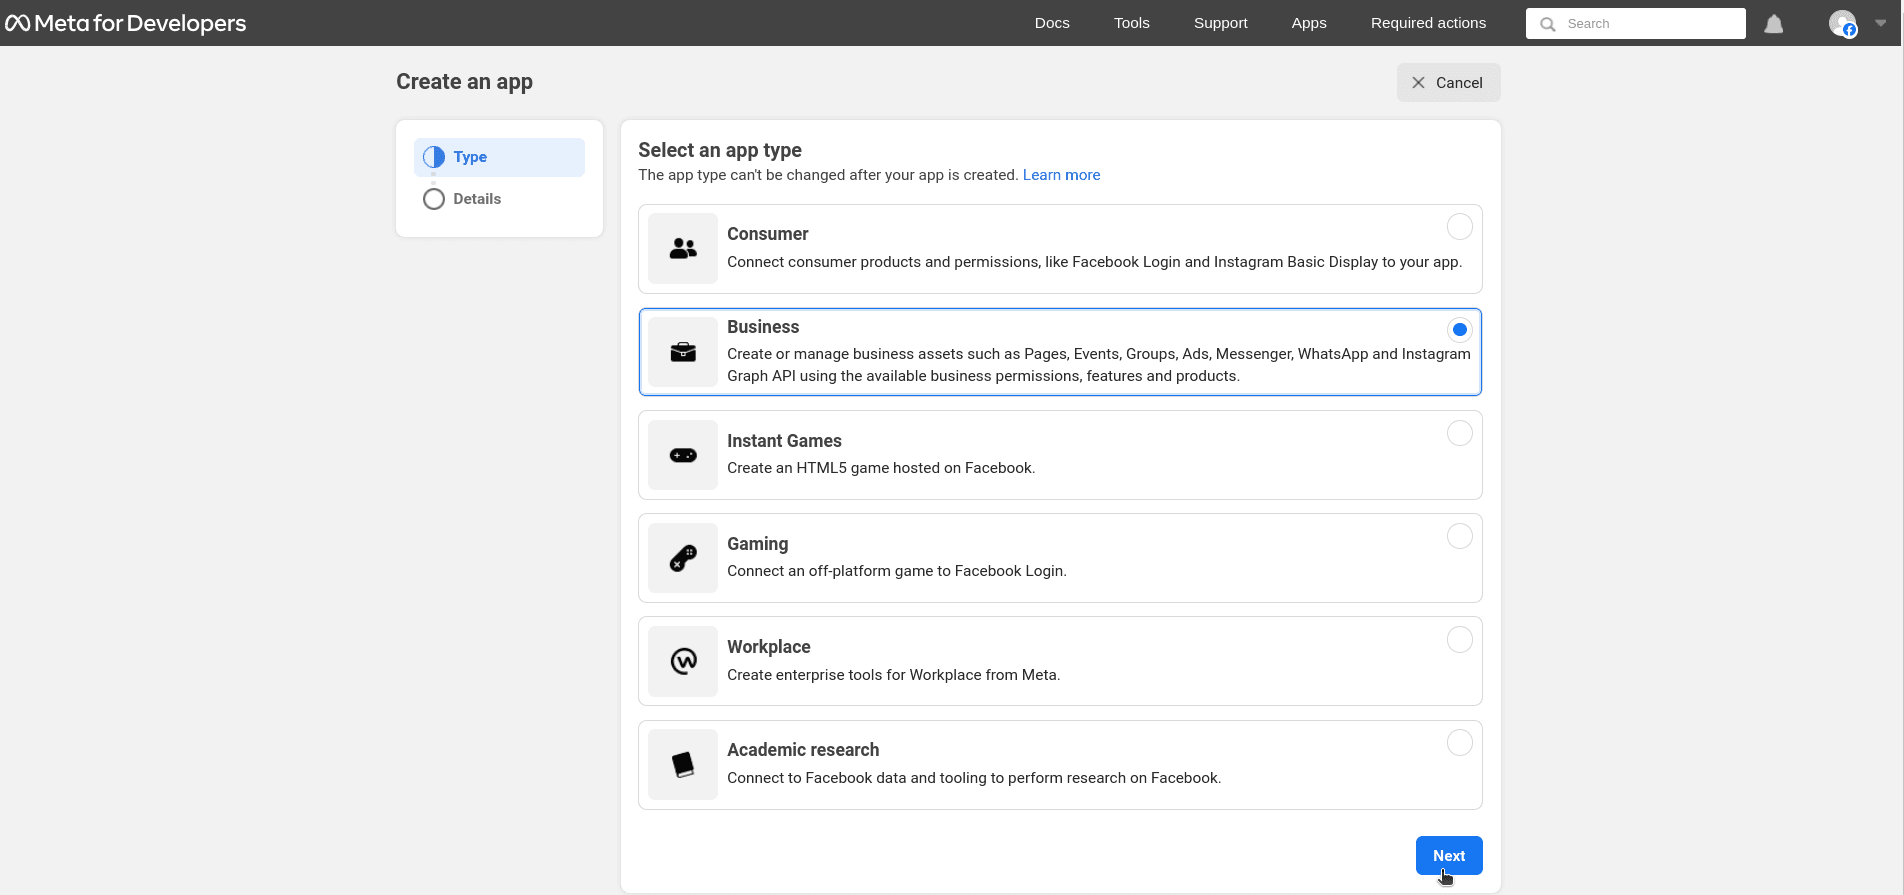
Select Business
"Select Business" - the type of app you want to create and use for your business.
Create App details
Give your app a name, enter a contact email, and connect it with your business account.

Add WhatsApp to your app
In your app, add the WhatsApp product.
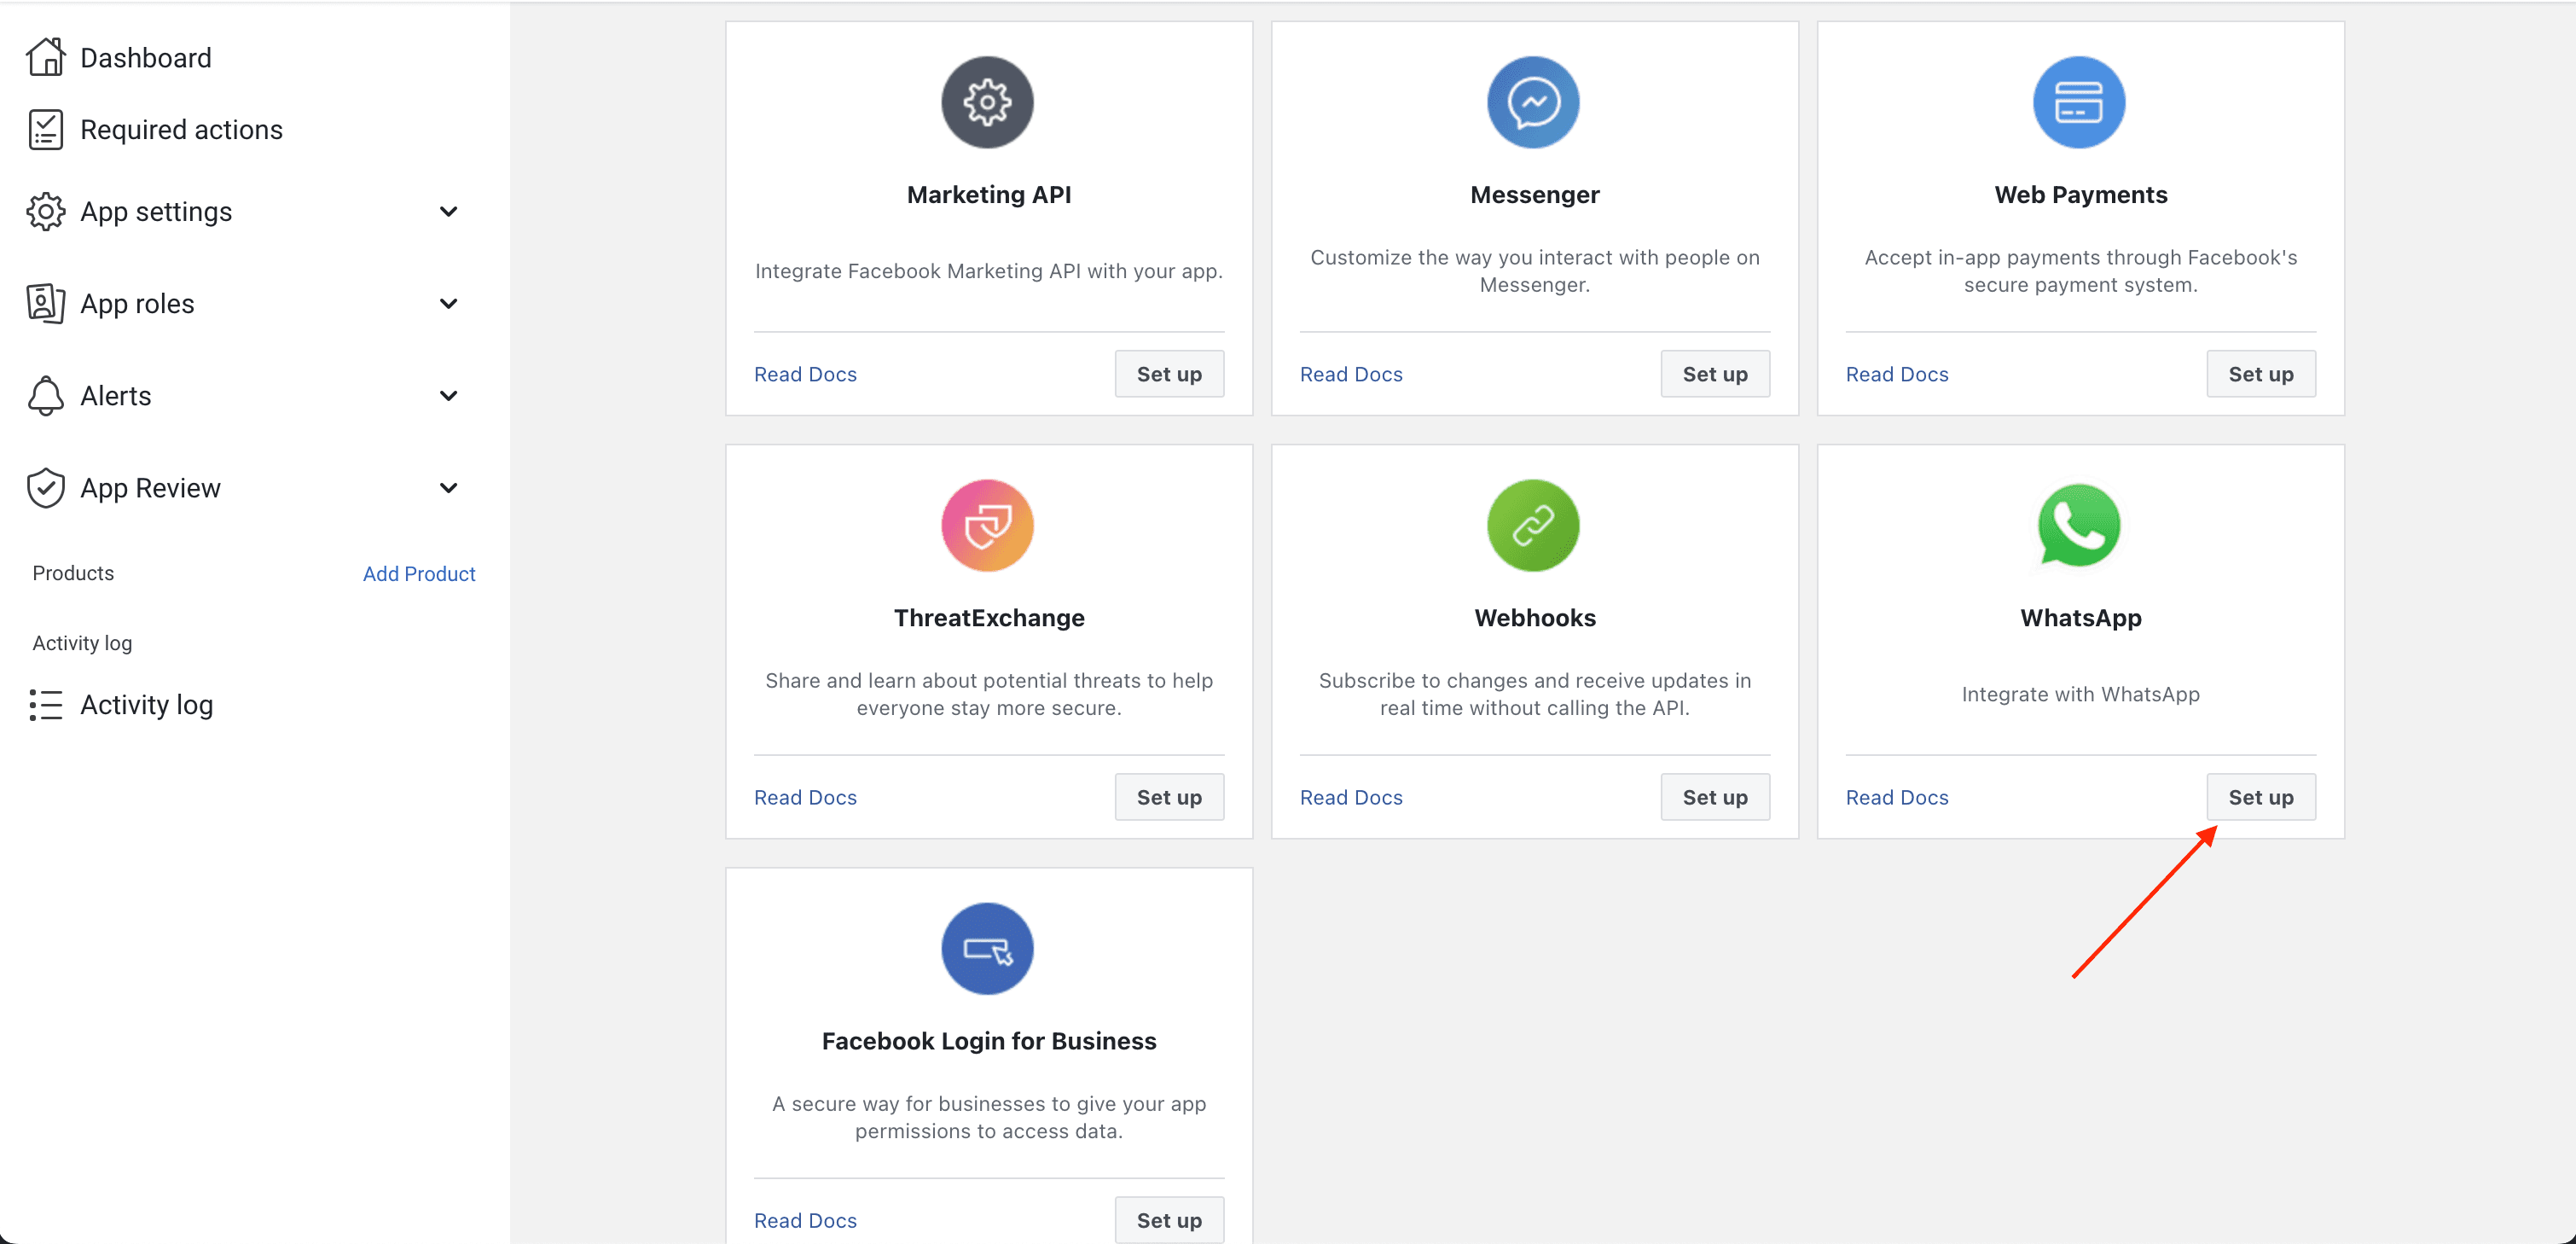
First, you'll need to select a business profile if you already have one setup. Then continue.

Note: If you don't have a business profile set up, then you'll be met with a different screen. From here, just let the platform guide you through the process of setting up a business profile.
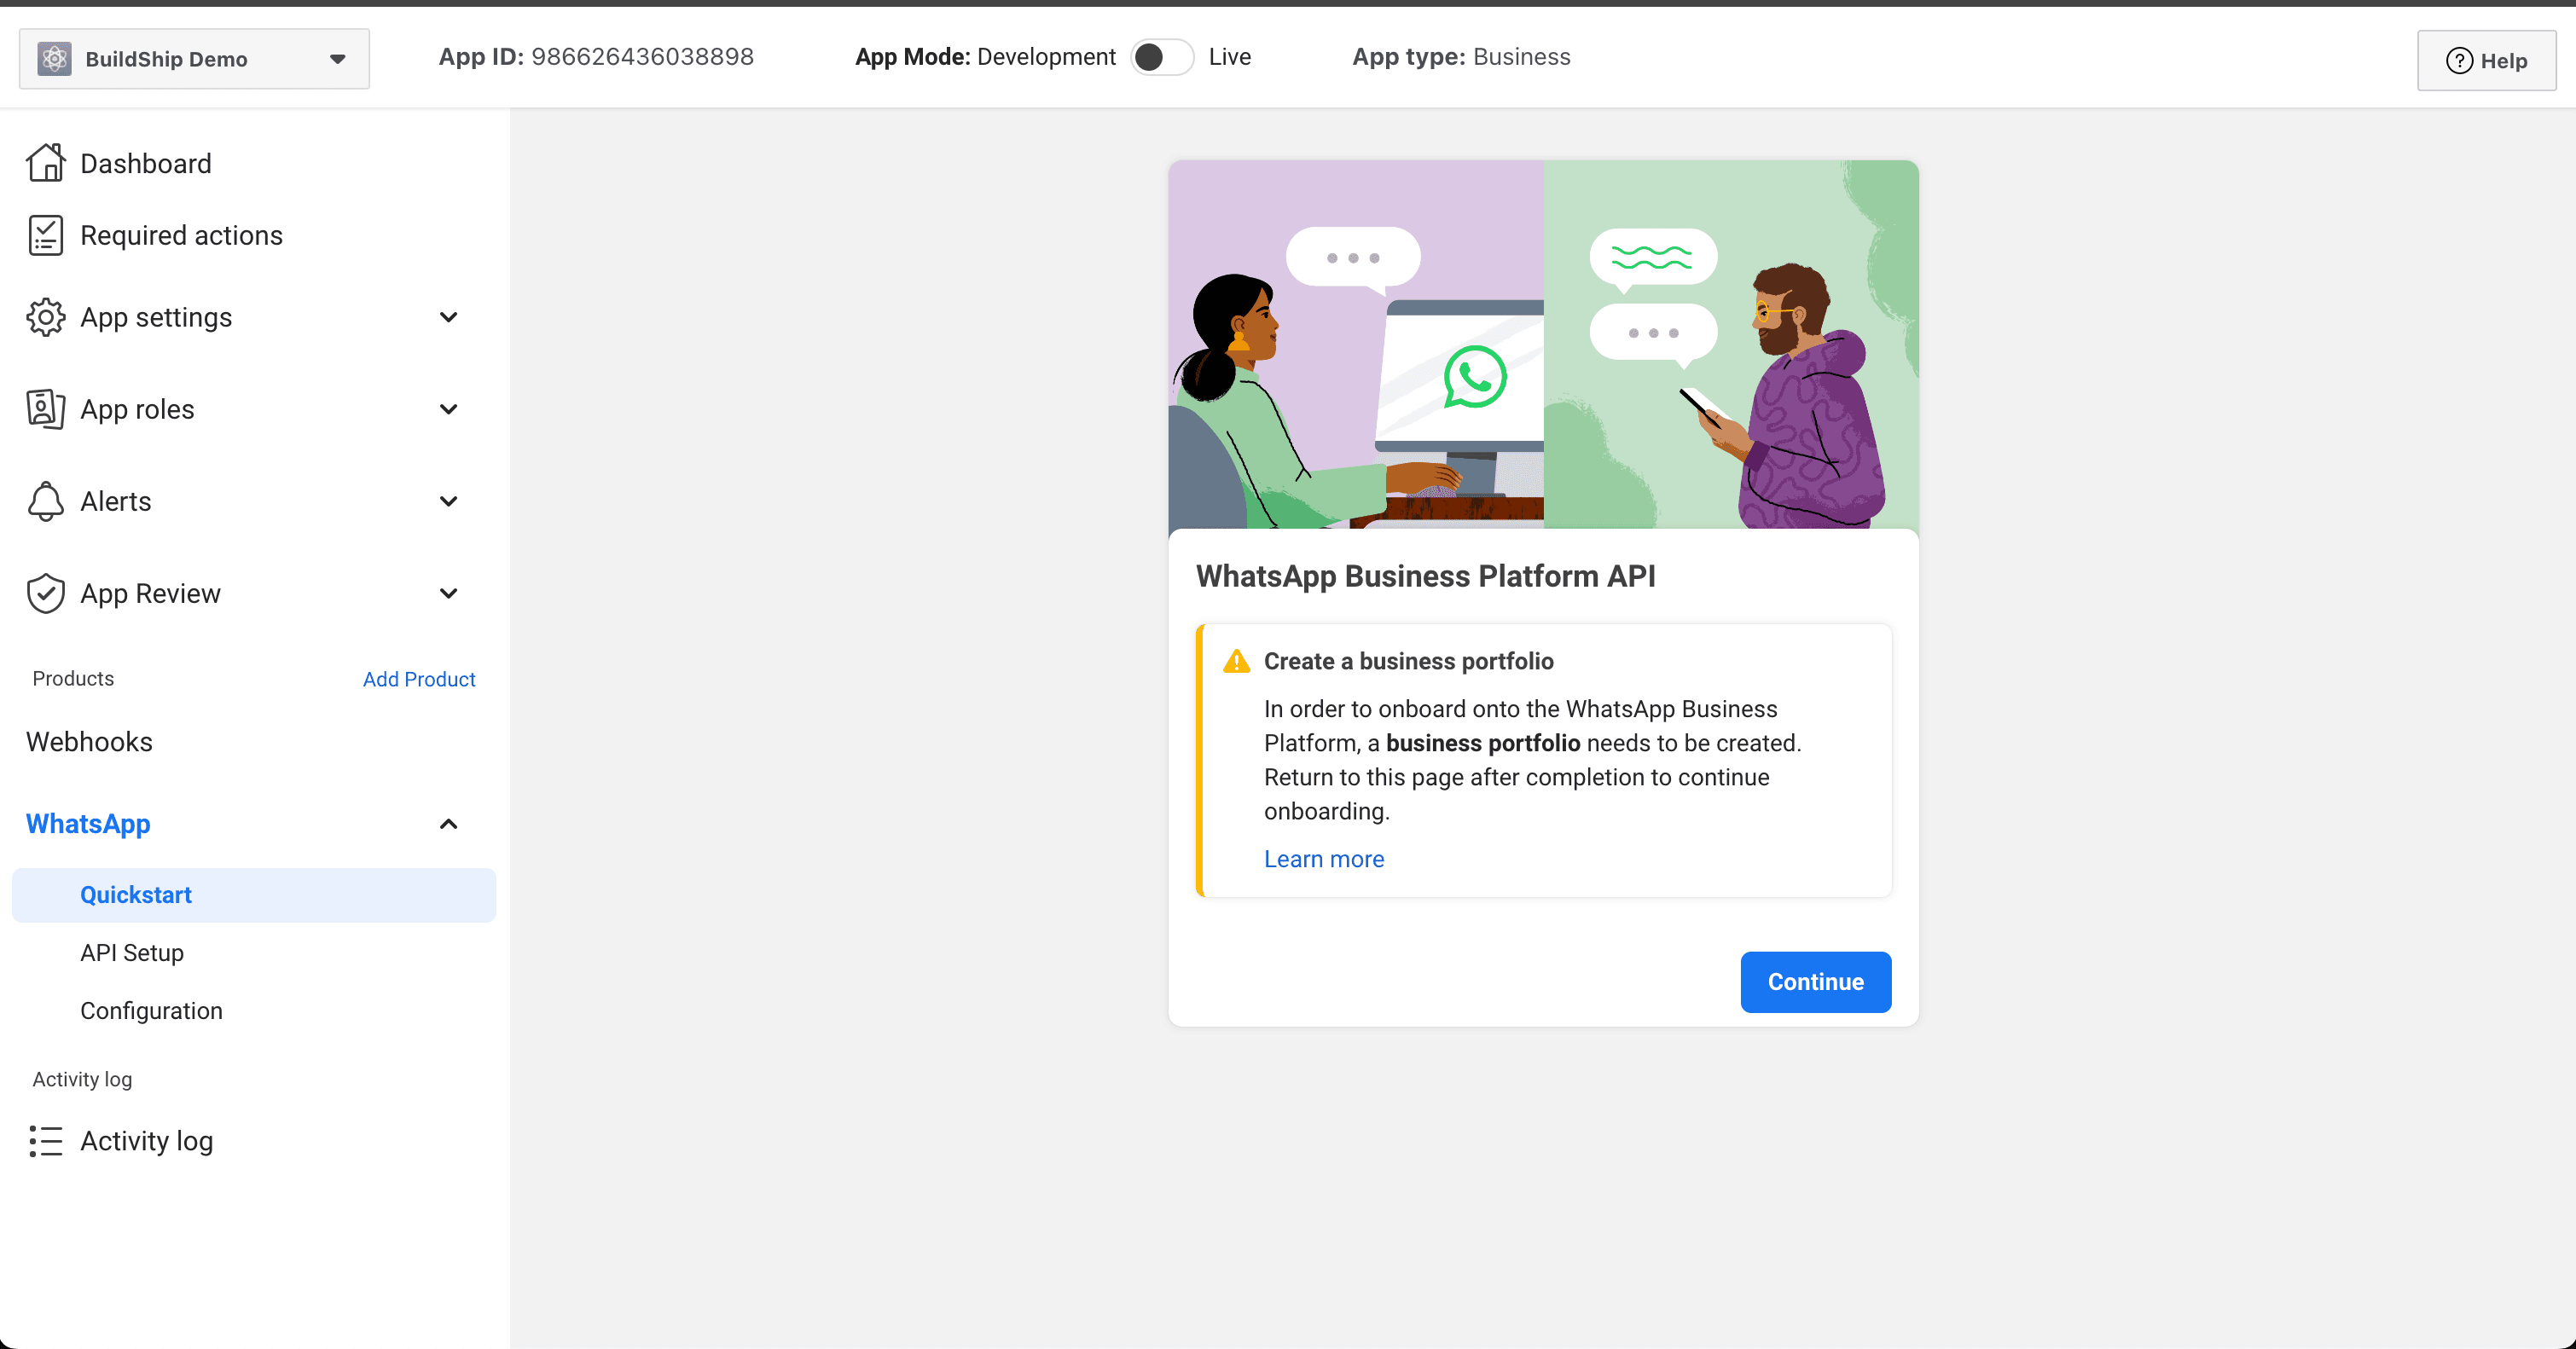
Then after adding the WhatsApp product you'll be redirected to the quickstart page
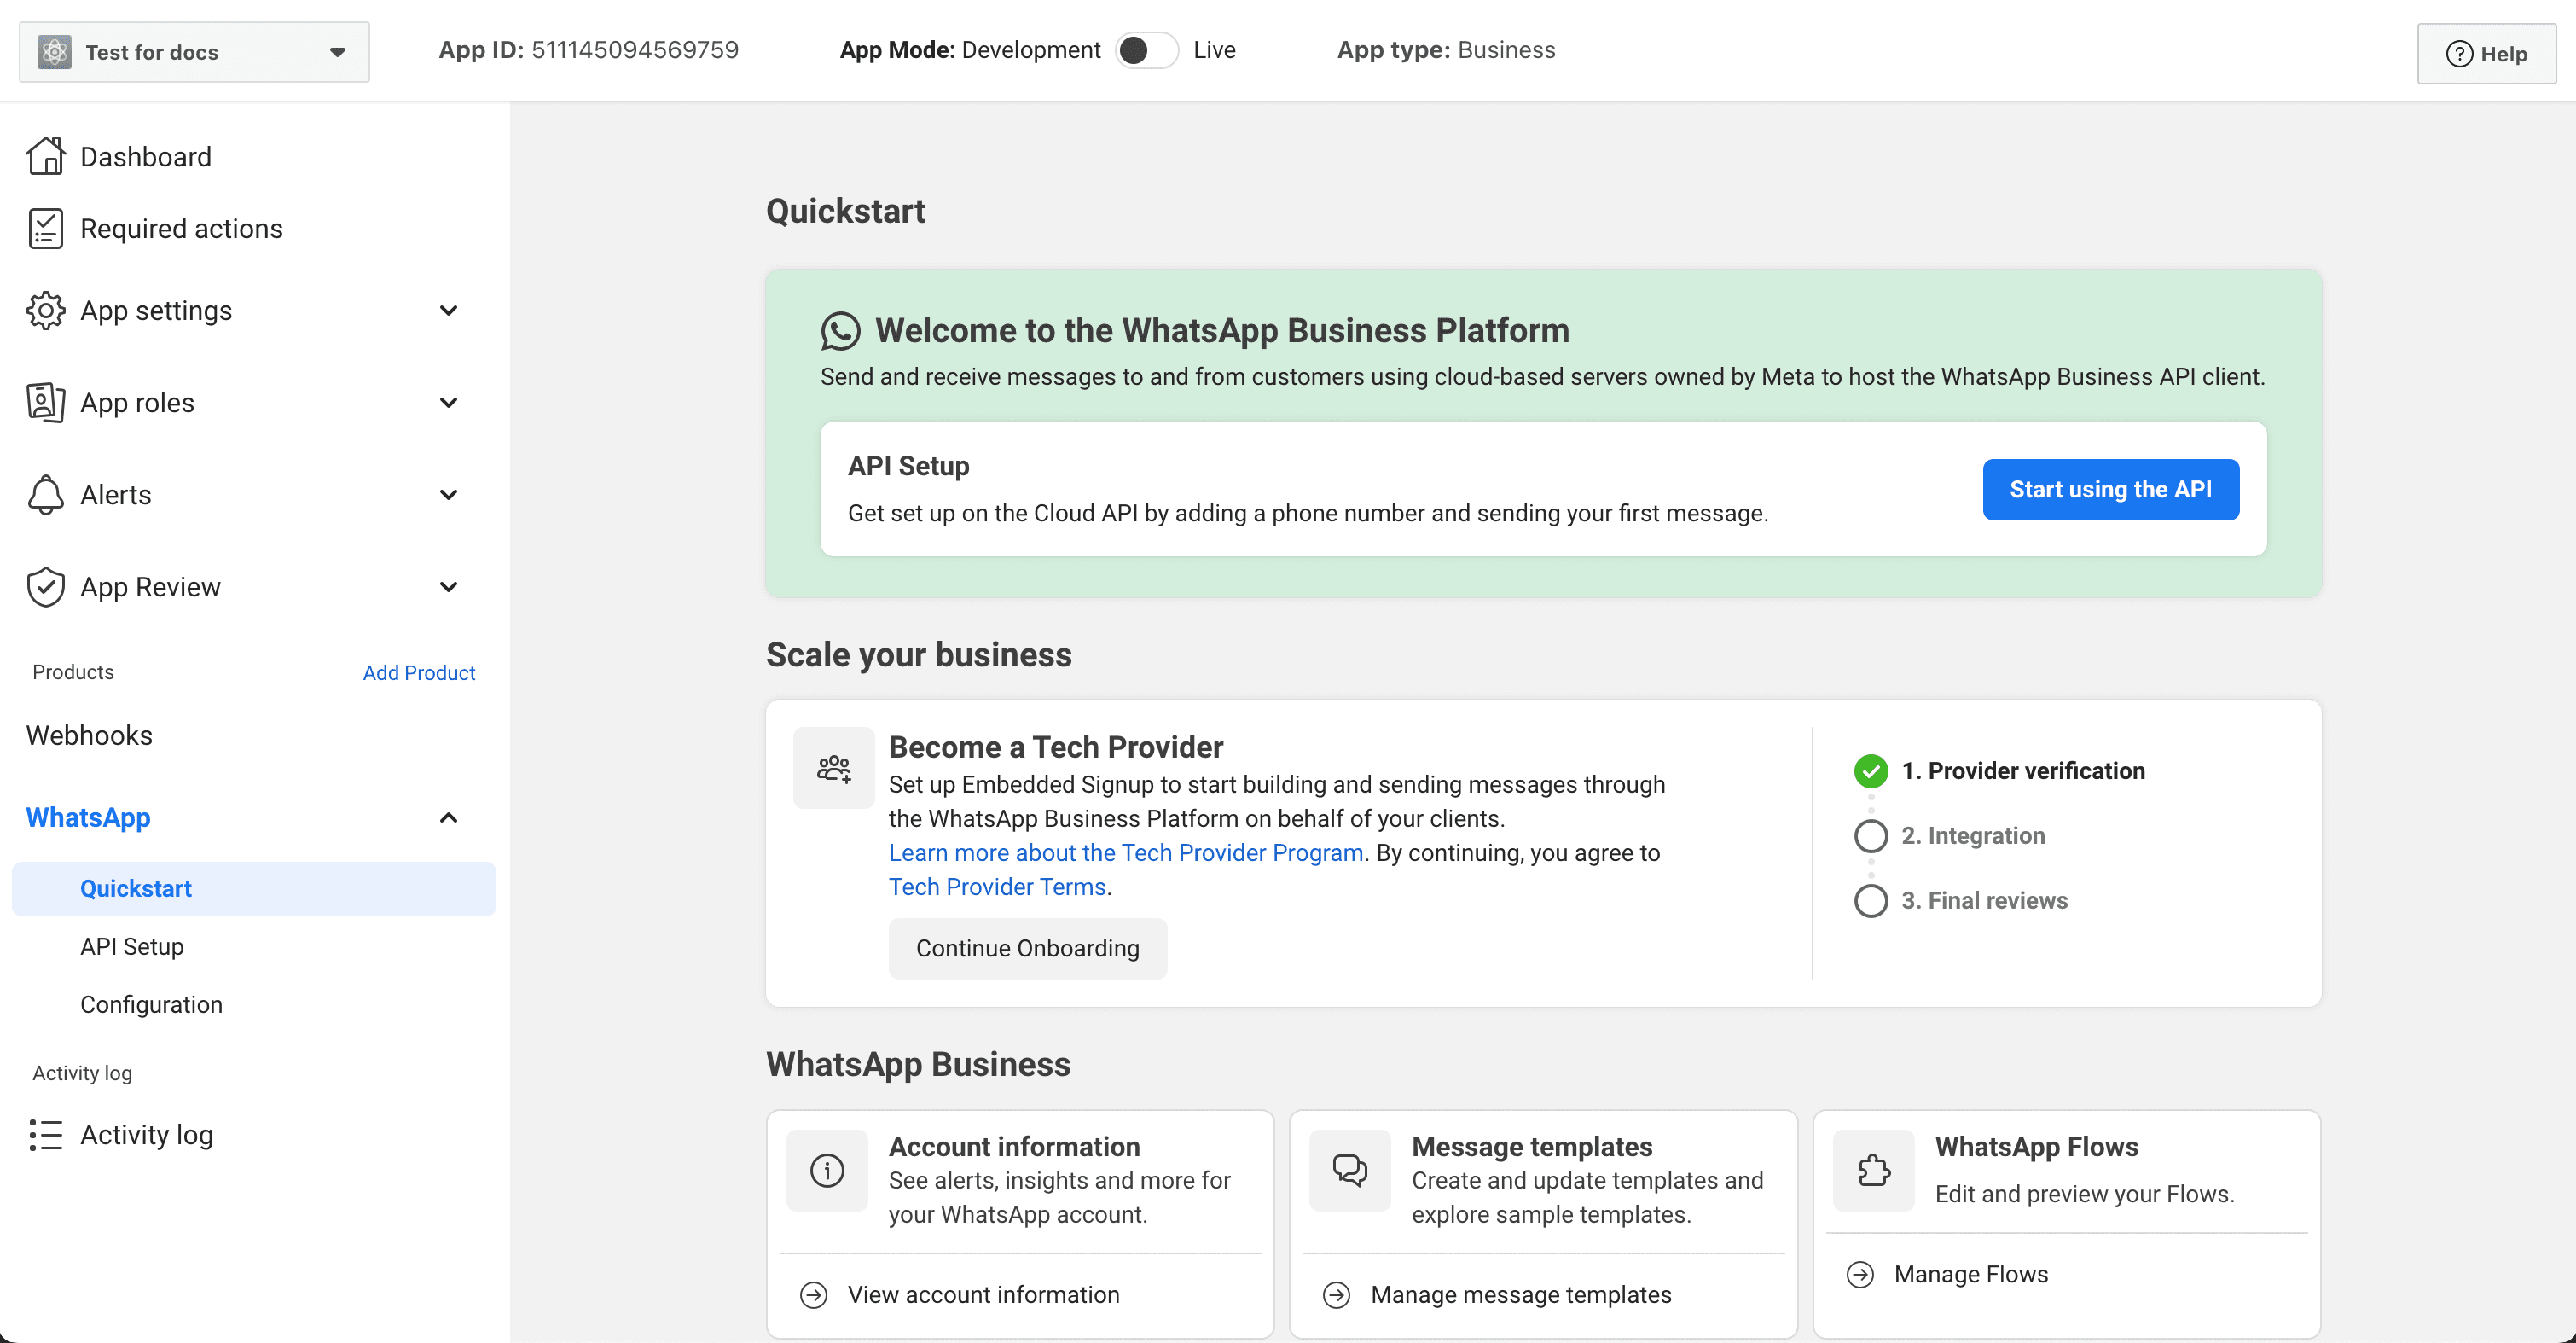
Copy your app credentials
First, go to the "API Setup" page and take note of the "Temporary access token". You'll need it later.

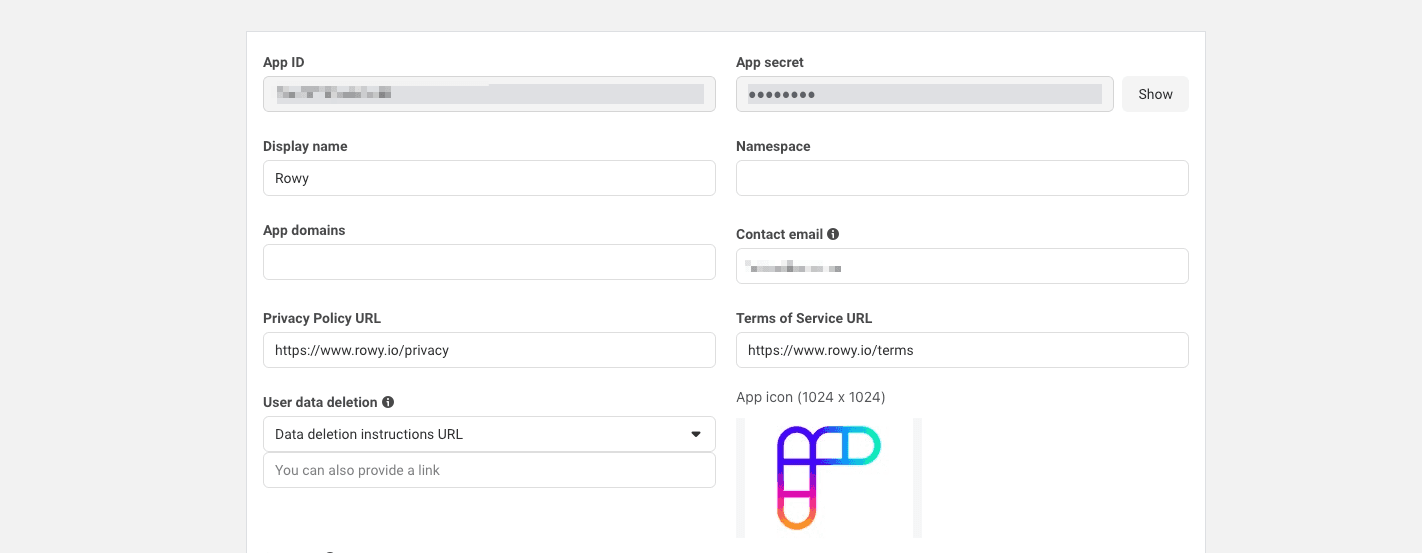
Next, got to "App settings" -> "Basic" and take note of the "App ID" and "App Secret". You'll need it later.
2. AI WhatsApp Bot Template
Take a pause from the Meta dashboard and let's clone the AI WhatsApp Bot template from BuildShip.
In BuildShip, clone the AI WhatsApp Bot template and ship your workflow. Remix link - https://app.buildship.com/template/Nmu4x1MCZNX8 (opens in a new tab)
The template uses the WhatsApp Bot trigger to verify incoming messages webhook payload from the WhatsApp Webhook by Meta. It then uses the OpenAI Text Generator node to automatically generate and send responses to the incoming messages.
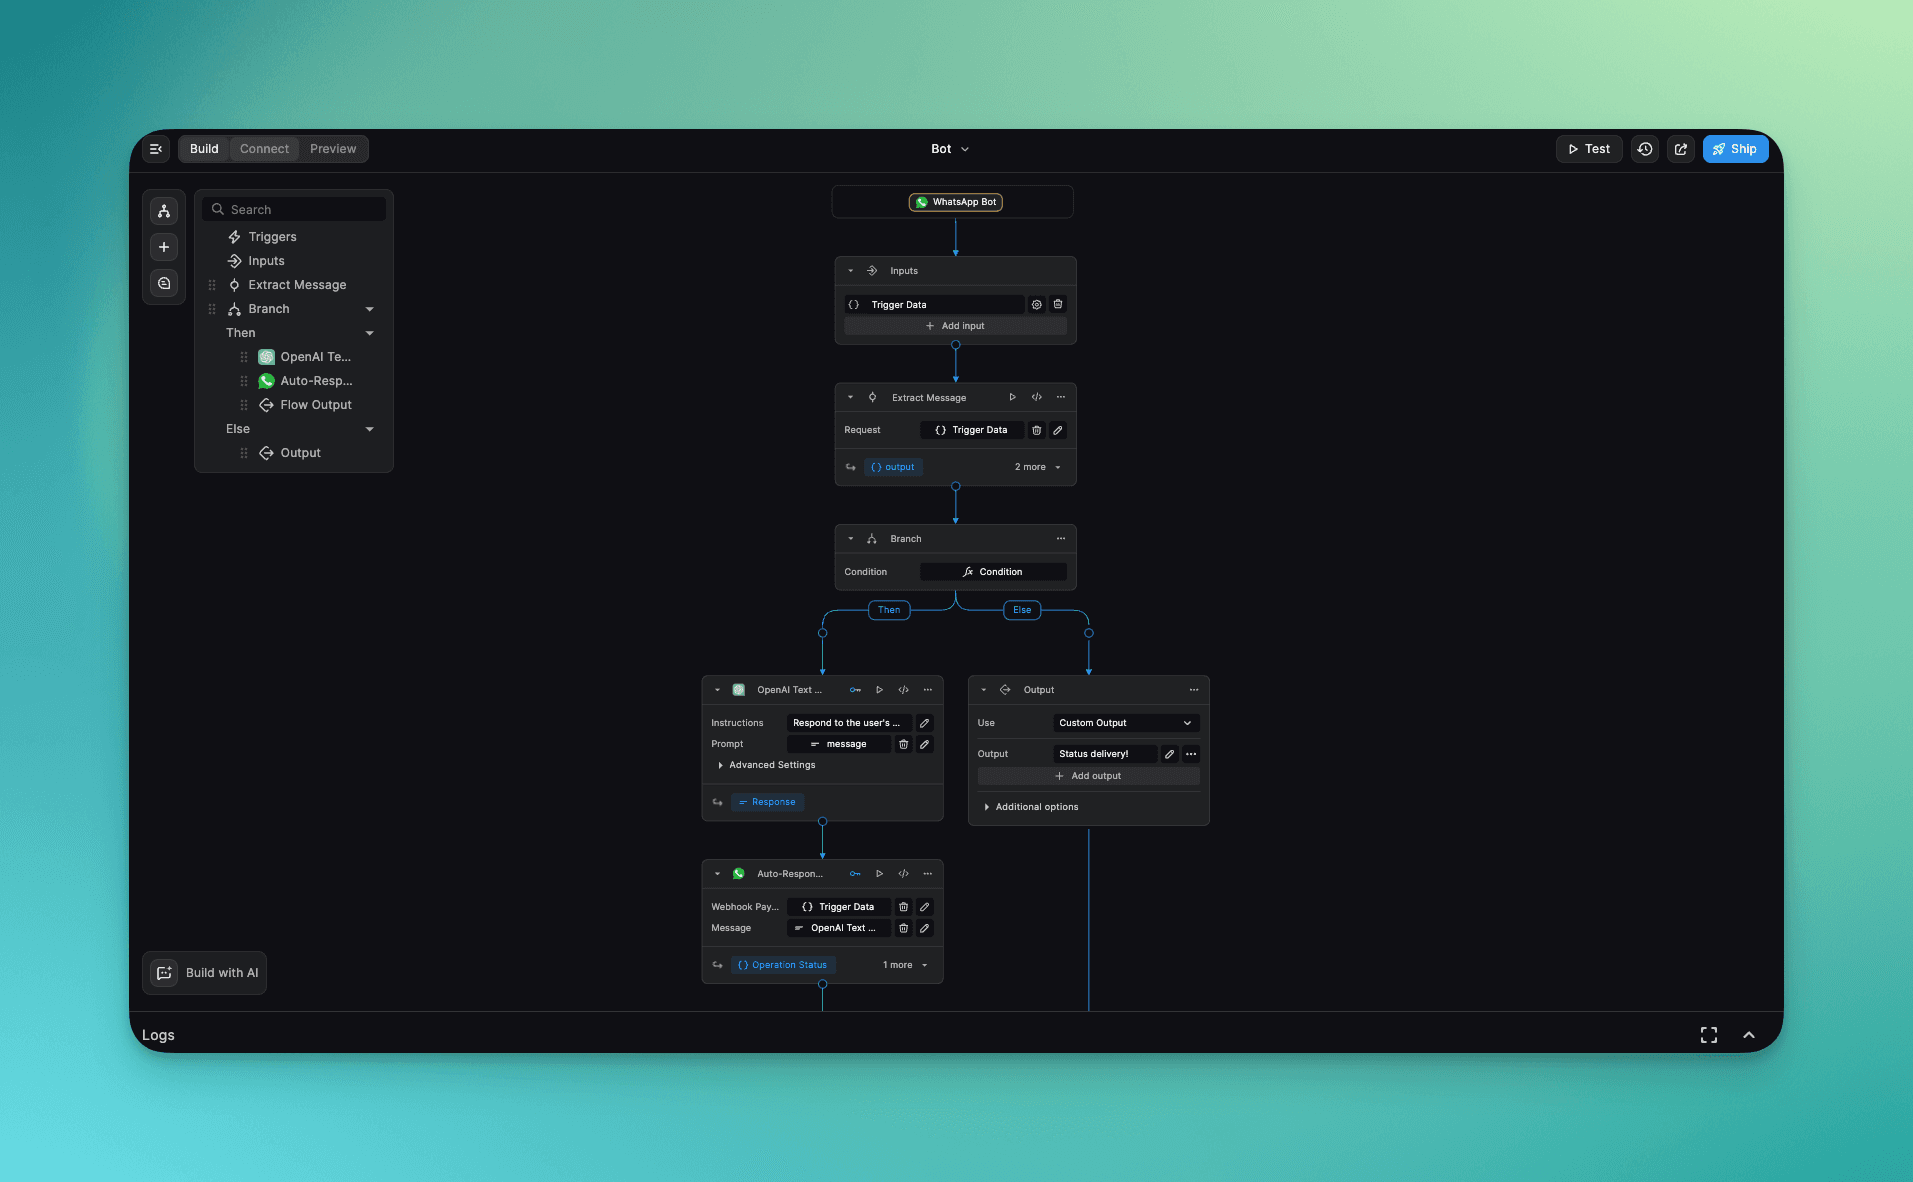
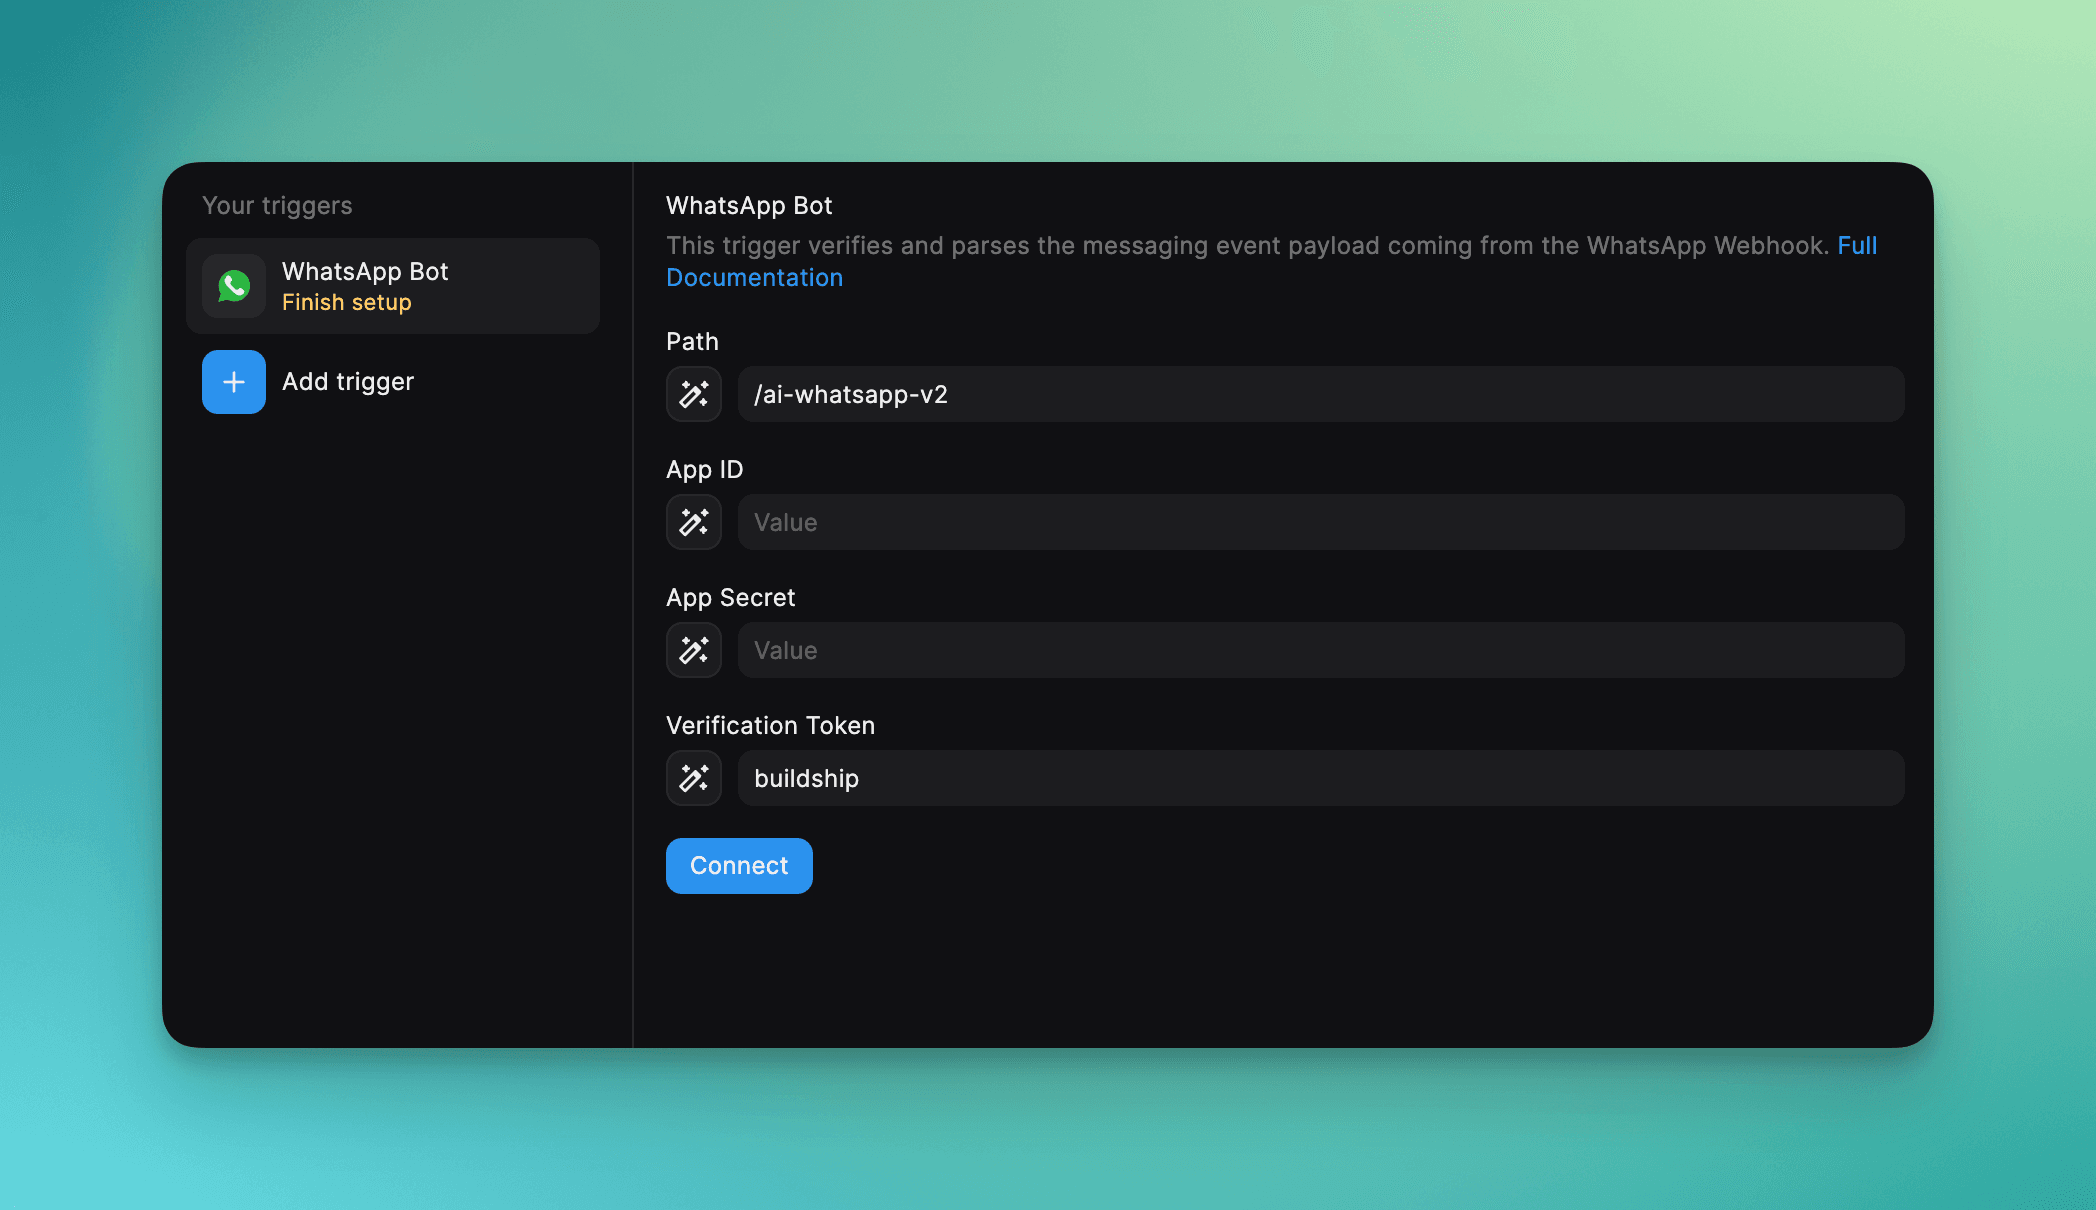
Configuring the WhatsApp Bot trigger
Trigger Inputs:
-
Path: This field specifies the endpoint path for receiving webhook requests from the WhatsApp API.
-
App ID: (mentioned in previous step) This field requires entering the App ID provided by the WhatsApp Business Manager Cloud API (opens in a new tab). It is a unique identifier for your application, displayed on top of your Meta App Dashboard.
-
App Secret: (mentioned in previous step) This field requires entering the App Secret provided by the WhatsApp Business Manager Cloud API (opens in a new tab). It is a secret key used for authentication and securing communication with the WhatsApp Cloud API.
-
Verification Token: This can be any text you want to use, just take note of it as you'll need it later.
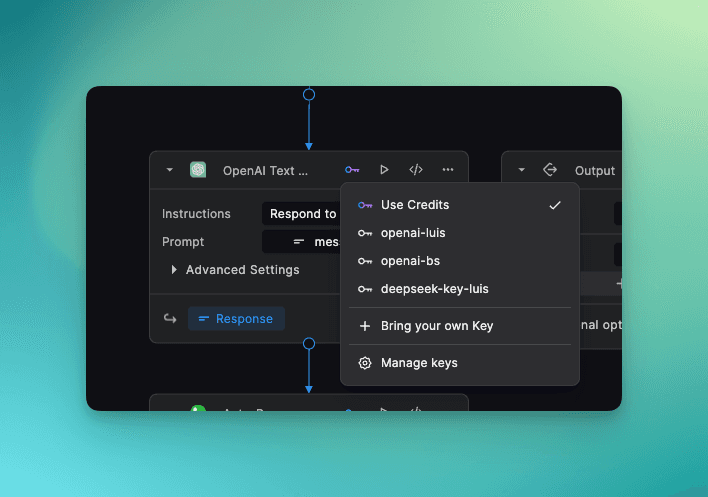
Configuring the OpenAI Text Generator node
This node is used to generate a response to the incoming message. You'll need to select your OpenAI API key or create a new one. Or just use the "Use Credits" option to use the credits from your BuildShip account.
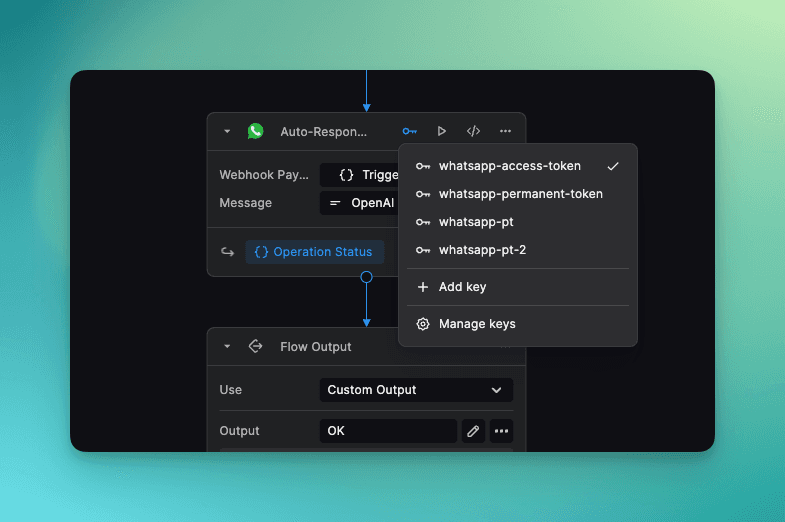
Configuring the Auto-Responder node
The Auto-Responder node is used to send the generated response to the incoming message. The only field you need to enter is the Access Token. You can use the temporary access token provided by Meta for testing purposes (mentioned in previous steps).
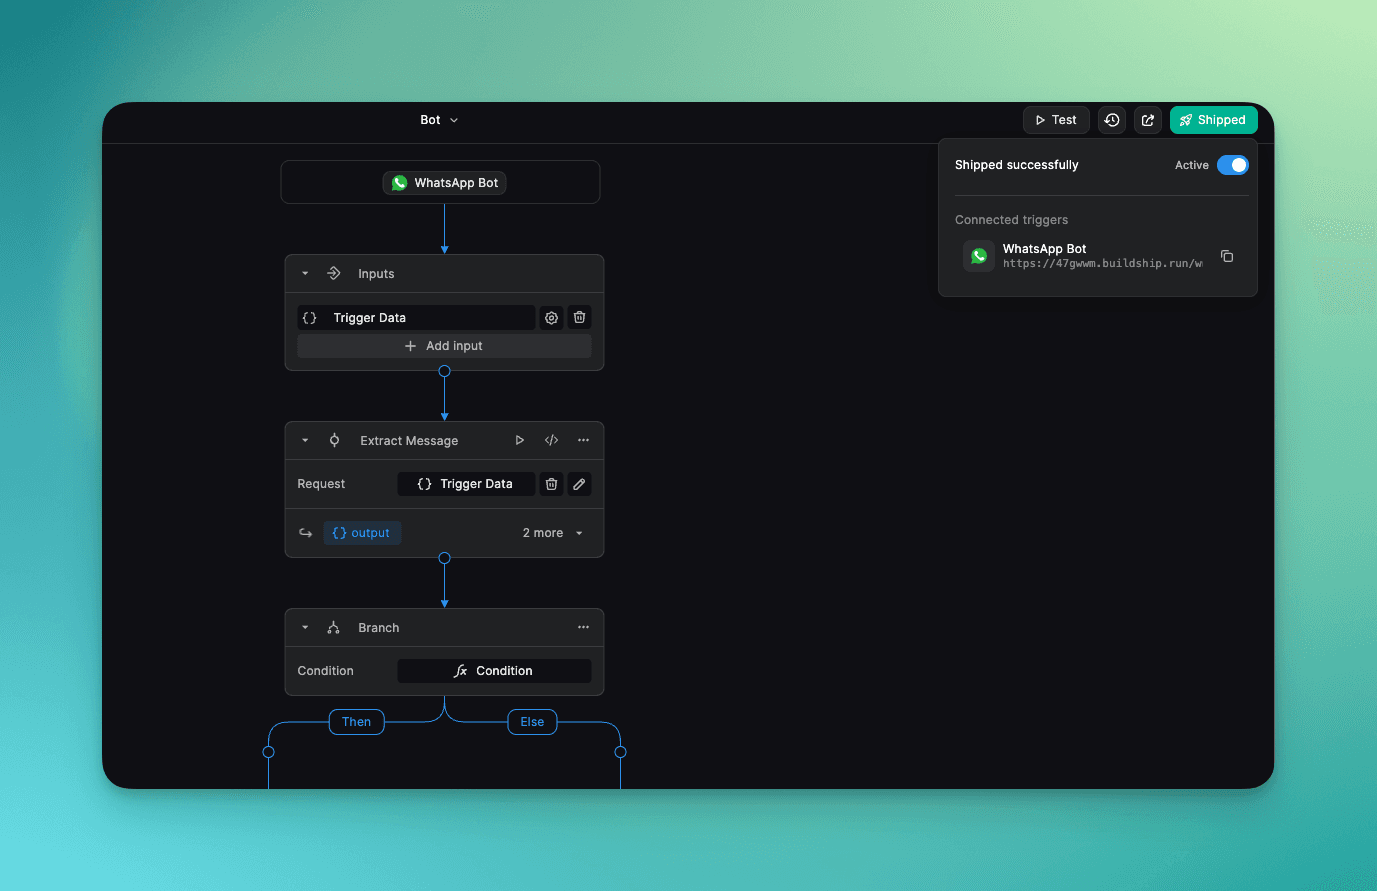
Ship 🚀 your workflow
Make sure to take note of the endpoint URL as you'll need it in the next step.
3 Webhook Verification
To get notified of incoming messages from WhatsApp, you need to set up a webhook. Here's how you can do it:
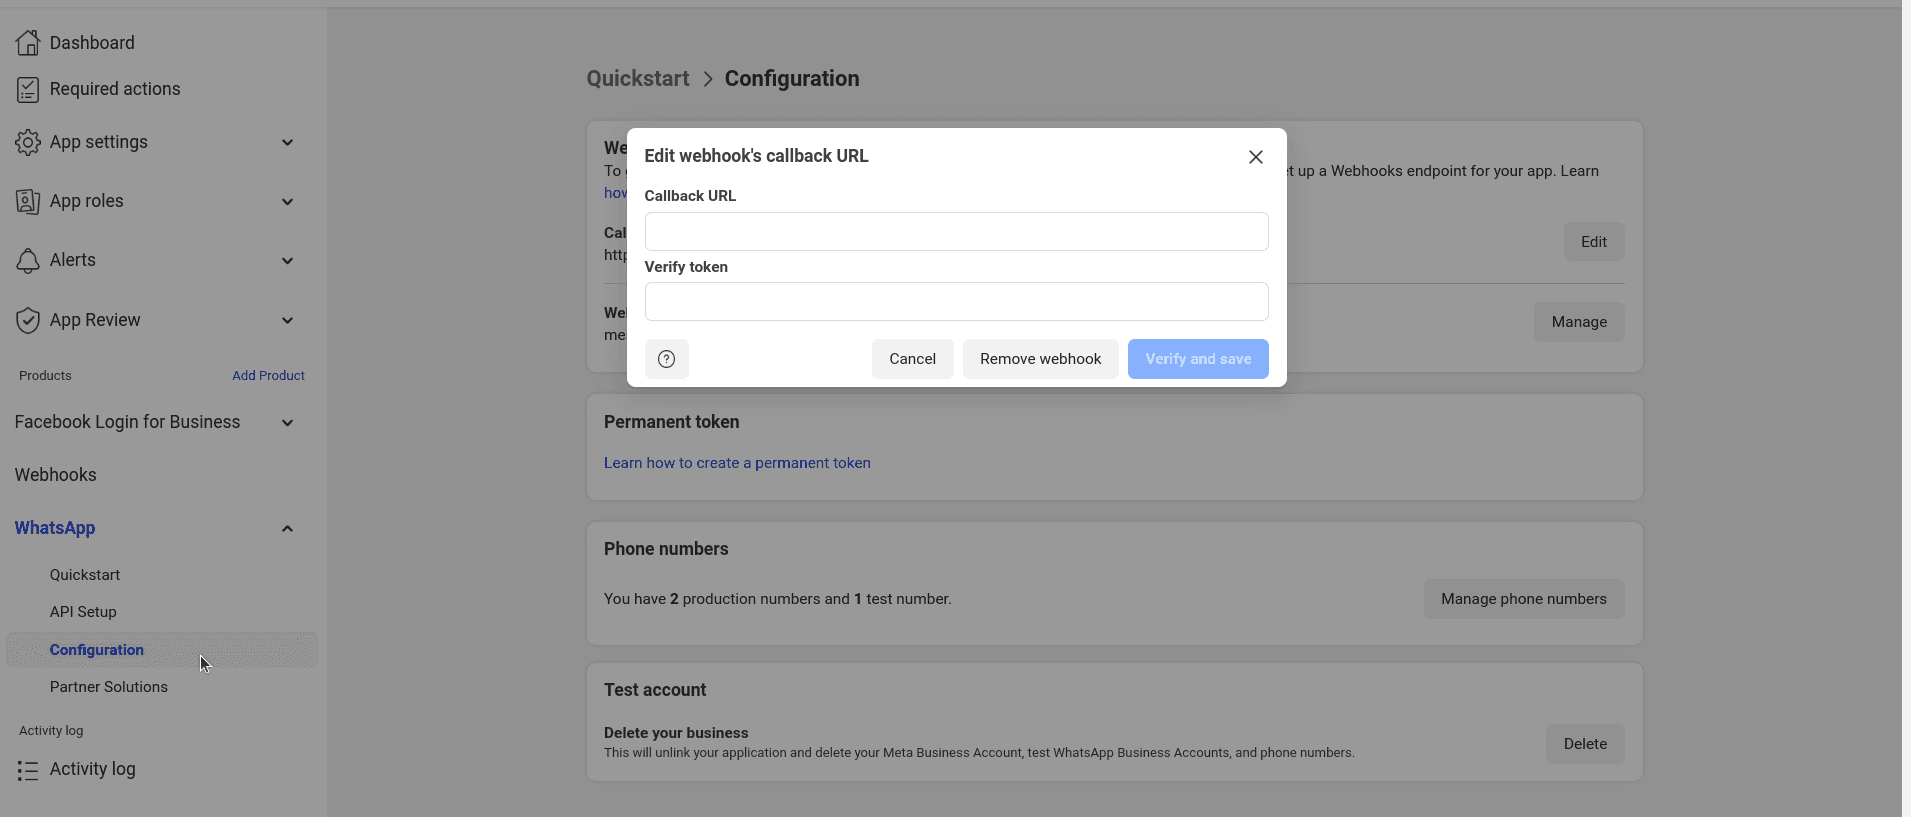
Save the webhook in Meta
To connect the WhatsApp API to BuildShip, you need to configure a webhook. In your Meta Developer Account, go to "WhatsApp" >> "Configuration" >> "Edit Webhook". Enter the endpoint URL you copied from the previous step as well as the verify token you entered earlier when you configured the WhatsApp Bot trigger. Then click "Verify" and "Save".
Subscribe to messaging notifications
To receive all messaging events from WhatsApp in BuildShip, you need to subscribe to messaging on webhooks. Click "Manage" (Webhook fields) and subscribe to messages.

Test setup with test message
First, go to "WhatsApp" >> "API Setup".
- For the From number, select the test number that Meta provides.
- For the To number, select a number from the recipient phone number list or add your own if not listed.
- Then click send message to test if you're receiving a message from WhatsApp. If it works, you'll receive a Hello World message from WhatsApp.

4. Testing the bot
First, make sure you have shipped 🚀 your workflow.
If everything is set up correctly, you can now test the bot by sending a message to the test WhatsApp phone number which you can obtain in the Meta dashboard from WhatsApp >> API setup.
Then you should receive an automatic response generated by OpenAI ✅.
If you don't receive a response, check the workflow for any errors, and make sure you followed all the steps correctly.
5. Setting up a Permanent Token
To set up a permanent token, you need a Meta Business Account. Full documentation link (opens in a new tab).
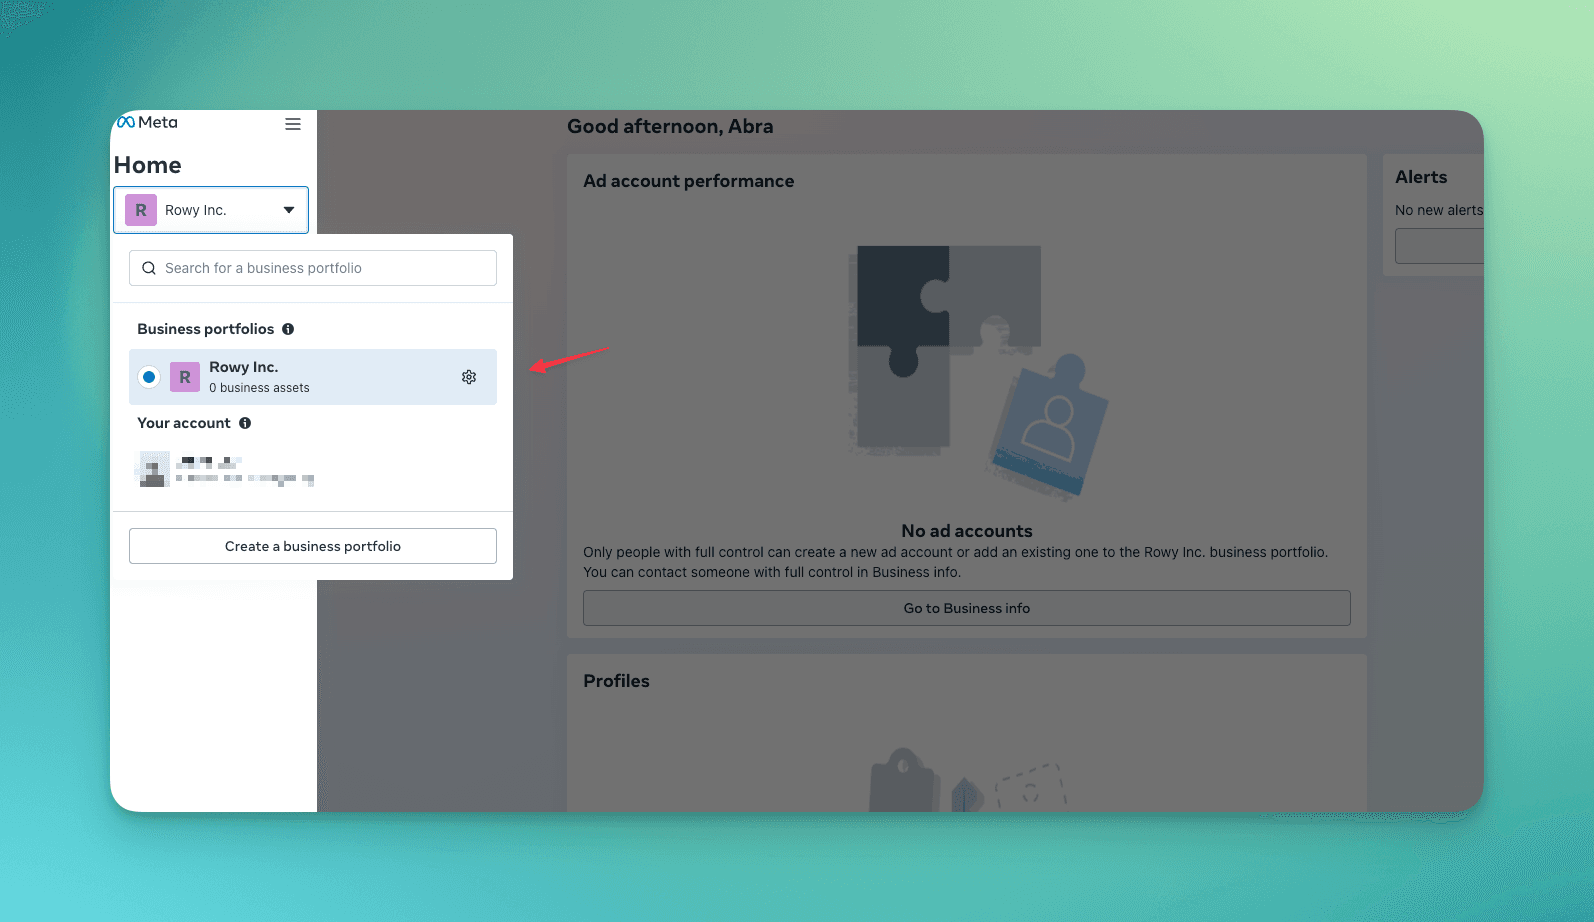
Go to Business Settings
Access your Business Settings (opens in a new tab). Then select the business account your app is associated with.
Create a system user
Go to "Settings" >> "System users". Click Add. Name the system user, choose Admin as the user role, and click Create System User.

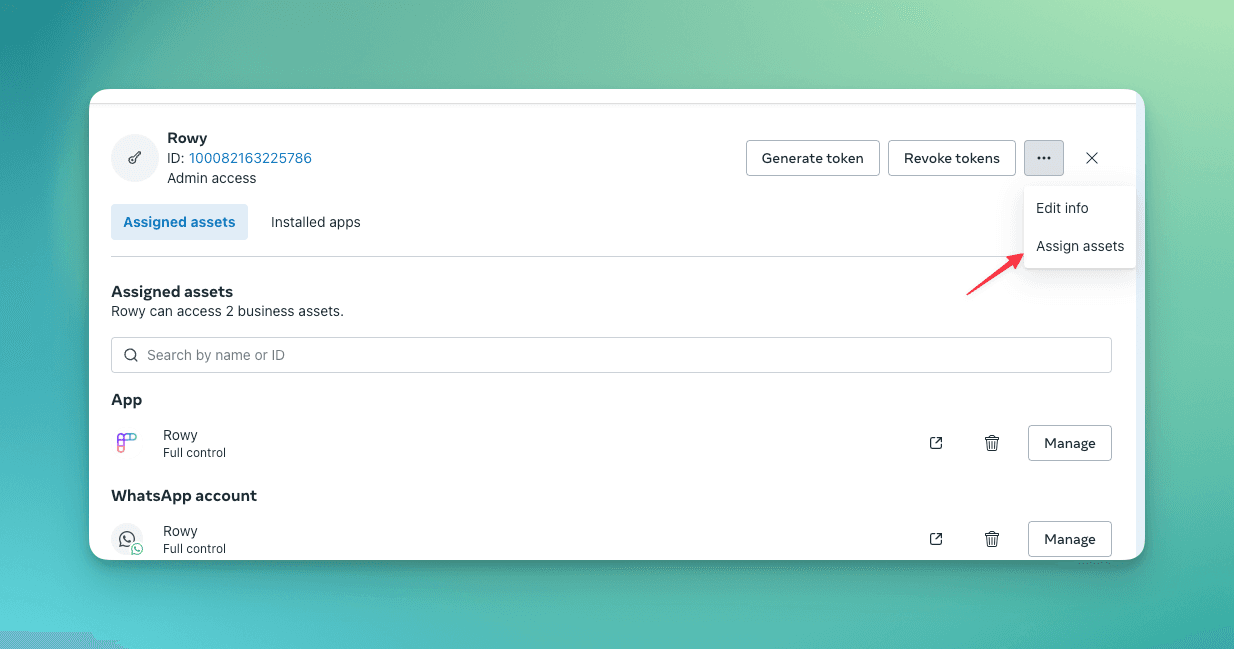
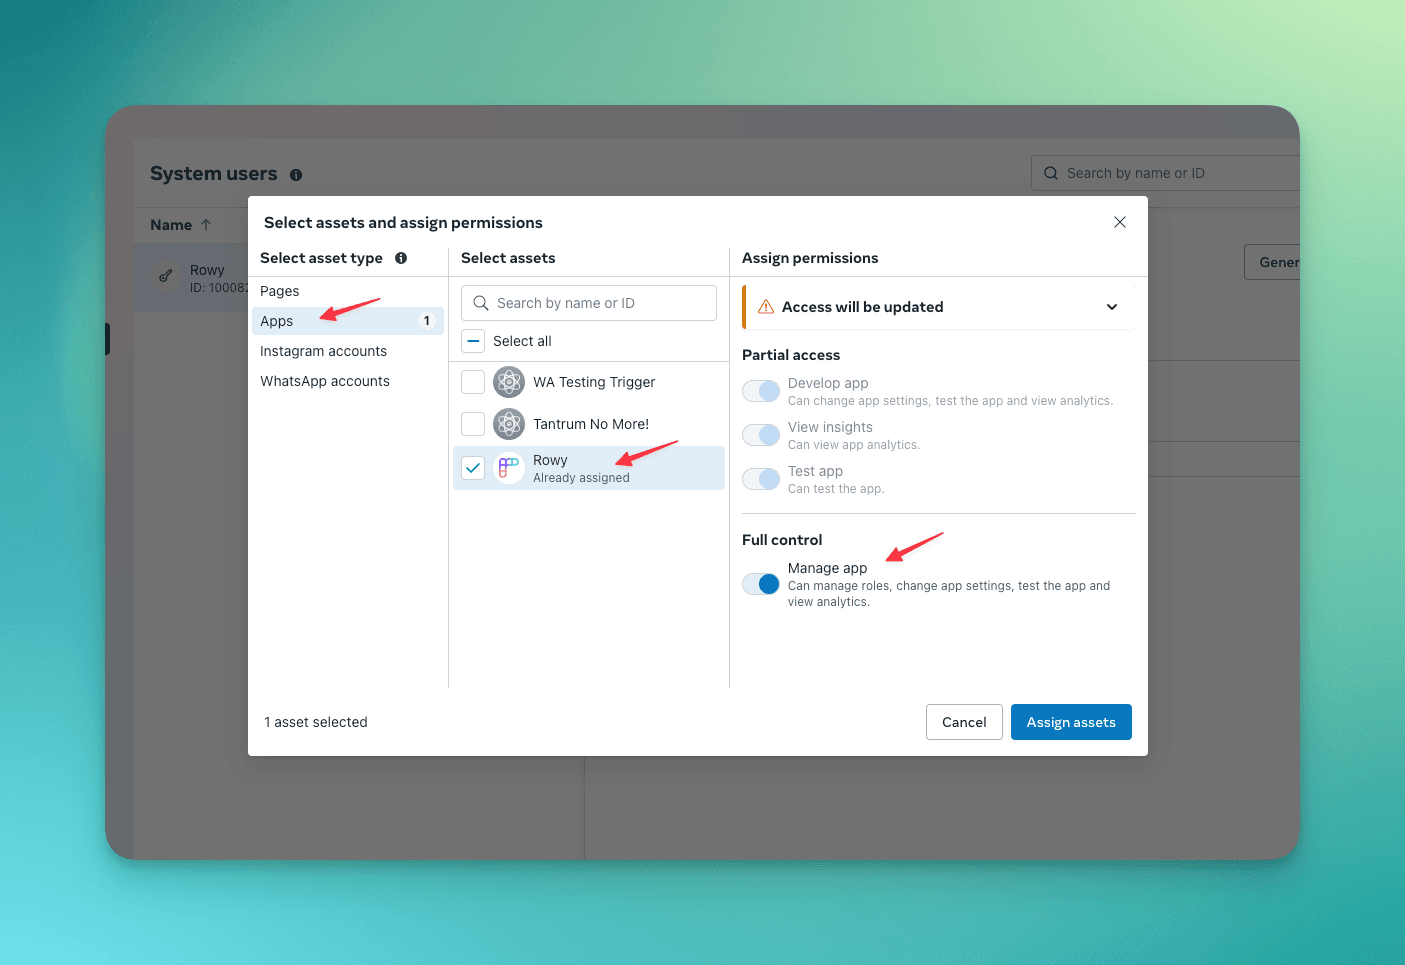
Associate the system user with your app
Go to "Assign Assets" >> "Apps". Select your app and give the system user partial or full access. Click "Assign assets".
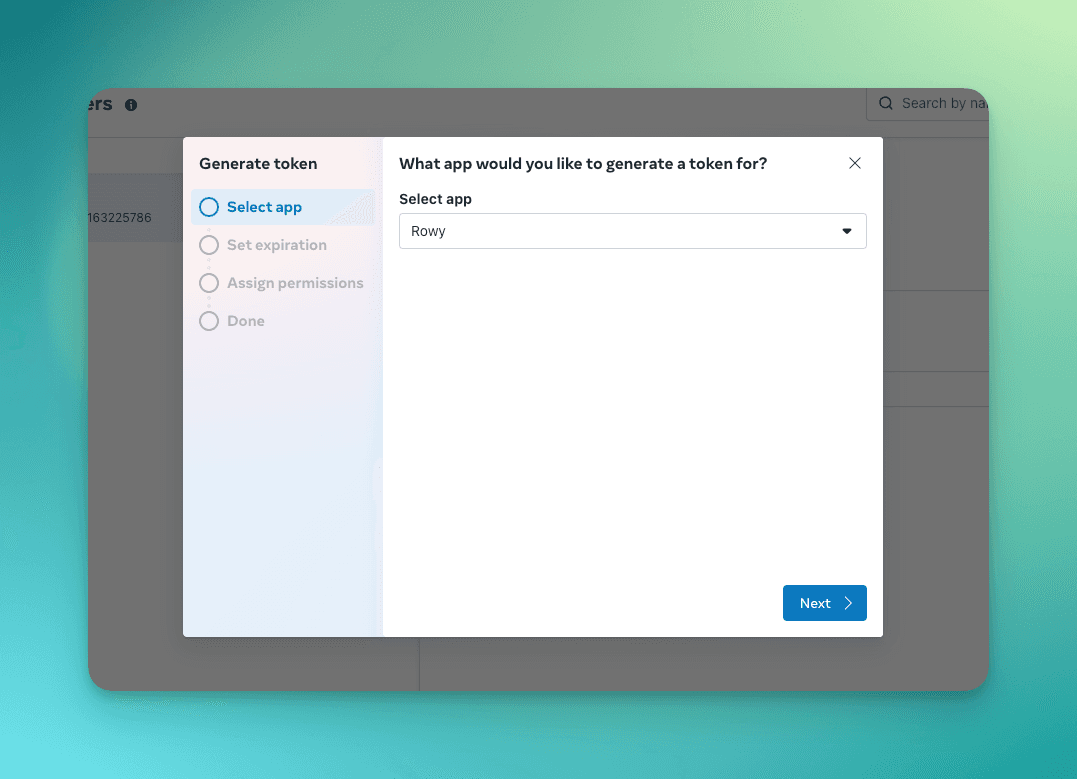
Generate a new token
Click "Generate new token" >> Select your app from the dropdown menu.
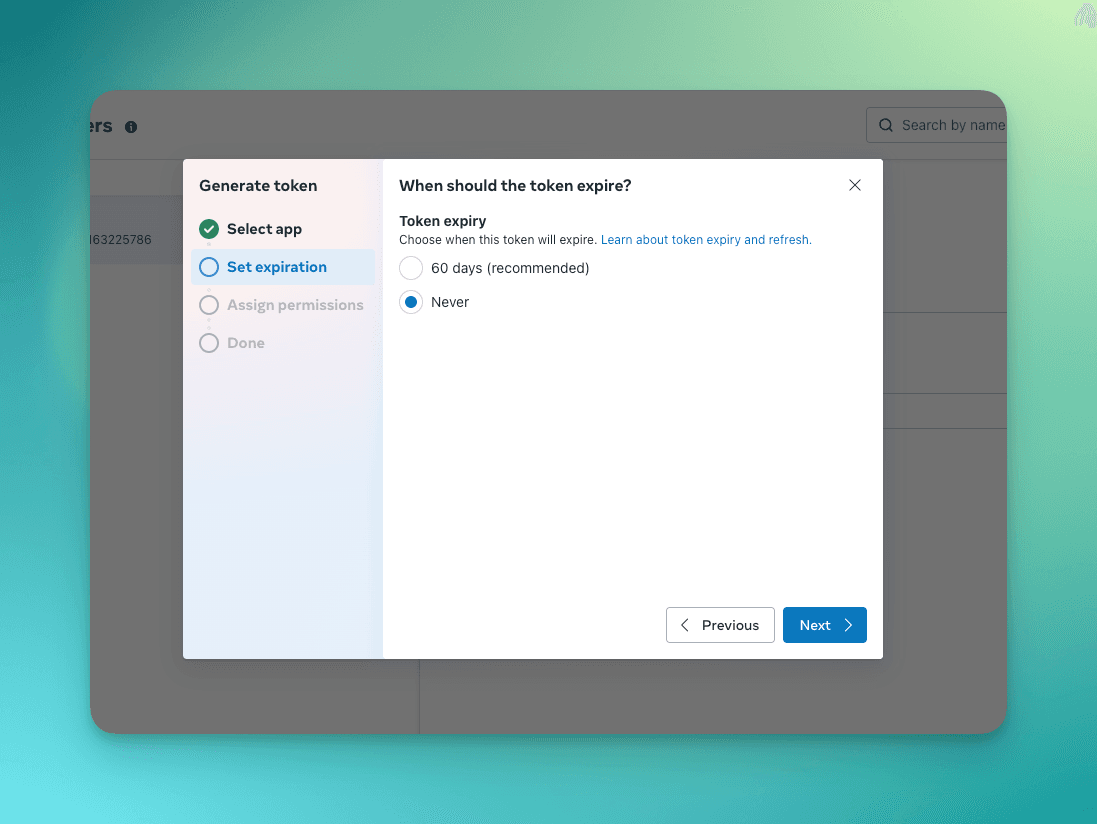
4.1. Set the token experiation date to Never expire.
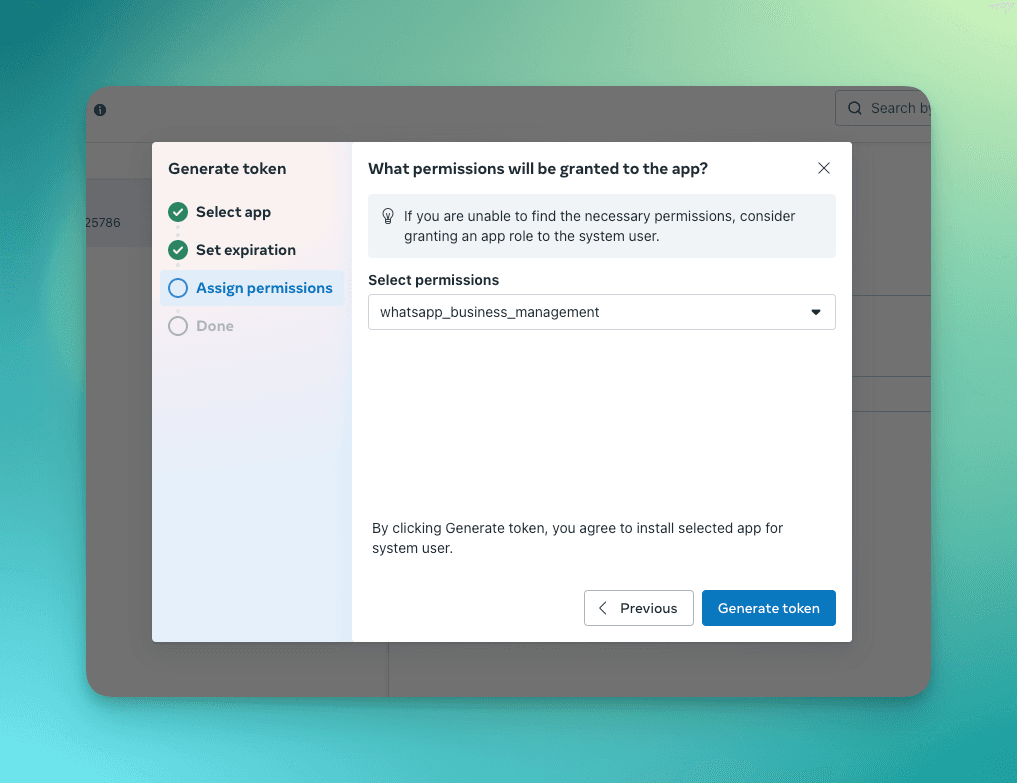
4.2. Make sure "whatsapp_business_messaging" and "whatsapp_business_management" are turned on. Click "Generate token".
Save your permanent token
Take note of the generated Access Token because you won't be able to see it again. This is a permanent token that can be used for your WhatsApp Bot.
Need Help?
- 💬Join BuildShip Community
An active and large community of no-code / low-code builders. Ask questions, share feedback, showcase your project and connect with other BuildShip enthusiasts.
- 🙋Hire a BuildShip Expert
Need personalized help to build your product fast? Browse and hire from a range of independent freelancers, agencies and builders - all well versed with BuildShip.
- 🛟Send a Support Request
Got a specific question on your workflows / project or want to report a bug? Send a us a request using the "Support" button directly from your BuildShip Dashboard.
- ⭐️Feature Request
Something missing in BuildShip for you? Share on the #FeatureRequest channel on Discord. Also browse and cast your votes on other feature requests.