Secure Your API Endpoint
As you build, ship, and deploy workflows on BuildShip, it's crucial to ensure the security of your API endpoint when making it accessible on the internet.

Using Authorization Header
The Authorization header provides the server with information to authenticate and authorize the client making a request. It typically contains a token or credentials that the server uses to validate the client’s identity and grant or deny access to the requested resource.
You have two options for accessing the Authorization header in your workflows:
Option 1: Listening for Authorization Header from a request
You can send a request to your workflow endpoint to define the input schema. Then you can easily select the Authorization header from the request headers. Follow these steps:
- Send a request to your workflow endpoint with the Authorization header.

- In BuildShip, select the Get Data button to load the request data. Once the data is loaded then you can find the
Authorization header by expanding the list of available headers.

- Click on the Add input to schema button to add the Authorization header as an input to your workflow. And that's
it.

Option 2: Manually accessing Authorization Header
You can manually create an input for you workflow to access the Authorization header. Follow these steps:
-
Click on the Connect Button at the top to setup the REST API Trigger.
-
Under the Workflow inputs schema section, add a new input. Call it
Authorizationand set the type to String, then save.
-
You can use dot notation to access any header value from the request headers. To begin, update the input to select the authorization header from the request headers instead of from the request body: Select Body > Trigger Data > headers > headers

Adding Condition to Validate Header
To enhance security, use a Branch Node to add a condition that validates and verifies the authorization header in the API request:
- For the first value of the condition select the Authorization input you created earlier. For the comparison, select the equals to operator (==). Lastly, set the final value to the key you want to validate.
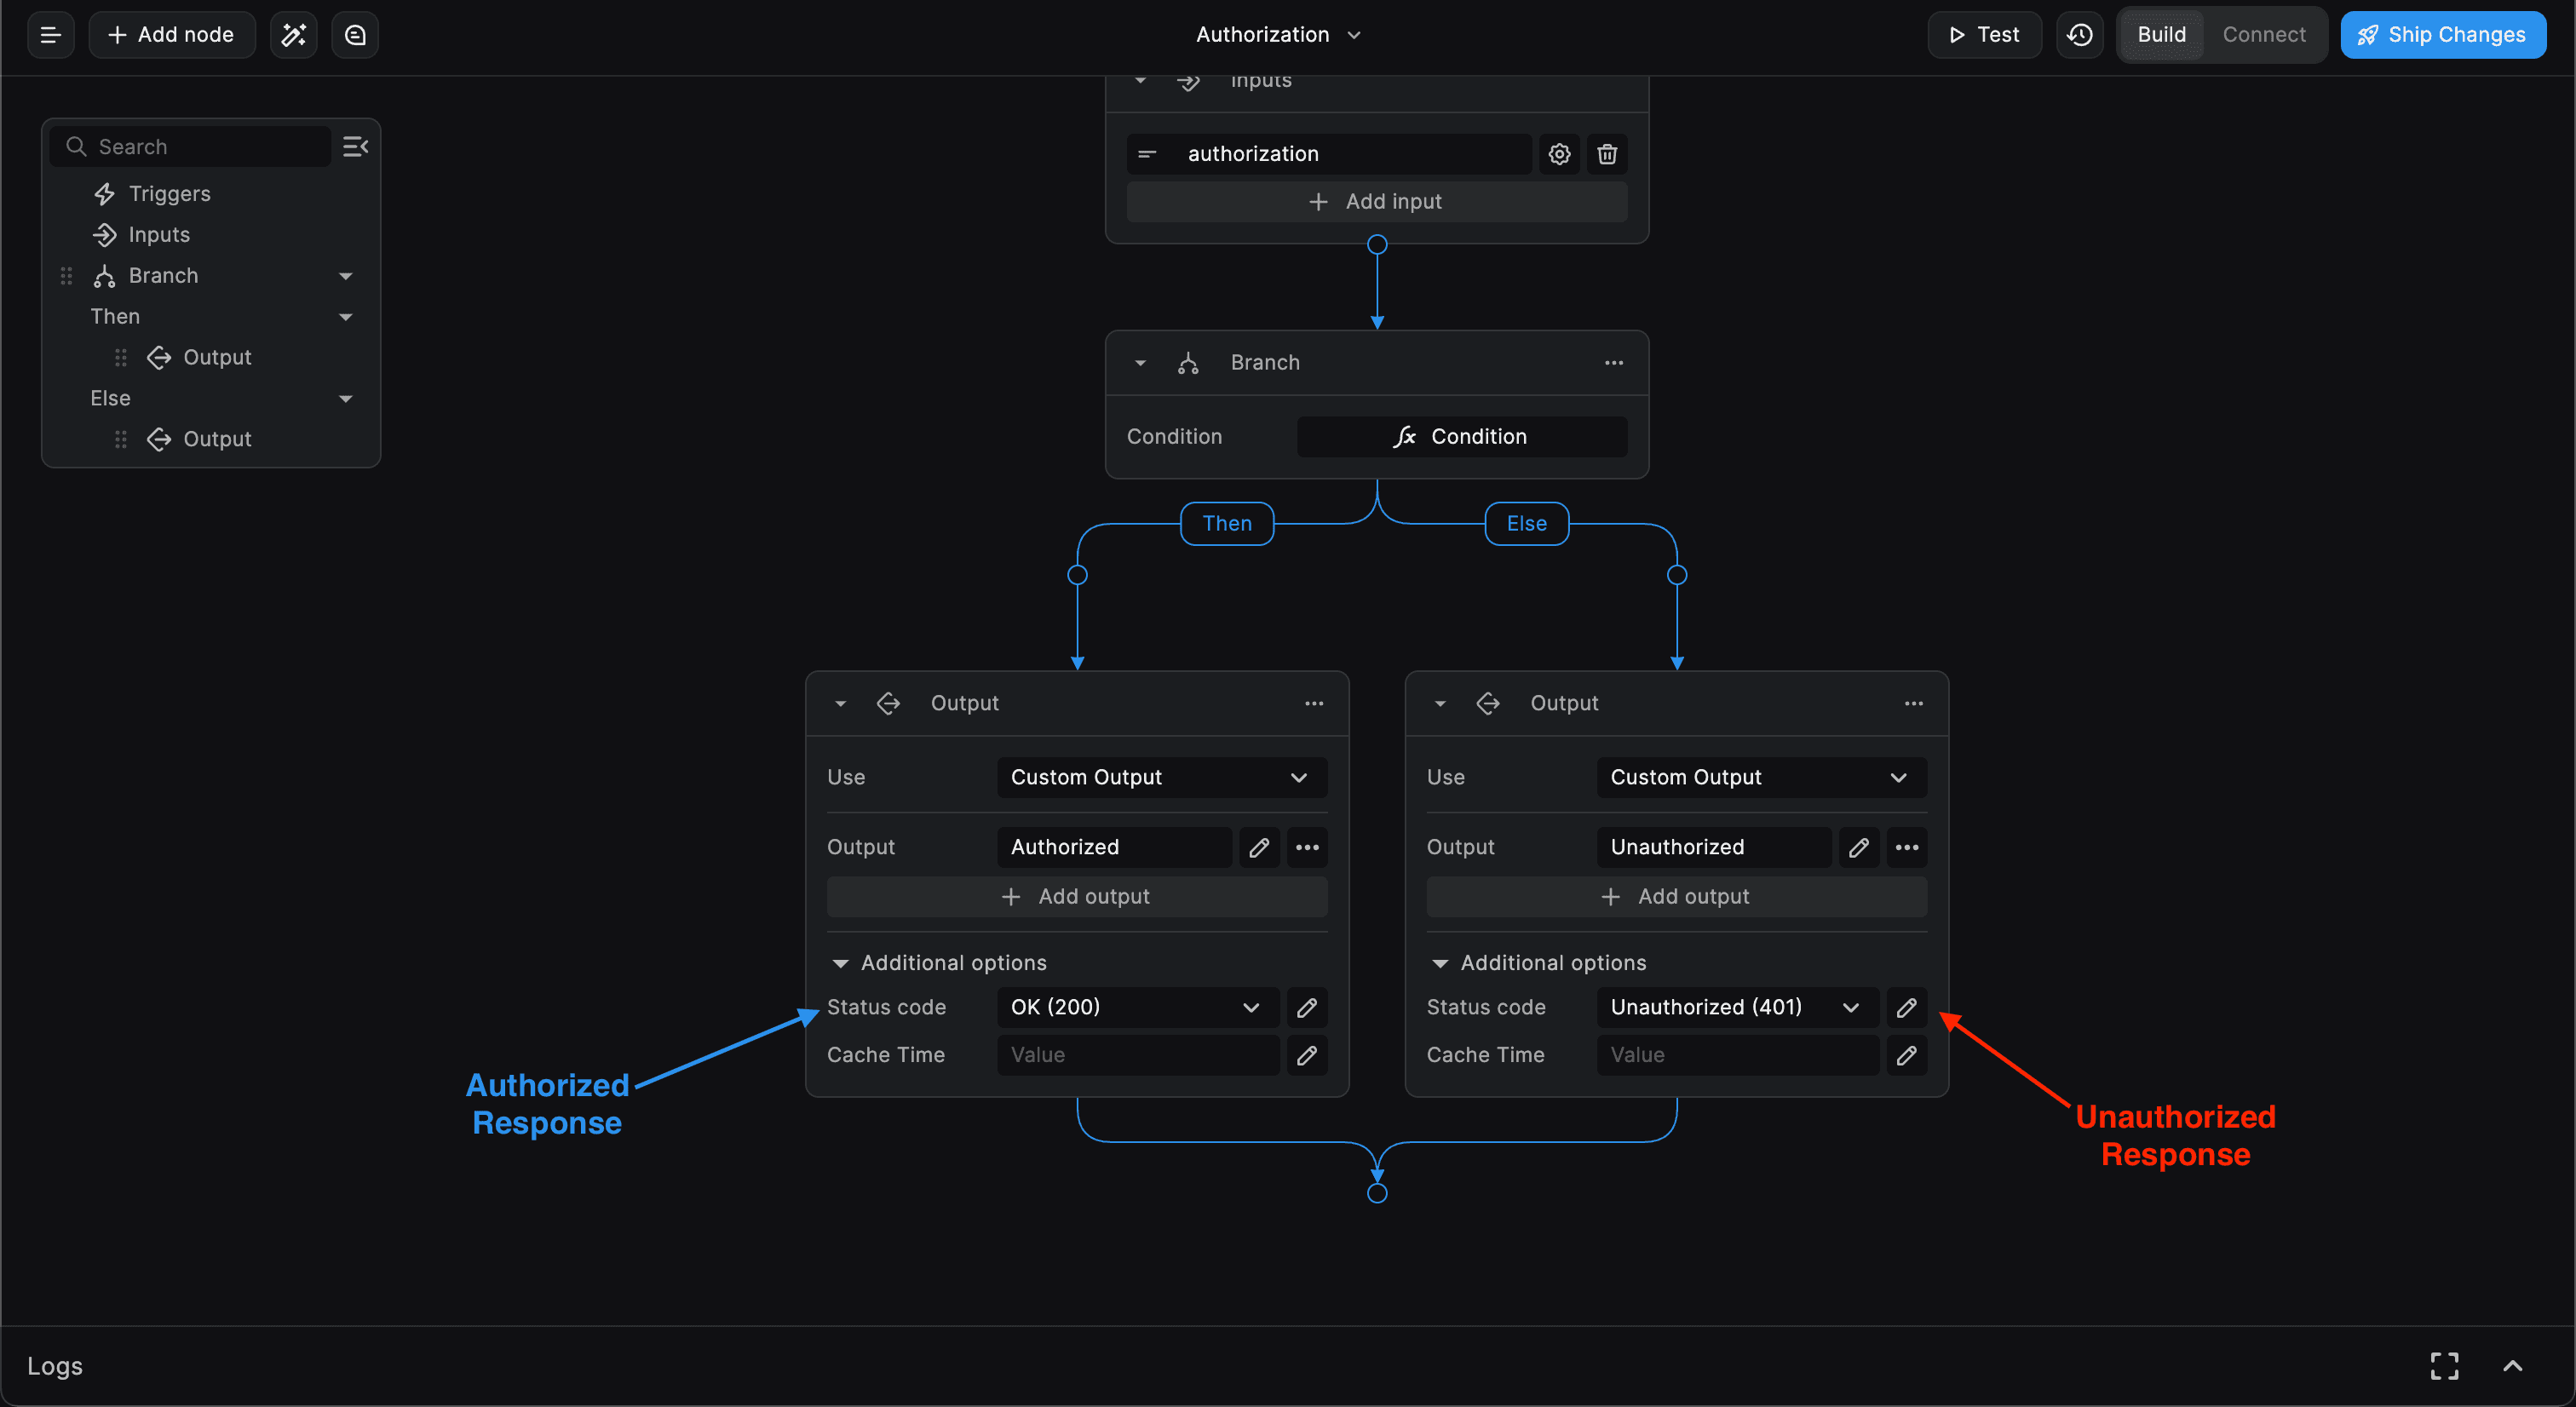
- Organize your workflow nodes into the "then" and "else" conditions accordingly.

Return Authorized and Unauthorized Responses
Given an authorized request, it's typical to return an HTTP 200 (OK) response back to the client. Likewise, for an
unauthorized request, return an HTTP 401 (Unauthorized) response. You can achieve this by setting the Status Code
which can be found under the Additional options of the Output node.

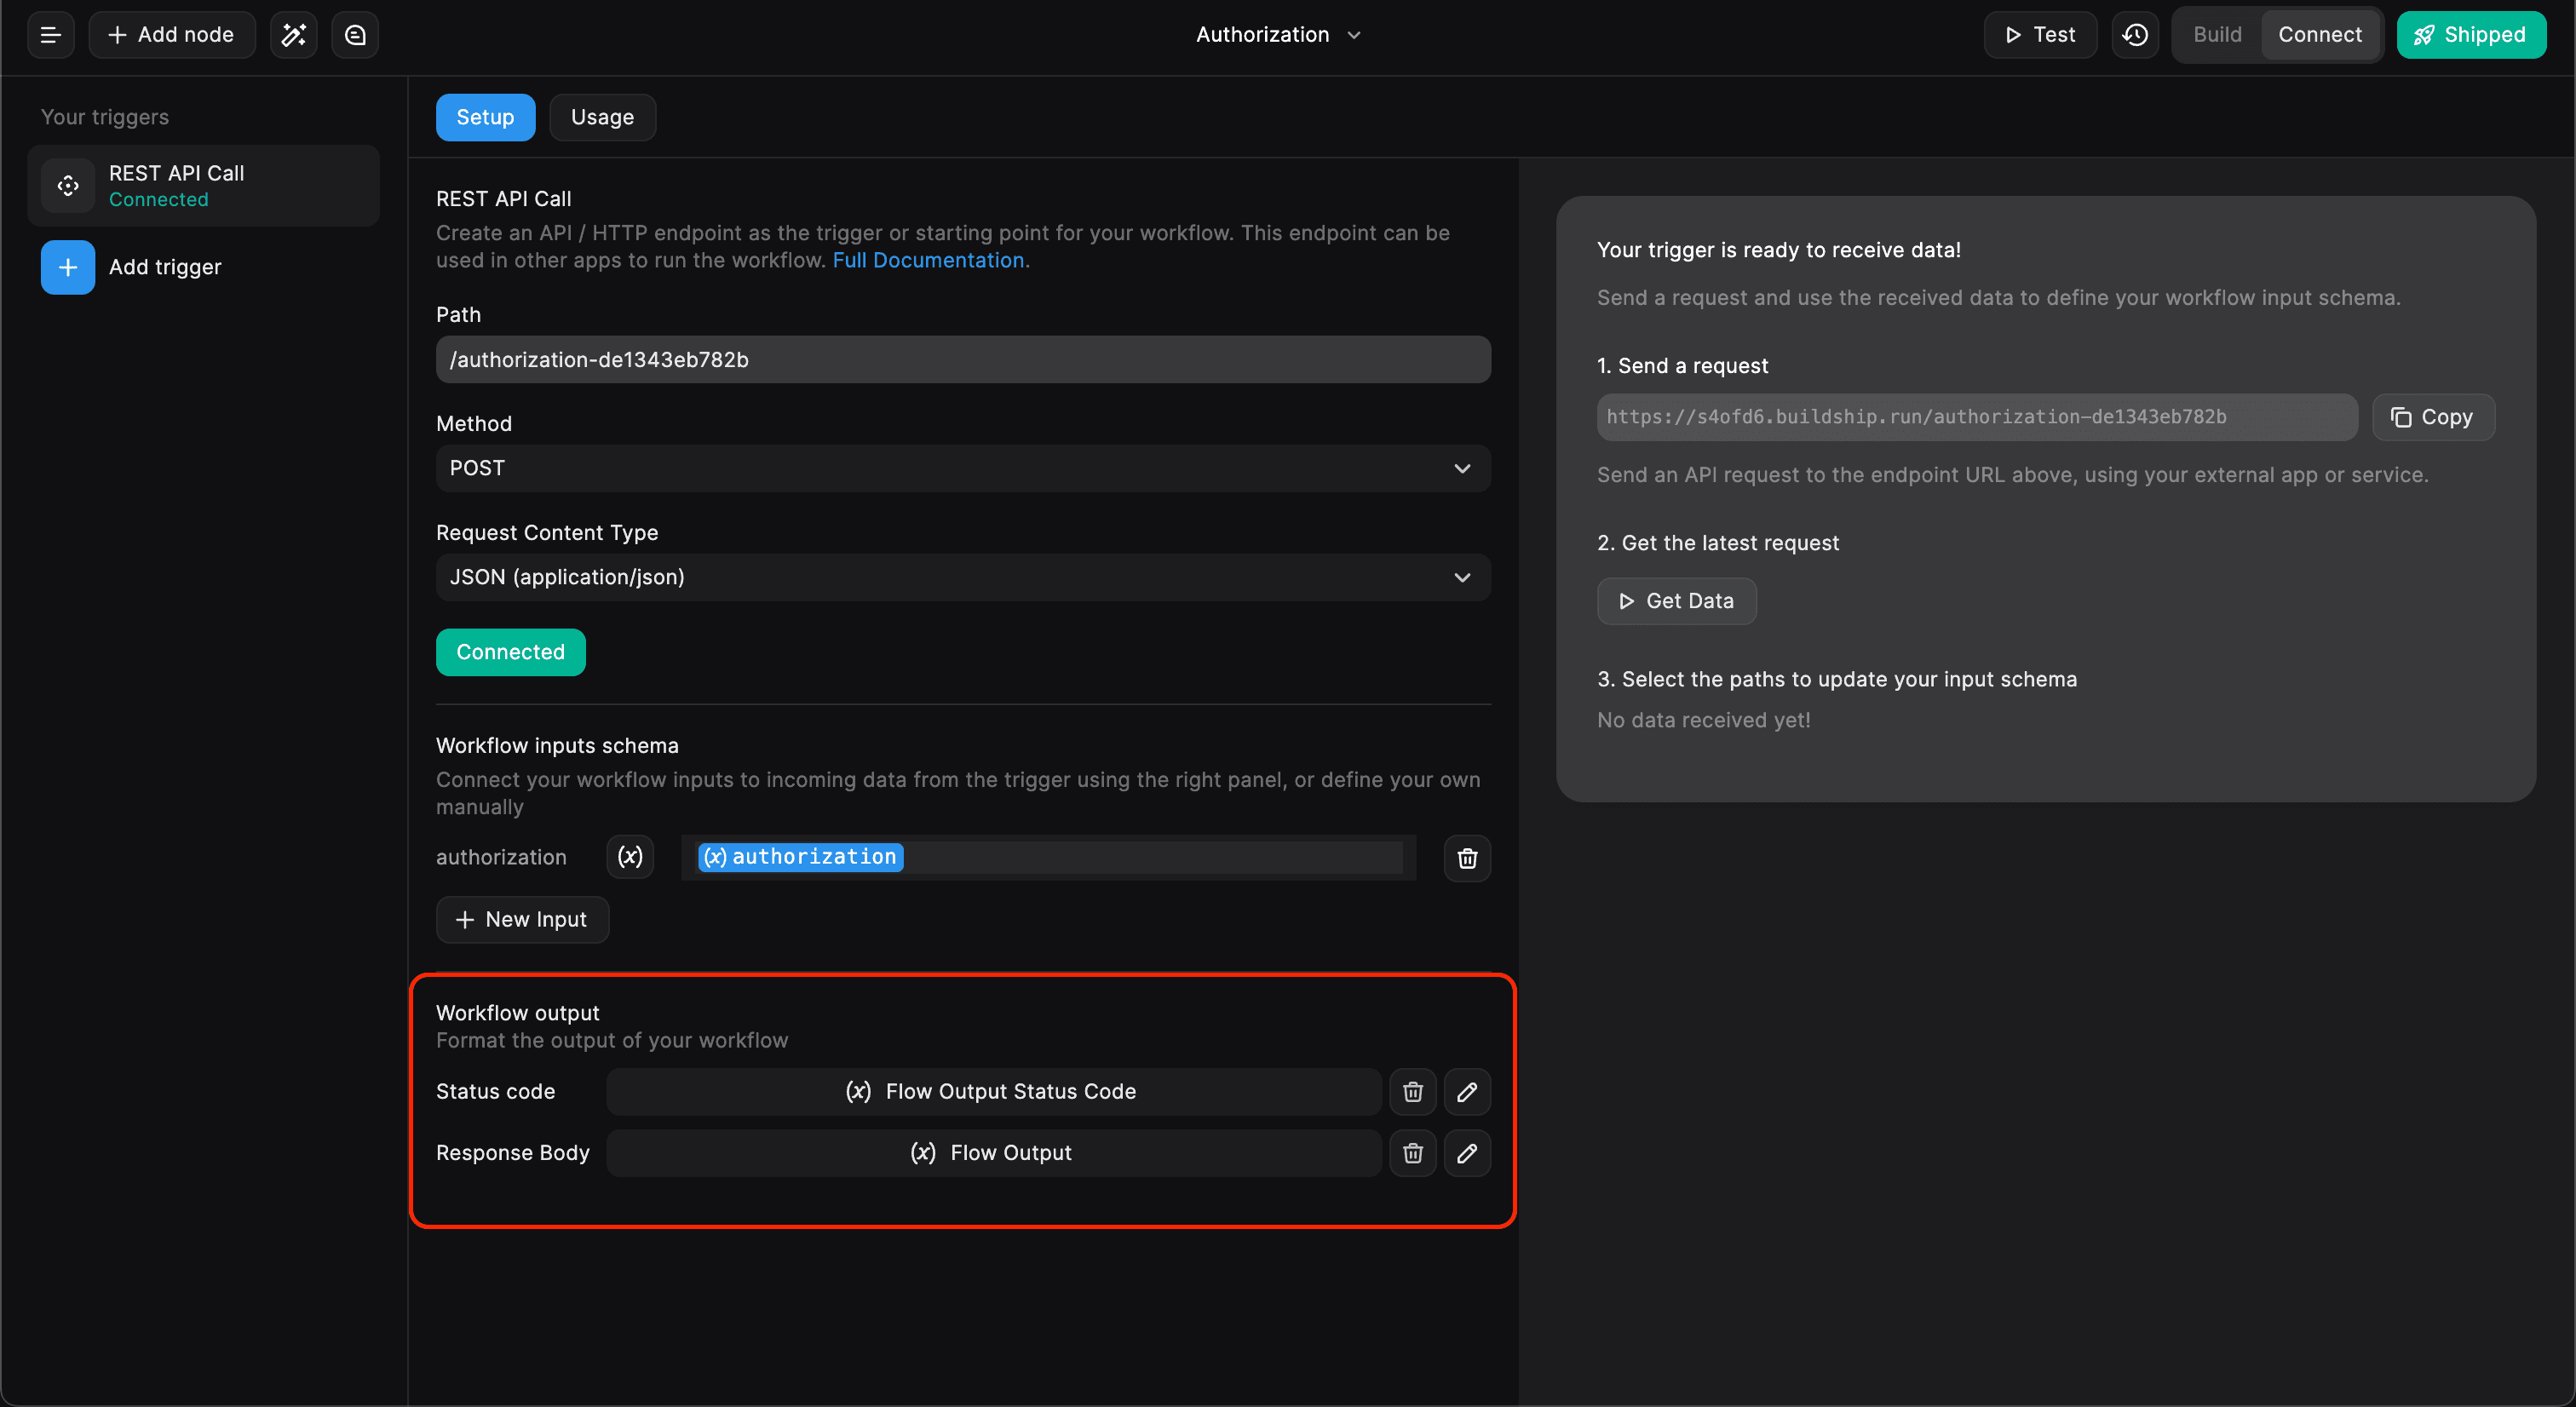
Lastly, you can update the workflow output properties in the trigger settings to return the Flow Output for the
response body and the Flow Output Status Code for the response status code.

- For setting the Response Body, select Flow Output > Flow Output
- For setting the Response Status Code, select Local Variables > Flow Output Status Code
Congratulations! Your API Endpoint is Now Secured
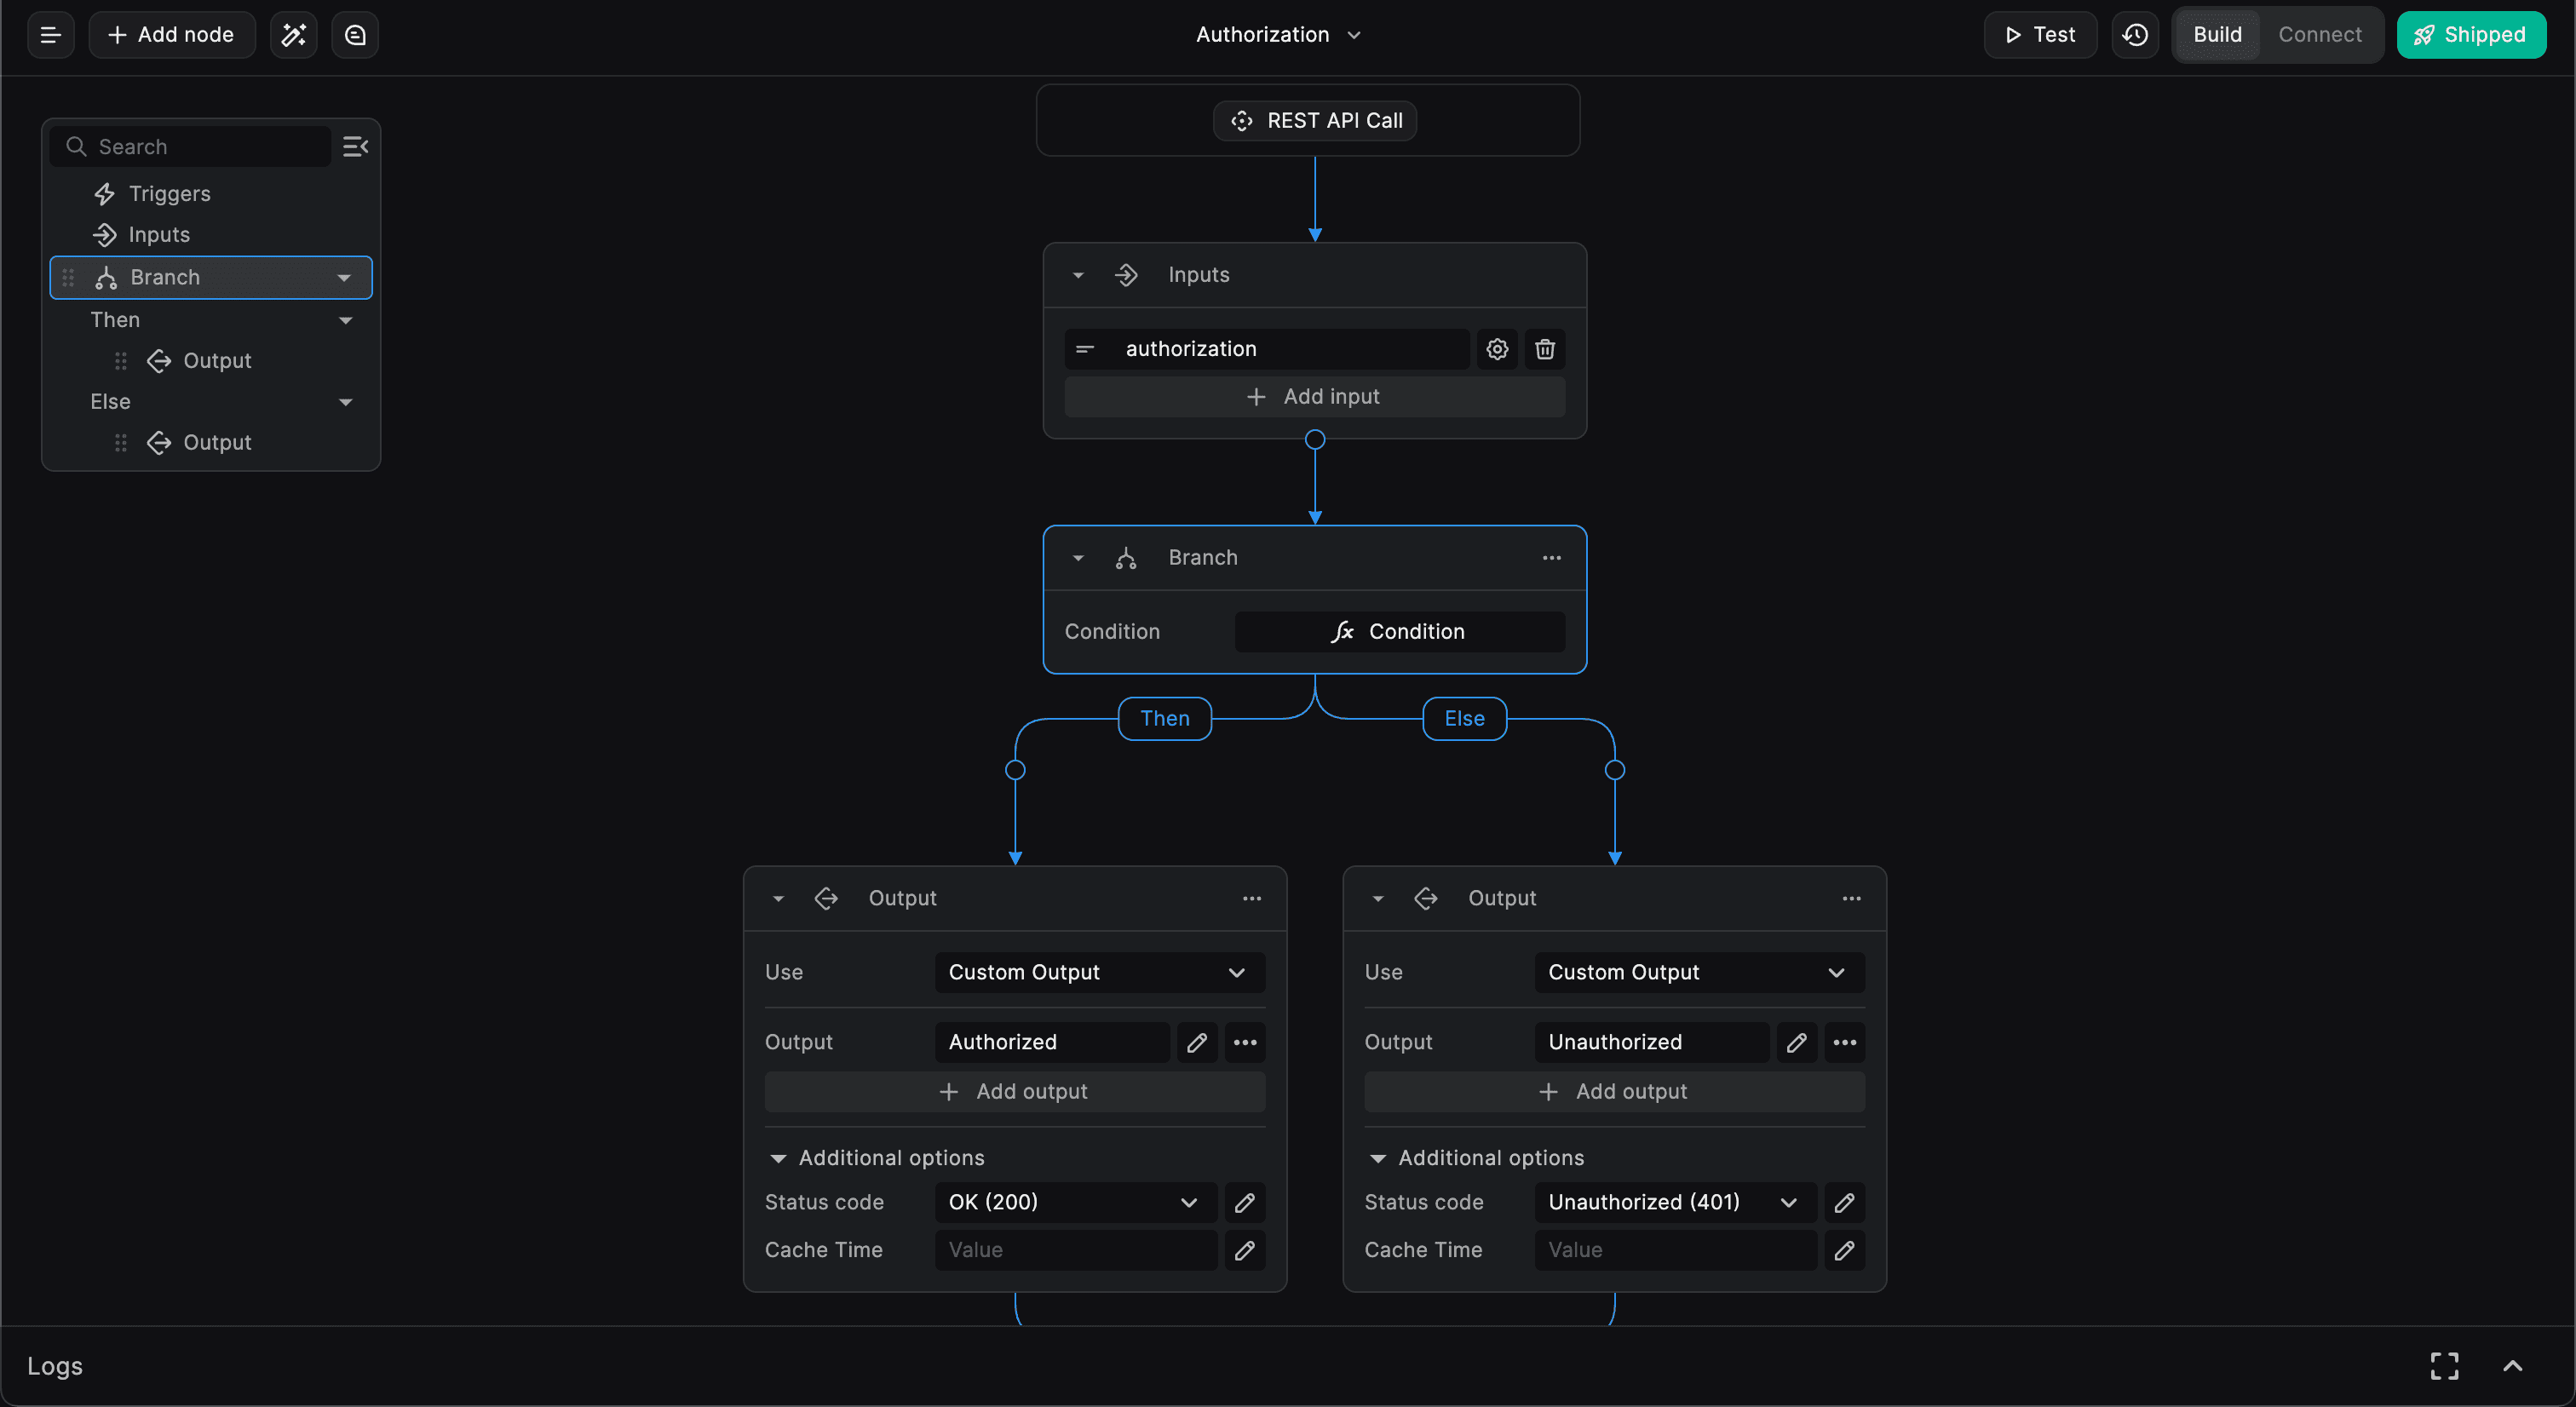
With the implemented security measures, you can confidently test and ship your workflow, ensuring the endpoint's safe usage within your application. Your workflow structure should resemble the following after following the above steps:

Additional Resources for Database Integration
For Supabase Database
If you're using Supabase as your database, refer to this video tutorial that demonstrates building a complete secure Supabase application from scratch.
For Firebase Database
If you're using Firebase as your database, check out our dedicated Firebase Authenticated User Trigger documentation for seamless integration here.
Need Help?
- 💬Join BuildShip Community
An active and large community of no-code / low-code builders. Ask questions, share feedback, showcase your project and connect with other BuildShip enthusiasts.
- 🙋Hire a BuildShip Expert
Need personalized help to build your product fast? Browse and hire from a range of independent freelancers, agencies and builders - all well versed with BuildShip.
- 🛟Send a Support Request
Got a specific question on your workflows / project or want to report a bug? Send a us a request using the "Support" button directly from your BuildShip Dashboard.
- ⭐️Feature Request
Something missing in BuildShip for you? Share on the #FeatureRequest channel on Discord. Also browse and cast your votes on other feature requests.