Creating BuildShip Triggers
Triggers are mechanisms to initiate a BuildShip Workflow. There are three main types of BuildShip Triggers:
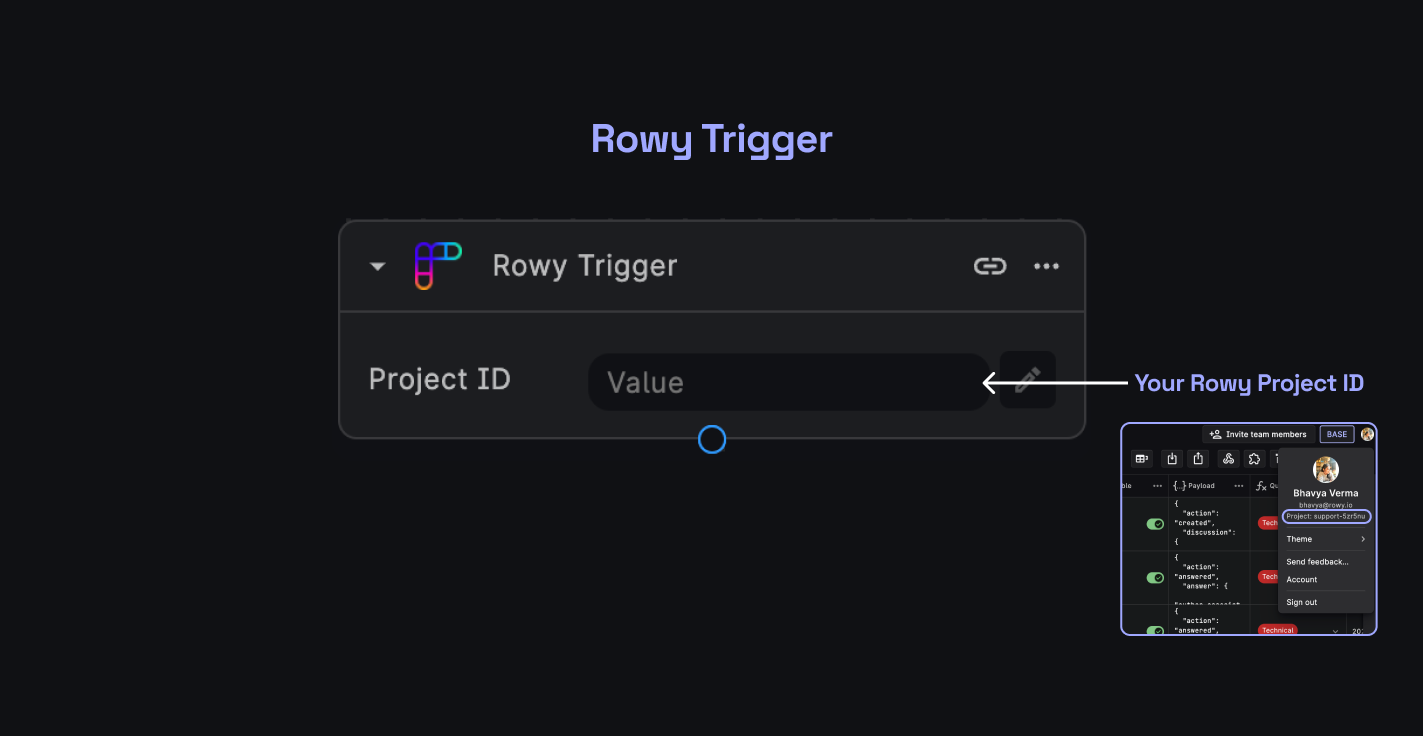
1. API-based Triggers
These are triggered via any API Call. For example, the Rowy Trigger: The BuildShip workflow gets triggered when the BuildShip Workflow endpoint is called via the Rowy Extension.
2. Webhook-based Triggers
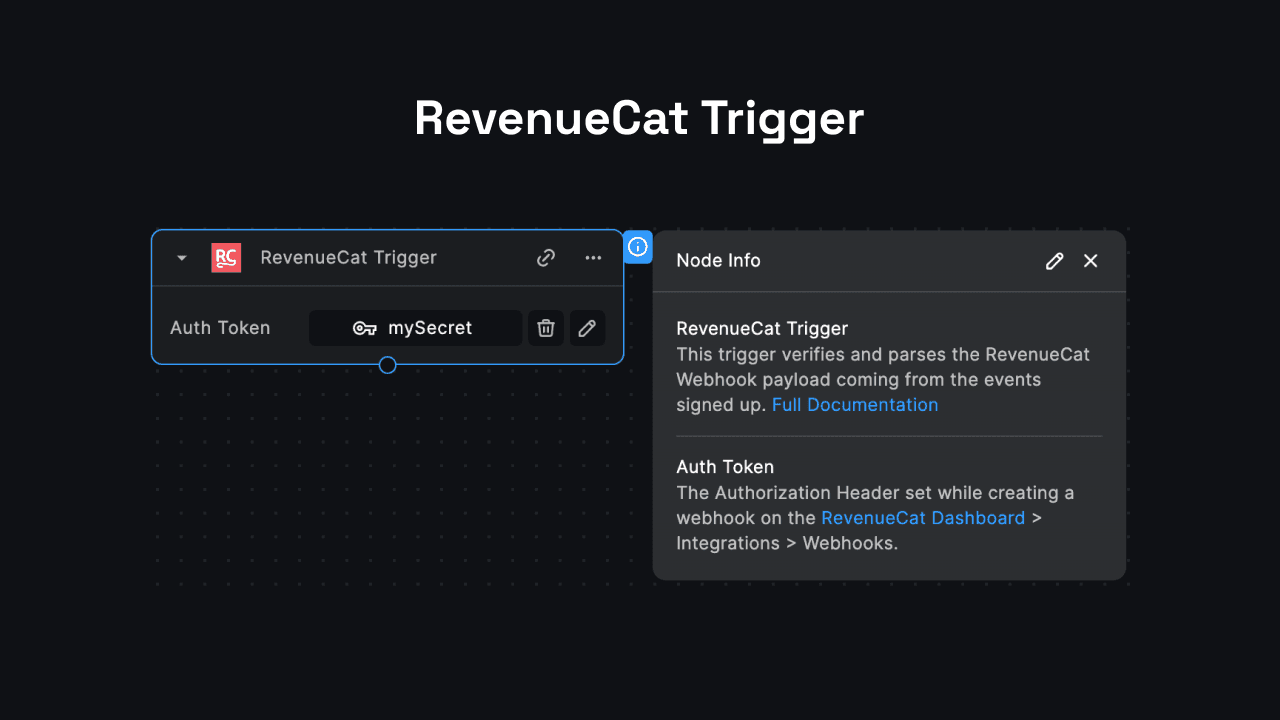
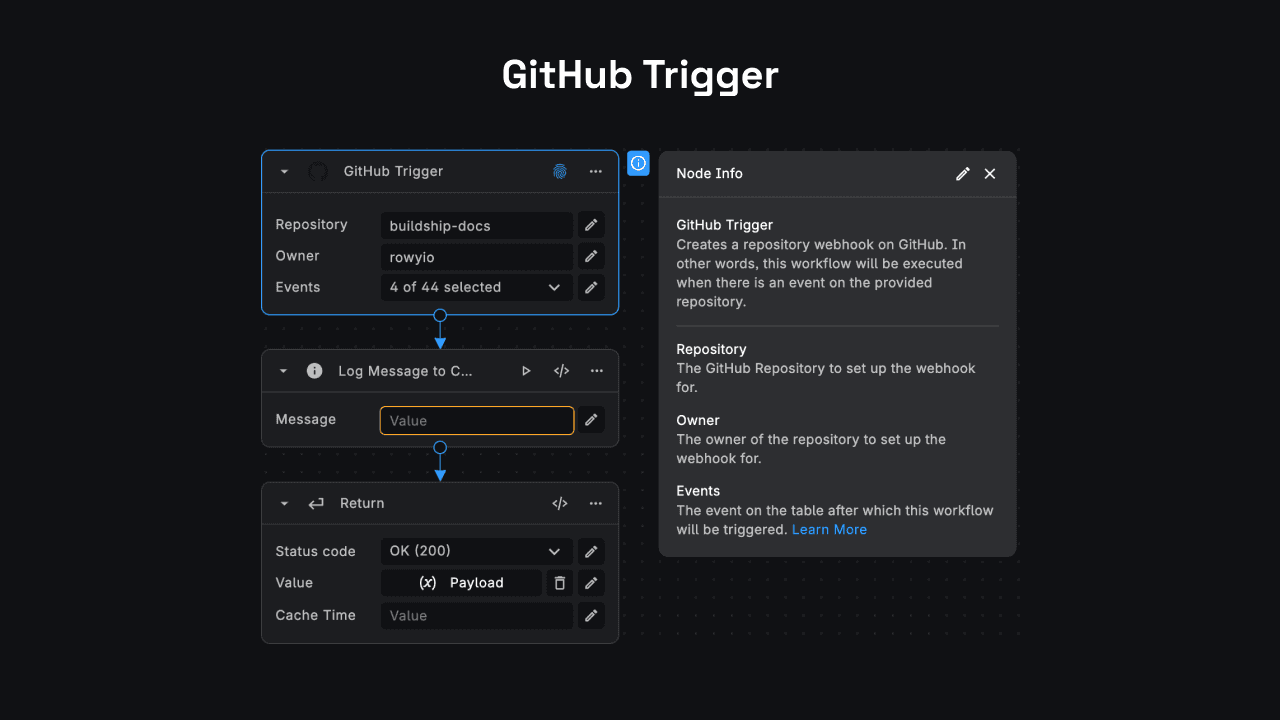
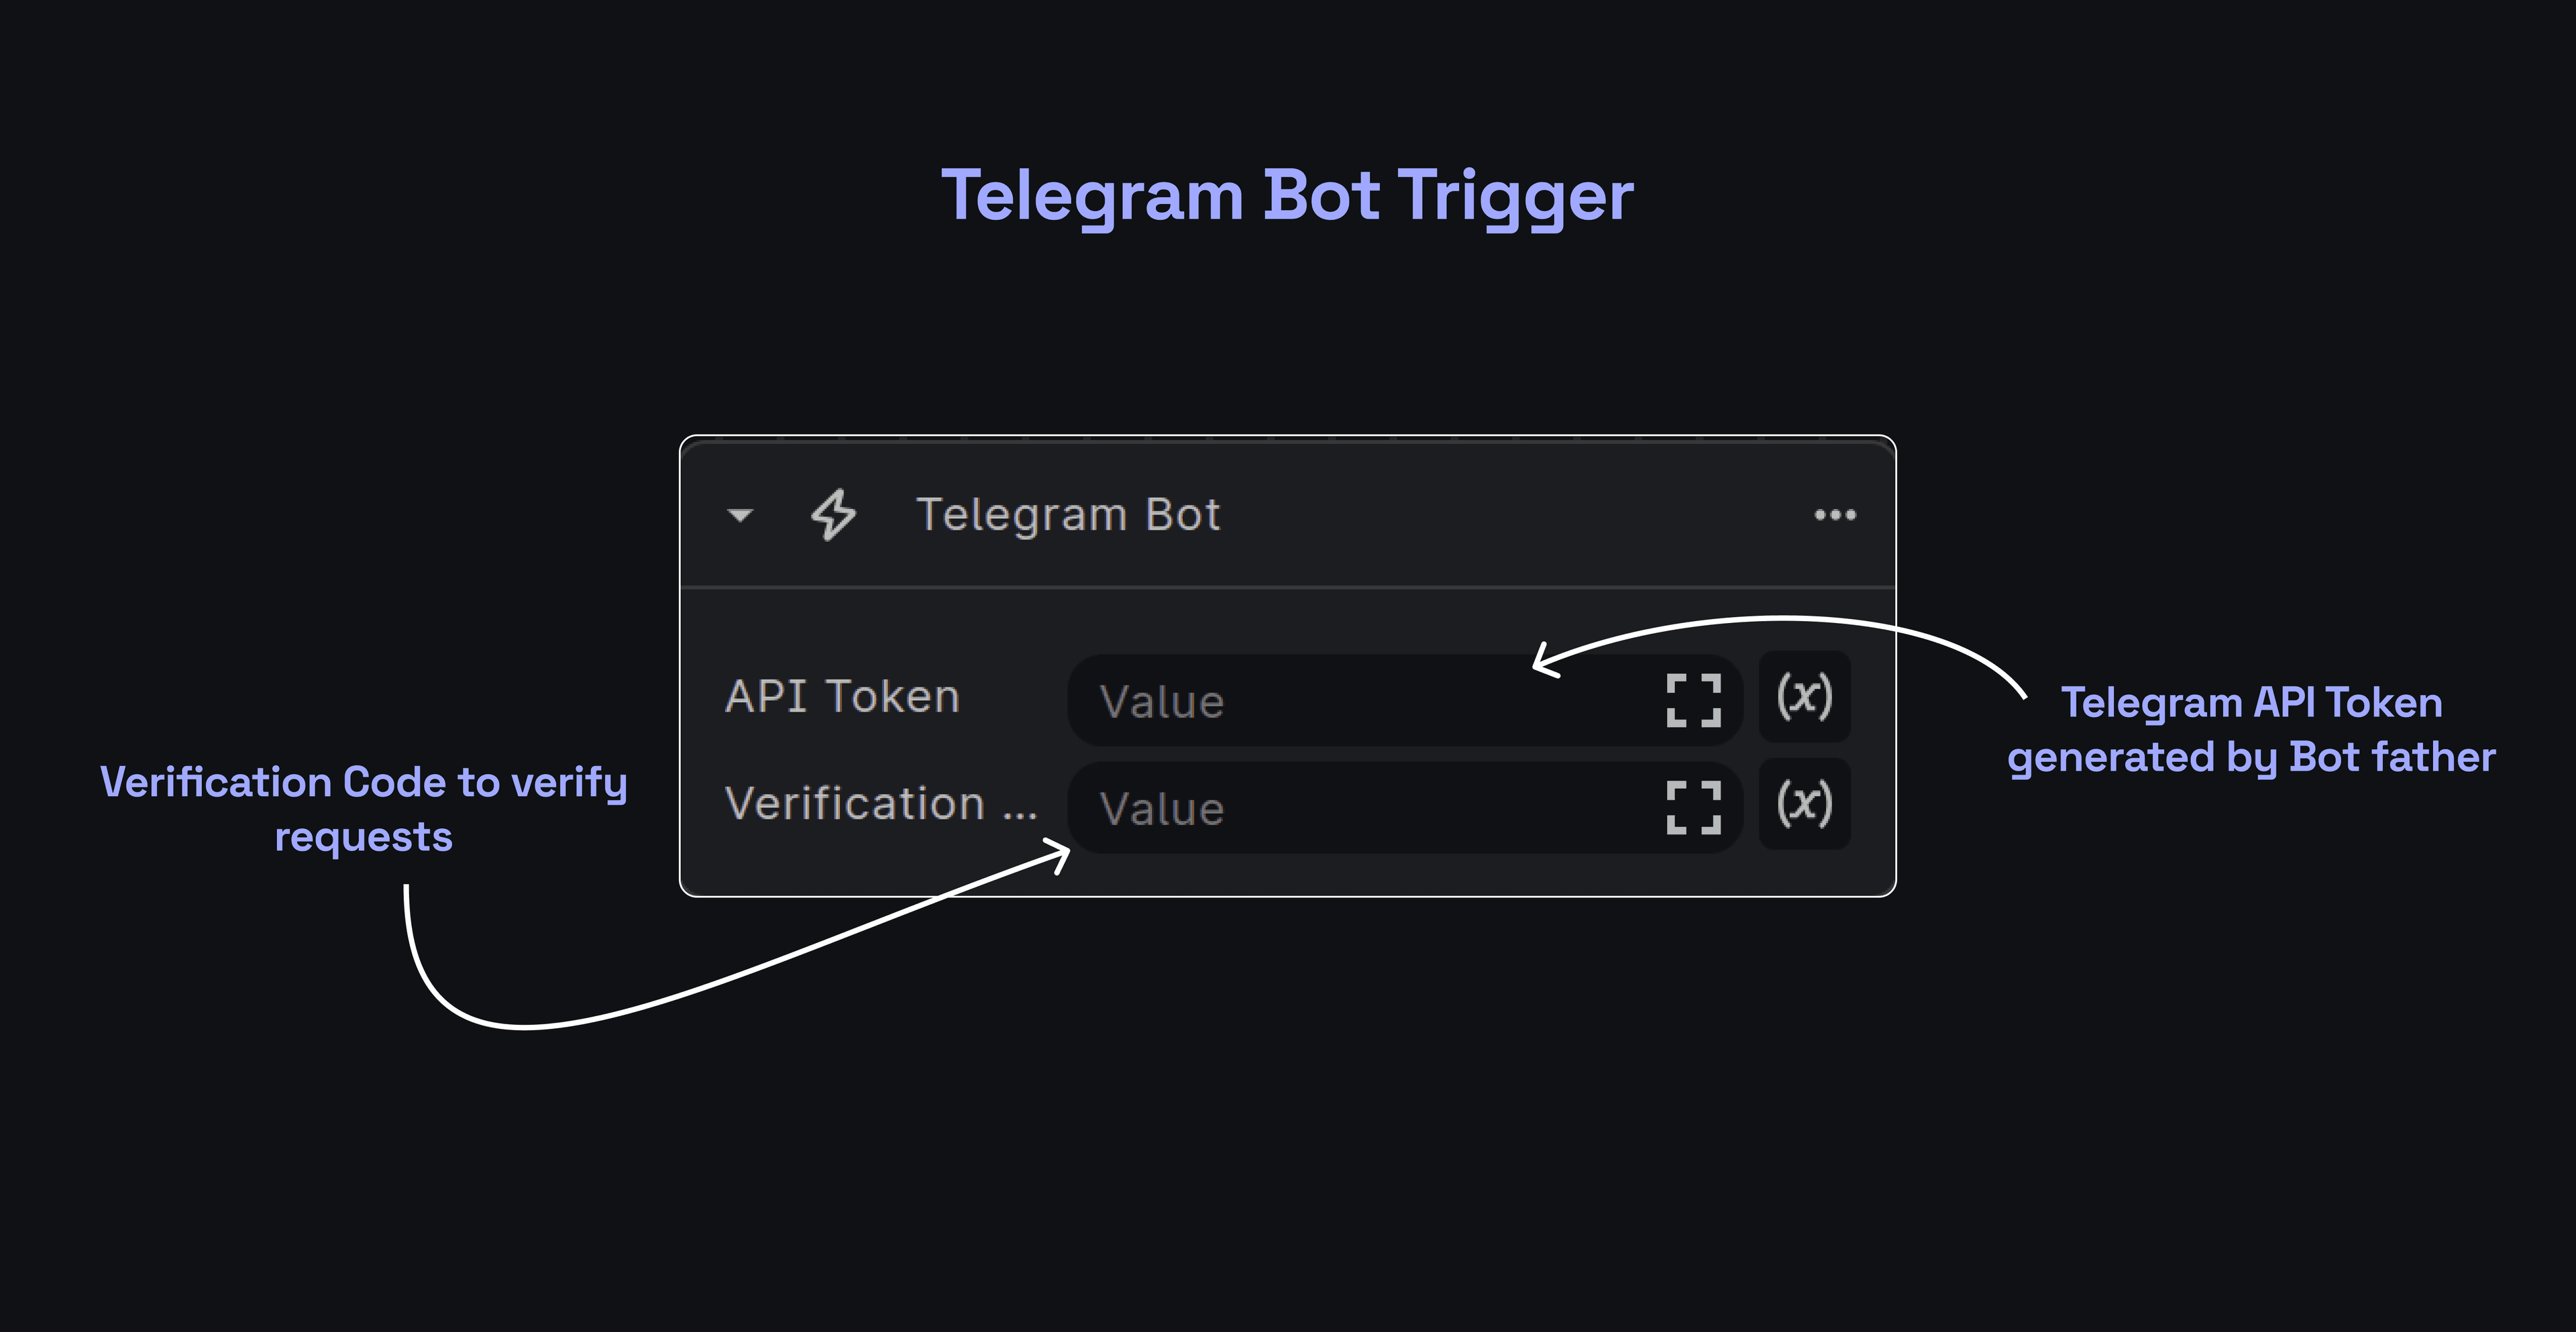
These are triggered by adding the BuildShip Workflow endpoint to a third-party service to receive a webhook call for specified events with the event payload. Examples include LemonSqueezy, GitHub Trigger, and RevenueCat Trigger.

Webhook-based triggers are preferably automatic. When a BuildShip Workflow is deployed or updated, the configuration is automatically updated on the linked service via their API Endpoints to set up webhooks.
If a service doesn't support automatic setup via API, manual instructions need to be provided for users to add the API endpoint. (See example: RevenueCat Trigger (opens in a new tab))
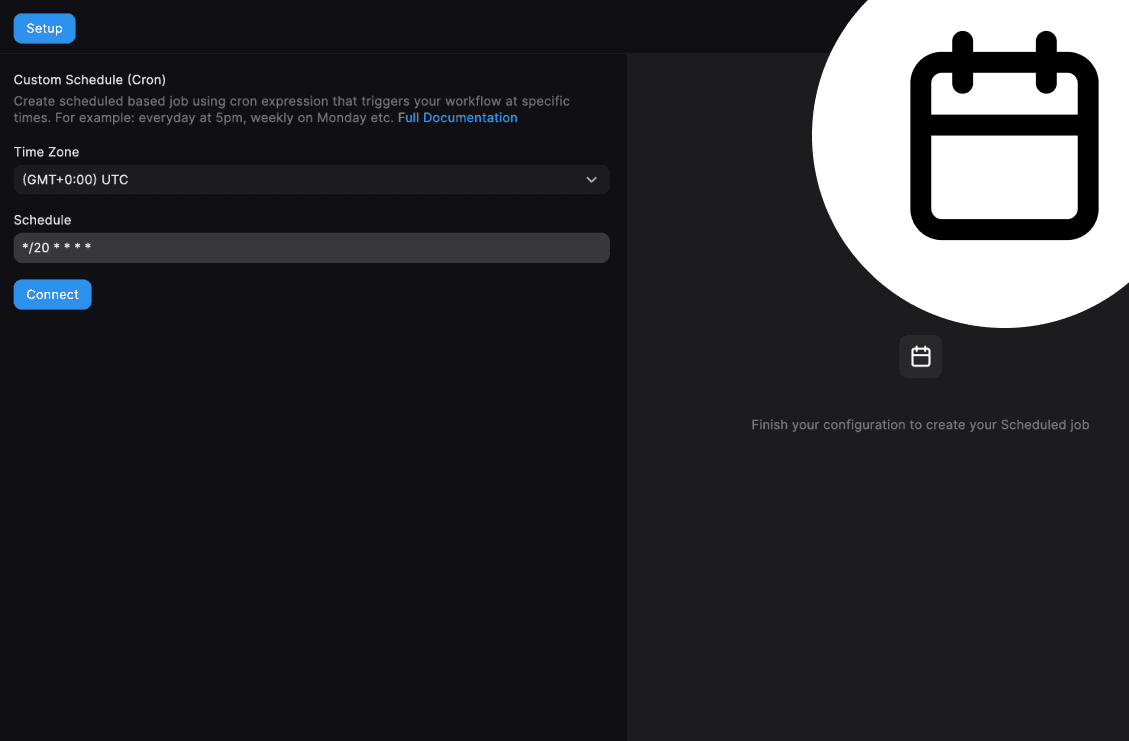
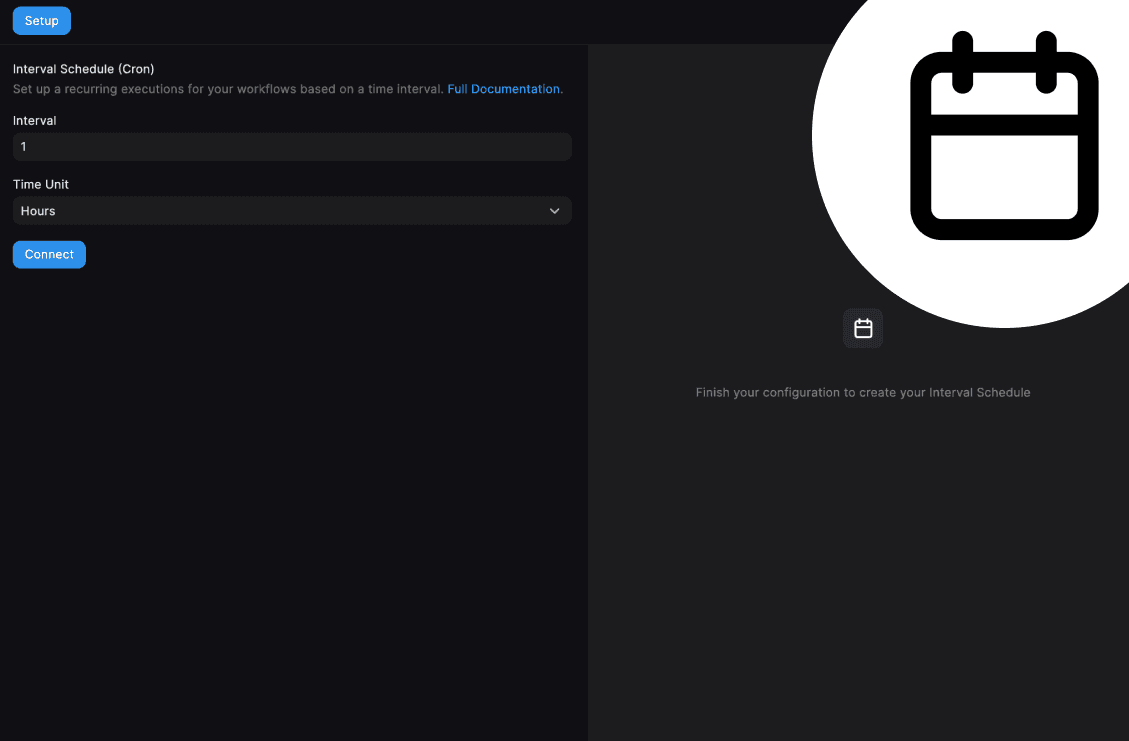
3. Schedule-based Triggers
These are cron-based triggers called by the GCP Cloud Scheduler at specified times/schedules. Examples include:
Trigger Authentication
Third-party triggers require authentication to connect with other services, either via API Keys or OAuth Apps.
API Key Authentication
The trigger and documentation should provide details on how users can easily find API Keys on the third-party service. For example:
OAuth App Authentication
If an OAuth App is required, contact the BuildShip Team to set up and verify the OAuth App. Here are some examples:
Building Trigger Logic
Building the trigger logic can be easily broken down into 4 major lifecycle function: onCreate, onUpdate,
onExecution, and onDelete.
1. onCreate
This function is called when a trigger is deployed for the first time. It's typically used for setup tasks, such as creating a webhook in an external service.
The onCreate function in a trigger is responsible for the set up. You can think of it like “what happens when the
trigger gets connected for the first time”.
Trigger set up steps could include:
- Setting up a webhook for the service - let’s say a Cloud Scheduler for a Cron Job, or a Webhook for your Supabase Project with the related config as defined by the user in the inputs
For some cases, it is okay for the onCreate function to do nothing. What goes here depends entirely on the use-case.
async function onCreate({ ...triggerInputs }, { auth, runtimeUrl, workflow, trigger, env }) {
  // an onCreate function which does nothing
  // makes sense for triggers which are API-based (in which case only the OnExecution & getData methods matter)
  return true;
}
Let’s try and understand this with the help of an example. We’re now looking at the onCreate function for the Webflow
Trigger:
async function onCreate(
  { site_id, triggerType, filter }, // trigger inputs
  { auth, runtimeUrl, workflow, trigger, env }, // trigger script options
) {
  try {
    const { access_token } = await auth.getToken();
    const webhookUrl = `${runtimeUrl}/executeWorkflow/${workflow.id}/${trigger.id}`;
    const url = `https://api.webflow.com/v2/sites/${site_id}/webhooks`;

    let body = {
      triggerType: triggerType,
      url: webhookUrl,
    };

    const _filter = triggerType === 'form_submission' ? filter : null; // filter is only required for form_submission

    const options = {
      method: 'POST',
      headers: {
        accept: 'application/json',
        'content-type': 'application/json',
        authorization: `Bearer ${access_token}`,
      },
      body: JSON.stringify({
        ...body,
        ..._filter,
      }),
    };

    const resp = await fetch(url, options);
    const respJson = await resp.json();

    await env.set([
      {
        name: `webflow-webhook-id`,
        value: respJson.id,
      },
    ]);
    return true;
  } catch (e) {
    return e;
  }
}-
Similar to the node script, the trigger functions too take in two sets of params:
- Node Inputs (
NodeInputs) - in the example below, thesite_id,triggerType, andfilterare all inputs for the trigger - the values filled in by the user - Trigger Script Options (
TriggerScriptOptions) - this contains theauth,runtimeUrl,workflow,trigger, andenvobjects. You can learn more about them here.
- Node Inputs (
Available Trigger Script Options (for onCreate, onUpdate, and onDelete)
For onCreate, onUpdate, and onDelete, the following options are passed as the second parameter to the trigger lifecycle functions:
runtimeUrl: The URL of the runtime environment.auth: An object containinggetTokenandgetKeyfunctions for handling authentication.workflow: An object containing theidandruntimeEnvof the workflow.trigger: The trigger object itself. (check a sample Trigger object here (opens in a new tab))env: An environment manager for the trigger. (check this section below for more details)secret: An object with a get function to retrieve secrets. (check this section below for more details)
Using Environment Variables (env)
There are three methods available in both triggers and nodes to get, set and delete environment variables:
- Get Environment Variables
env.get(string, 'project' | 'workflow'); // default "workflow"`
- Set Environment Variables
await env.set({ name: string; value: string } | { name: string; value: string }[], ”project” | “workflow”) // default "workflow"
- Delete Environment Variables
await env.delete(string | string[], ”project” | “workflow”) // default "workflow"
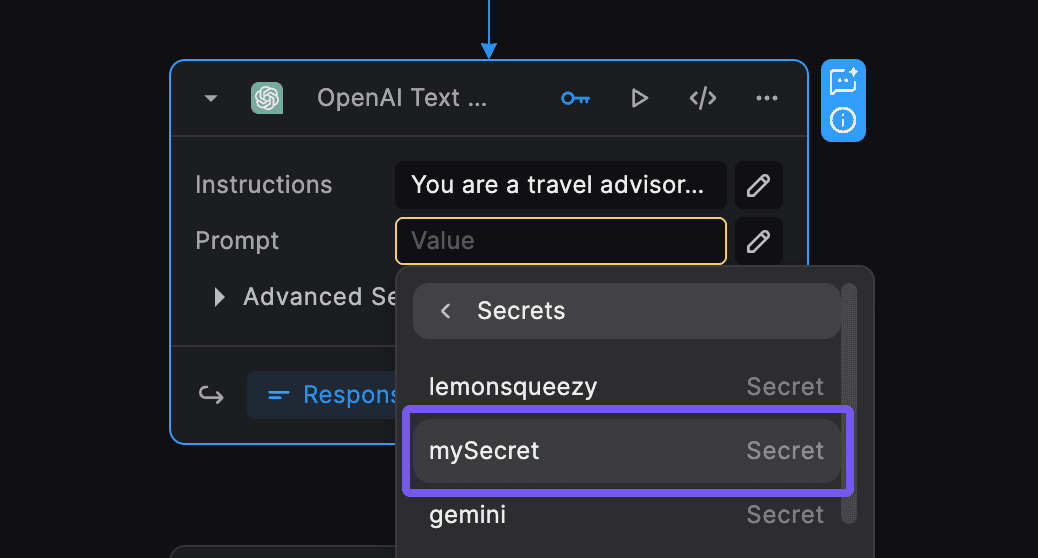
Using Secrets
The secrets stored via the BuildShip secret manager can be accessed like:
async function onCreate(
  { ...triggerInputs },
  { secret }, // trigger script options
) {
  // Fetch a secret named "mySecret"
  const apiKey = await secret.get('mySecret');
}
- This is the function which should include the API Call to set up the webhook endpoint.
💡
If the automated webhook set up fails on the first try, this needs to be handled in the
onUpdatefunction. Check theonUpdateexample.
2. onUpdate
This function is invoked when a trigger is redeployed. It's used to update any resources that were created during the onCreate phase.
Check out the available Trigger Script Options for onUpdate here.
For some cases, services allow the creation endpoint/method to also update the existing webhook. For such cases we can re-use the onCreate script. To do that, simply update the exports for the trigger like:
export default {
  onCreate,
  onUpdate: onCreate,
  onExecution,
  onDelete,
  getData,
};
Here’s an example of the onUpdate function for the Webflow Trigger:
async function onUpdate(
  { site_id, triggerType, filter }, // trigger inputs
  { auth, runtimeUrl, workflow, trigger, env }, // trigger script options
) {
  const hook_id = env.get(`webflow-webhook-id`);
  const { access_token } = await auth.getToken();

  if (hook_id) {
    // delete the existing webhook first
    onDelete({}, { auth, env });
  }
  try {
    // create a webhook with updated input values
    onCreate({ site_id, triggerType, filter }, { auth, runtimeUrl, workflow, trigger, env });
  } catch (e) {
    return e;
  }
}
3. onDelete
This function is called when a workflow or trigger is deleted. Its primary purpose is for clean-up operations, like deleting any previously created webhooks.
Check out the available Trigger Script Options for onDelete here.
For some cases, it is okay for the onDelete function to do nothing. What goes here depends entirely on the use-case.
async function onDelete({ ...triggerInputs }, { auth, runtimeUrl, workflow, trigger, env }) {
  // an onDelete function which does nothing
  // makes sense for triggers which are API-based (in which case only the OnExecution & getData methods matter)
  return true;
}
We’re now looking at the onDelete function for the Webflow Trigger:
async function onDelete({}, { auth, env }) {
  try {
    const hook_id = env.get(`webflow-webhook-id`);

    if (!hook_id) {
      return 'No webhook to delete.';
    }

    const { access_token } = await auth.getToken();

    // clean up the set up webhooks
    const url = `https://api.webflow.com/v2/webhooks/${hook_id}`;
    const options = {
      method: 'DELETE',
      headers: {
        authorization: `Bearer ${access_token}`,
      },
    };

    const resp = await fetch(url, options);
    const respJson = await resp.json();

    await env.delete(['webflow-webhook-id']);
    return true;
  } catch (e) {
    return e;
  }
}
4. onExecution or onExecution.start
The onExecution function is a deprecated alias. The trigger execution is now broken down into two phases:
- onExecution / onExecution.start
- onResponse / onExecution.end
This function is called when a trigger is executed, which starts a workflow. onExecution.start is the modern,
recommended version, while onExecution is a deprecated alias. This function provides the initial data for the
workflow.
The onExecution is primary required to parse the incoming request body. The value returned via this function is what’s
passed to as the trigger output.
Here’s an example of the onExecution.start function for the Webflow Trigger:
async function onRequest({ _ }, { nodeReq, logging, request, env }) {
  const body = request.body ?? (await parser['json'](nodeReq));

  const ret = {
    query: request.query,
    headers: request.headers,
    body: body !== null && body !== void 0 ? body : {},
  };

  return ret;
}
This can be exported as:
export default {
  onCreate,
  onExecution: {
    start: onRequest,
    end: onResponse,
  },
  onUpdate,
  onDelete,
  getData,
};
Available Trigger Script Options (for onExecution.start)
For onExecution (onExecution.start), the following options are passed as the second parameter to the trigger lifecycle
functions:
...(state.current ?? {}): The current state of the workflow execution.workflowExecutionId: The ID of the current workflow execution.logging: The logging object.terminate: A function to terminate the workflow execution.// Example of terminating a workflow execution return terminate(200, 'No changes detected.');env: An environment manager for the trigger. (check this section below for more details)secret: An object with a get function to retrieve secrets. (check this section below for more details)auth: An object containinggetTokenandgetKeyfunctions.
// Example of getting an OAuth token
const { access_token } = await auth.getToken();

// Example of getting a key-based API key
const apiKey = auth.getKey();getBuildShipFile: A function to get a BuildShip file. (check this for more details)trigger: The trigger object. (check a sample Trigger object here (opens in a new tab))workflow: An object containing the workflowid.
5. onResponse or onExecution.end
This function is called after a workflow has finished executing.
onExecution.endis the modern version, and onResponse is its deprecated alias. It is often used for cleanup tasks or to format the final response of the workflow.
The first param for the inputs for the onResponse function are structured as:
- outputs: Contains the outputs of the workflow, mapped from the
trigger's node values with keys starting with
outputs.. - config: Contains the trigger's config values (the same as what would be passed to other lifecycle functions).
Here’s what a sample onResponse function looks like:
const onResponse = ({ outputs, config }, { logging, req }) => {
  return {
    status: parseInt(outputs.status ?? 200),
    value: outputs.body,
    cacheMaxAge: 0,
  };
};
Available Trigger Script Options (for onExecution.end)
For onExecution (onExecution.end), the following options are passed as the second parameter to the trigger
lifecycle functions:
...(state.current ?? {}): The current state of the workflow execution.workflowExecutionId: The ID of the current workflow execution.logging: A logging object.terminate: A function to terminate the workflow execution.env: An environment manager for the trigger. (check this section below for more details)secret: An object with a get function to retrieve secrets. (check this section below for more details)auth: An object containing getToken and getKey functions.getBuildShipFile: A function to get a BuildShip file.trigger: The trigger object. (check a sample Trigger object here (opens in a new tab))workflow: An object containing the workflow id.
6. getData
This function is used to fetch sample data for a trigger. This is particularly useful for previewing the trigger's output in the editor without having to run an entire workflow.
Copy and paste the following default getData function along with the helper functions to display the incoming request from the logs whenever the “Get Data” button is clicked on the Setup Preview screen for the trigger.
const getAccessToken = async () => {
  const response = await fetch('http://metadata/computeMetadata/v1/instance/service-accounts/default/token', {
    headers: { 'Metadata-Flavor': 'Google' },
  });

  if (!response.ok) {
    throw new Error(`Failed to obtain access token: ${response.statusText}`);
  }

  const data = await response.json();
  return data.access_token;
};

const fetchLogEntries = async (triggerId, retries = 3, delay = 1000) => {
  const projectId = process.env.GCLOUD_PROJECT;
  const accessToken = await getAccessToken();

  const filter = `logName="projects/${projectId}/logs/buildship-node-io" AND jsonPayload.nId="${triggerId}"`;

  const requestBody = {
    resourceNames: [`projects/${projectId}`], // Added resourceNames field
    filter: filter,
    pageSize: 1,
    orderBy: 'timestamp desc',
  };

  for (let attempt = 1; attempt <= retries; attempt++) {
    try {
      const response = await fetch('https://logging.googleapis.com/v2/entries:list', {
        method: 'POST',
        headers: {
          Authorization: `Bearer ${accessToken}`,
          'Content-Type': 'application/json',
        },
        body: JSON.stringify(requestBody),
      });

      if (!response.ok) {
        const errorText = await response.text();
        throw new Error(`Error fetching log entries: ${response.statusText} - ${errorText}`);
      }

      const data = await response.json();
      const entries = data.entries || [];

      if (entries.length > 0) {
        return entries;
      }

      // Delay before the next attempt if entries were empty
      if (attempt < retries) {
        await new Promise((resolve) => setTimeout(resolve, delay));
      }
    } catch (error) {
      // Retry if it's not the last attempt
      if (attempt < retries) {
        await new Promise((resolve) => setTimeout(resolve, delay));
      } else {
        throw new Error(`Failed to get data after ${retries} attempts.`);
      }
    }
  }

  // If all retries exhausted and no entries found
  throw new Error('No data found. Send a request to the API and try again.');
};

const getData = async (inputs, { trigger, workflow }) => {
  try {
    const entries = await fetchLogEntries(trigger.id, 5, 2000);
    return { success: true, message: '', data: entries[0].jsonPayload.o };
  } catch (err) {
    return { success: false, message: err?.message, data: null };
  }
};Quick Tip The easiest way to build triggers and implement the lifecycle functions is to build them out as nodes. This divides the functionality into executable chunks which can be individually tested and are easier to debug.
Need Help?
- 💬Join BuildShip Community
An active and large community of no-code / low-code builders. Ask questions, share feedback, showcase your project and connect with other BuildShip enthusiasts.
- 🙋Hire a BuildShip Expert
Need personalized help to build your product fast? Browse and hire from a range of independent freelancers, agencies and builders - all well versed with BuildShip.
- 🛟Send a Support Request
Got a specific question on your workflows / project or want to report a bug? Send a us a request using the "Support" button directly from your BuildShip Dashboard.
- ⭐️Feature Request
Something missing in BuildShip for you? Share on the #FeatureRequest channel on Discord. Also browse and cast your votes on other feature requests.