Integrate Supabase DB with BuildShip
BuildShip offers a powerful integration with Supabase allowing you to perform Create, Read, Update, and Delete (CRUD) operations on your data with ease. This integration is achieved through the Supabase Realtime API.
Prerequisites ✅
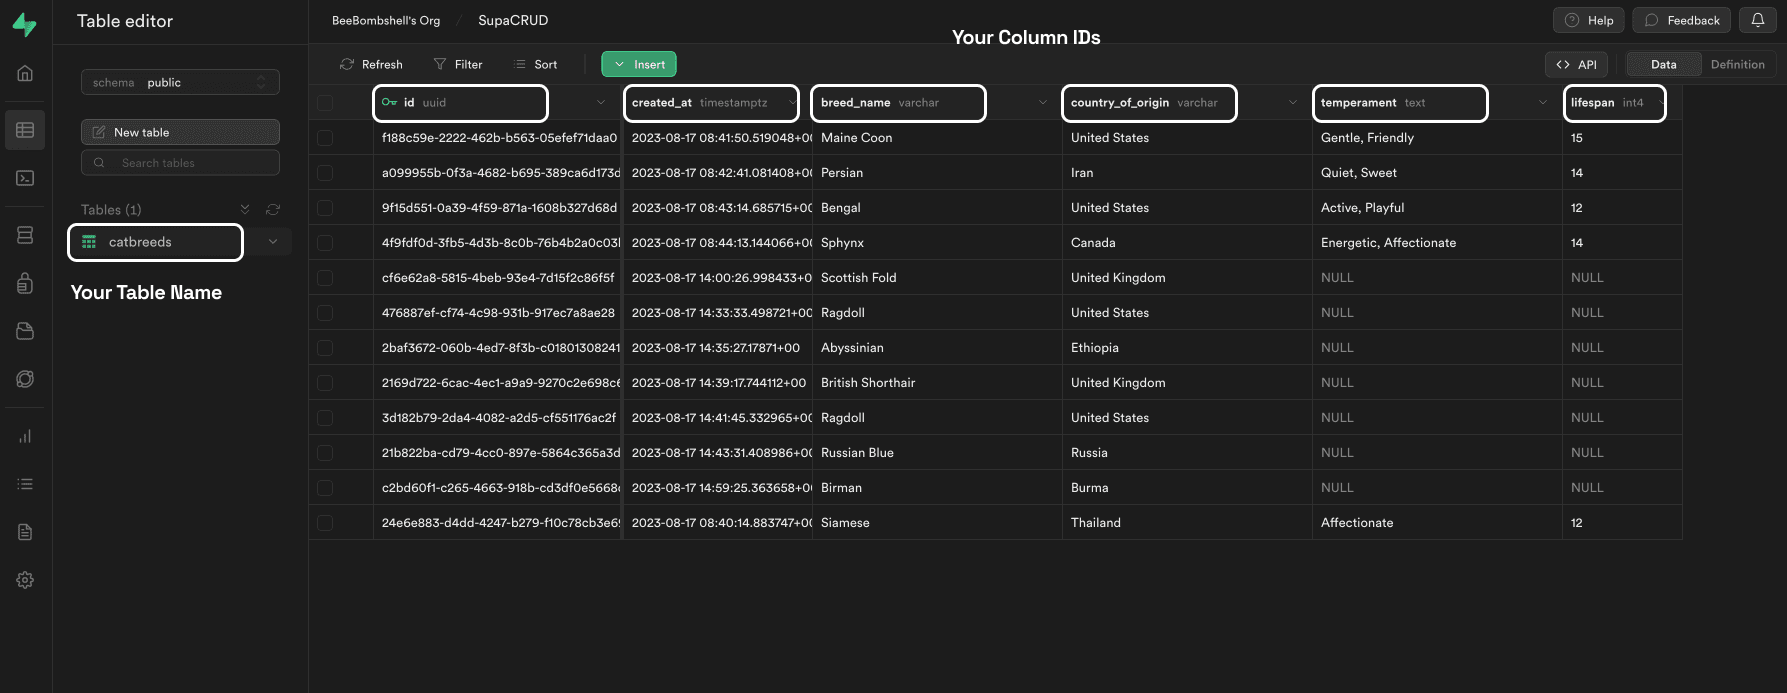
Your Supabase Table
A Supabase Table you want to integrate with BuildShip. If you don't have a Supabase project, you can create one at supabase.io (opens in a new tab).
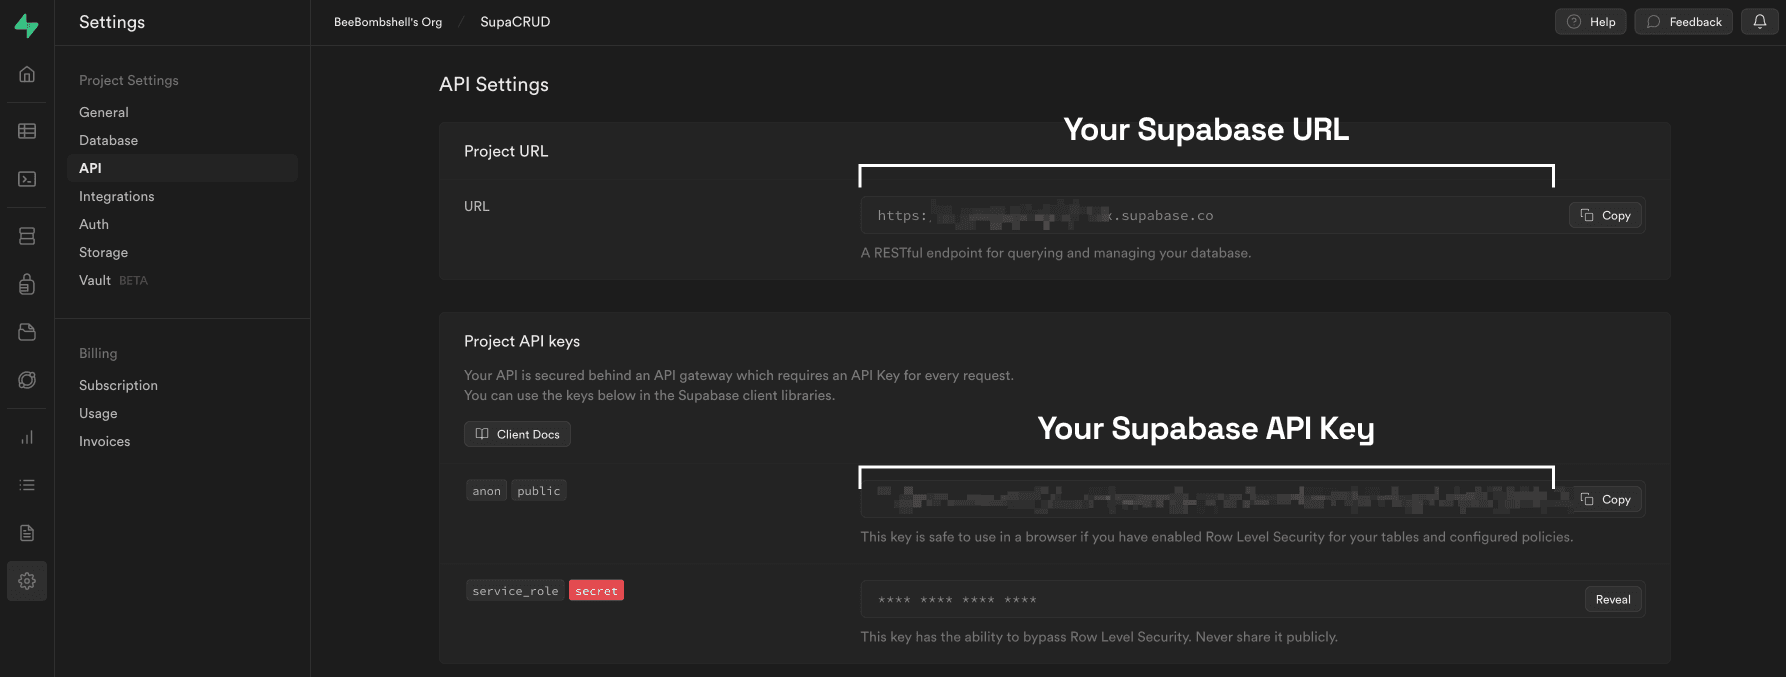
API Key and URL
Supabase provides two default API keys when you create a project: an anon key and a service_role key. These keys
can be found in the API Settings section of the dashboard.
Before you begin, make sure you have your Supabase API key and Table URL ready. You can obtain these keys from your Supabase project dashboard settings:
- Log in to your Supabase account.
- Navigate to your project's dashboard.
- In the dashboard settings, find and copy your API key and Table URL. These keys will be used to connect BuildShip with your Supabase project.
The anon Key
The anon key has very limited privileges and is designed to be used in Row Level Security (RLS) policies to
allow unauthenticated access to specific database tables or rows. For example: a policy can be created to allow
public access to the profiles table using the anon key.
The service_role Key
The service_role key has elevated privileges and can bypass RLS policies. This key should only be used on a
private server and never exposed to users or client-side applications.
Supabase Row-Level Security (RLS)
The BuildShip Supabase nodes use the Supabase Data APIs which are designed to work with Postgres Row Level Security (RLS).
Enabling Row Level Security
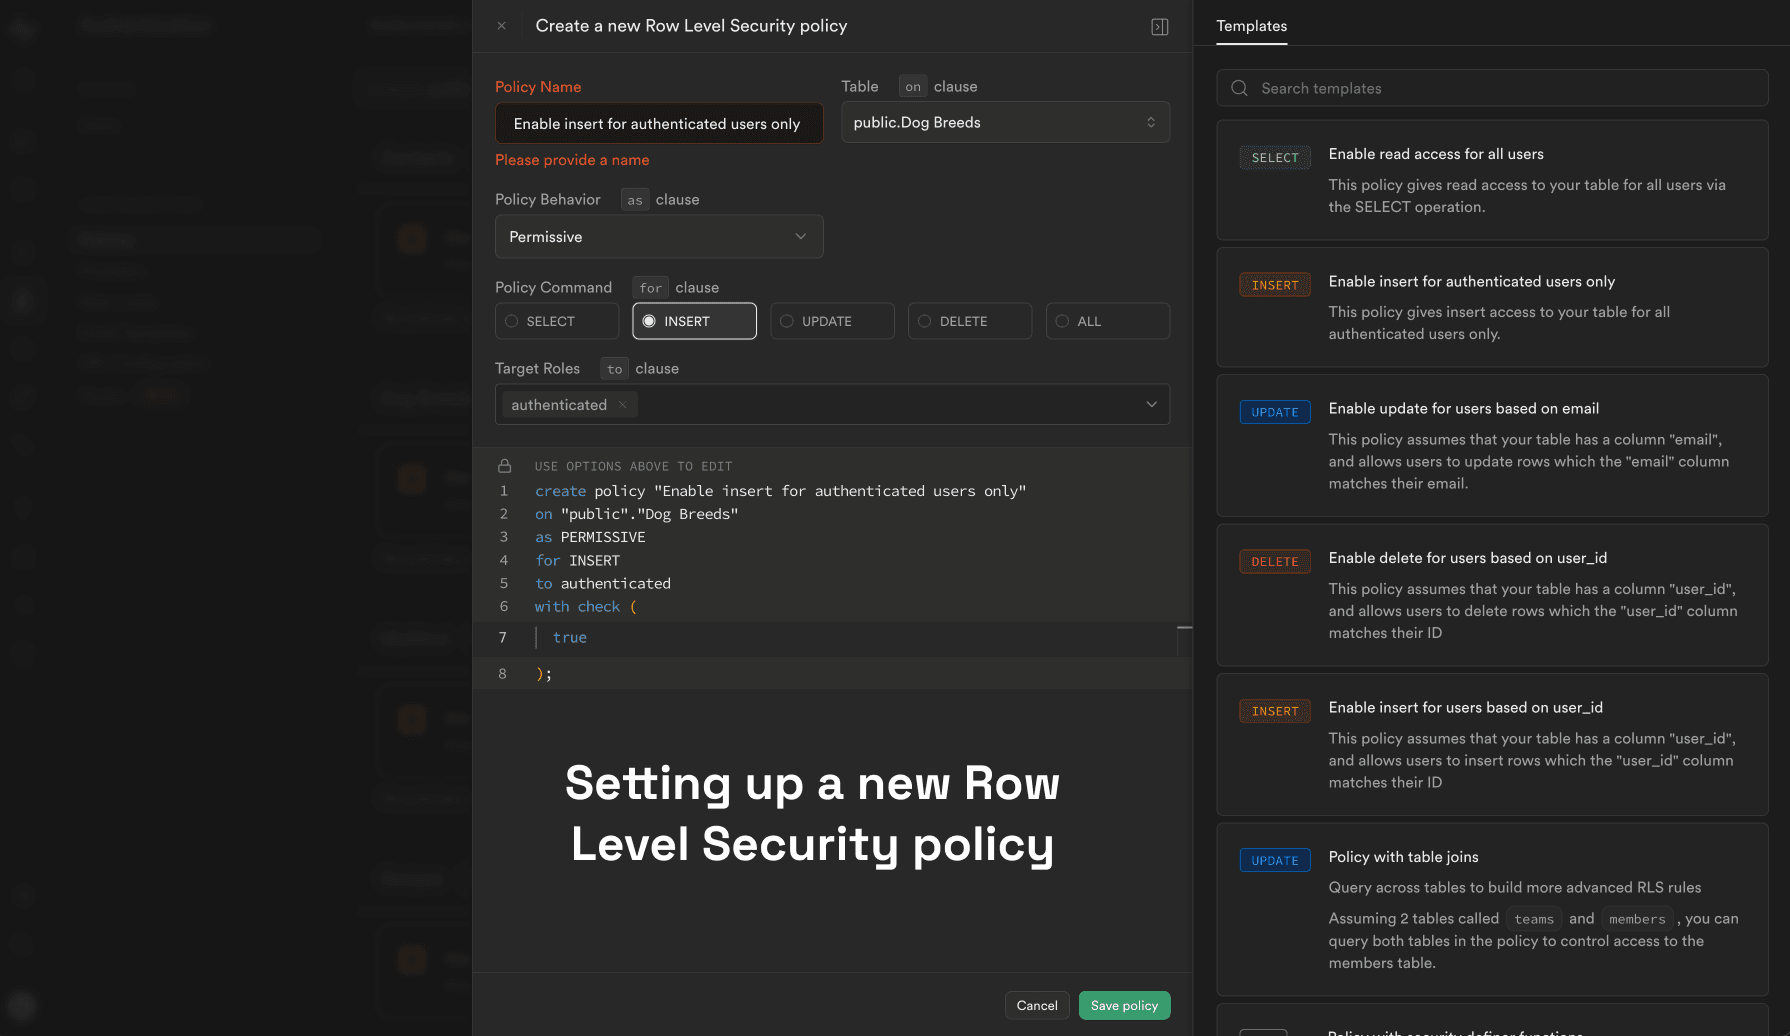
Any table you create in the public schema will be accessible via the Supabase Data API.
To restrict access, enable Row Level Security (RLS) on all tables, views, and functions in the public schema. You can
then write RLS policies to grant users access to specific database rows or functions based on their authentication
token.
To learn how to set up the Supabase Row Level Security, read the Supabase Docs here (opens in a new tab).
API Endpoints (Optional - For creating your own custom nodes)
You can get access to API endpoints directly from your table by clicking on the "API" button located at the top right corner of the Supabase table view. This is useful if you wish to create your own custom nodes for specific endpoints.
To perform CRUD operations on your Supabase database, you'll be required to create a custom RLS Policy (Row Level Security). By default, Supabase RLS is enabled to restrict all access using the anon key, this will prevent any operation and might result in an empty array.
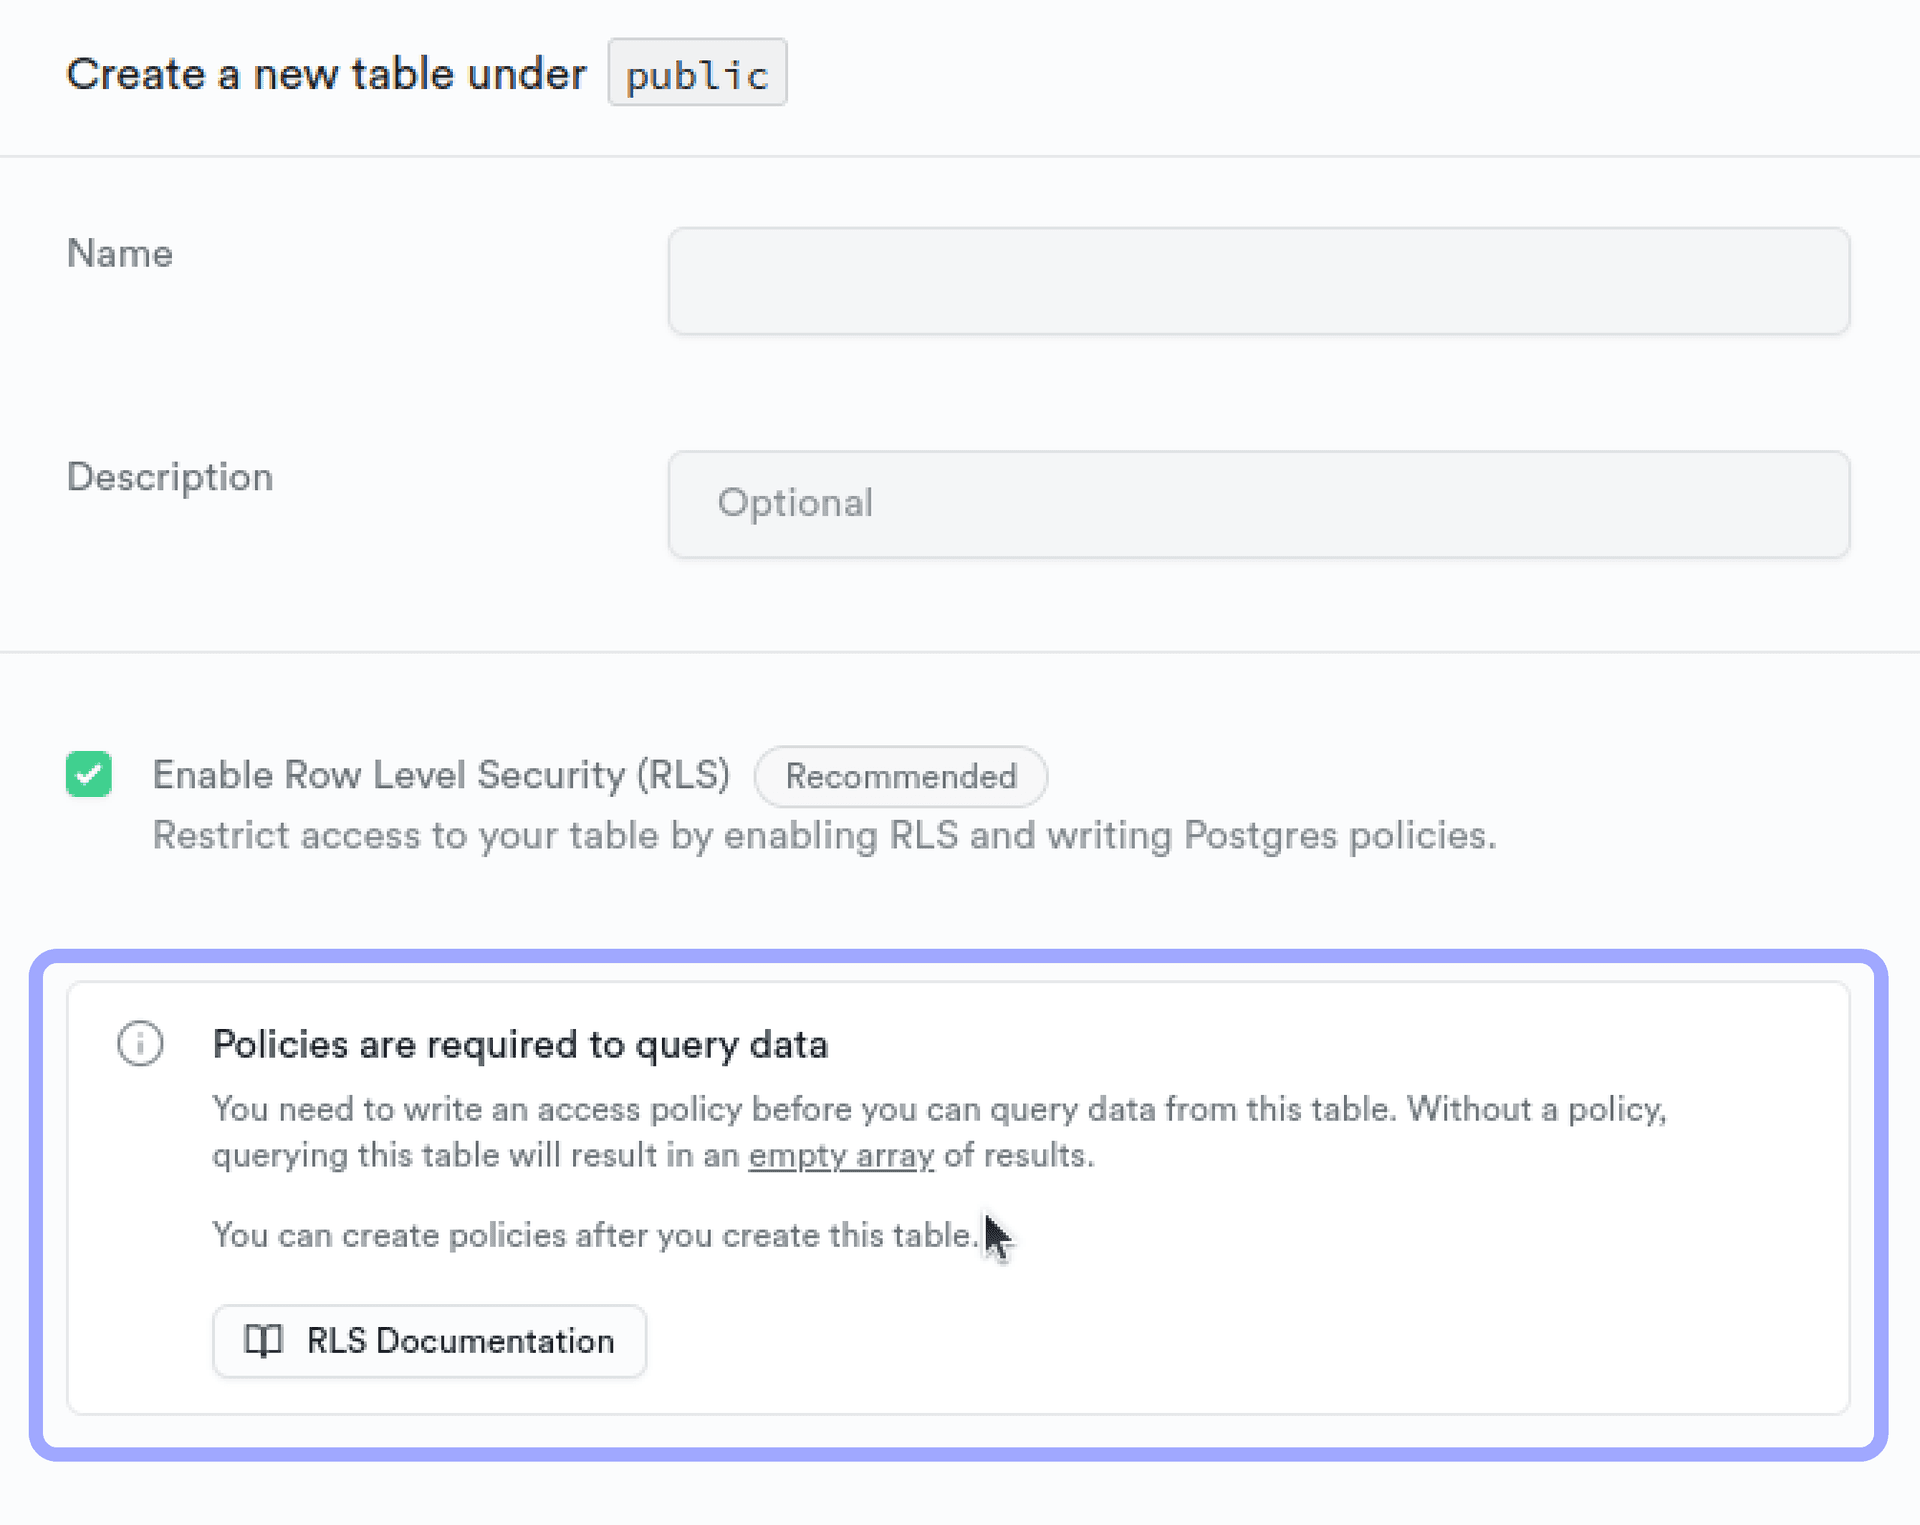
Note: You can also disable the RLS, but its not recommended. You can securely store your Supabase API key using BuildShip's secret manager, learn more here.
When to use Tokens?
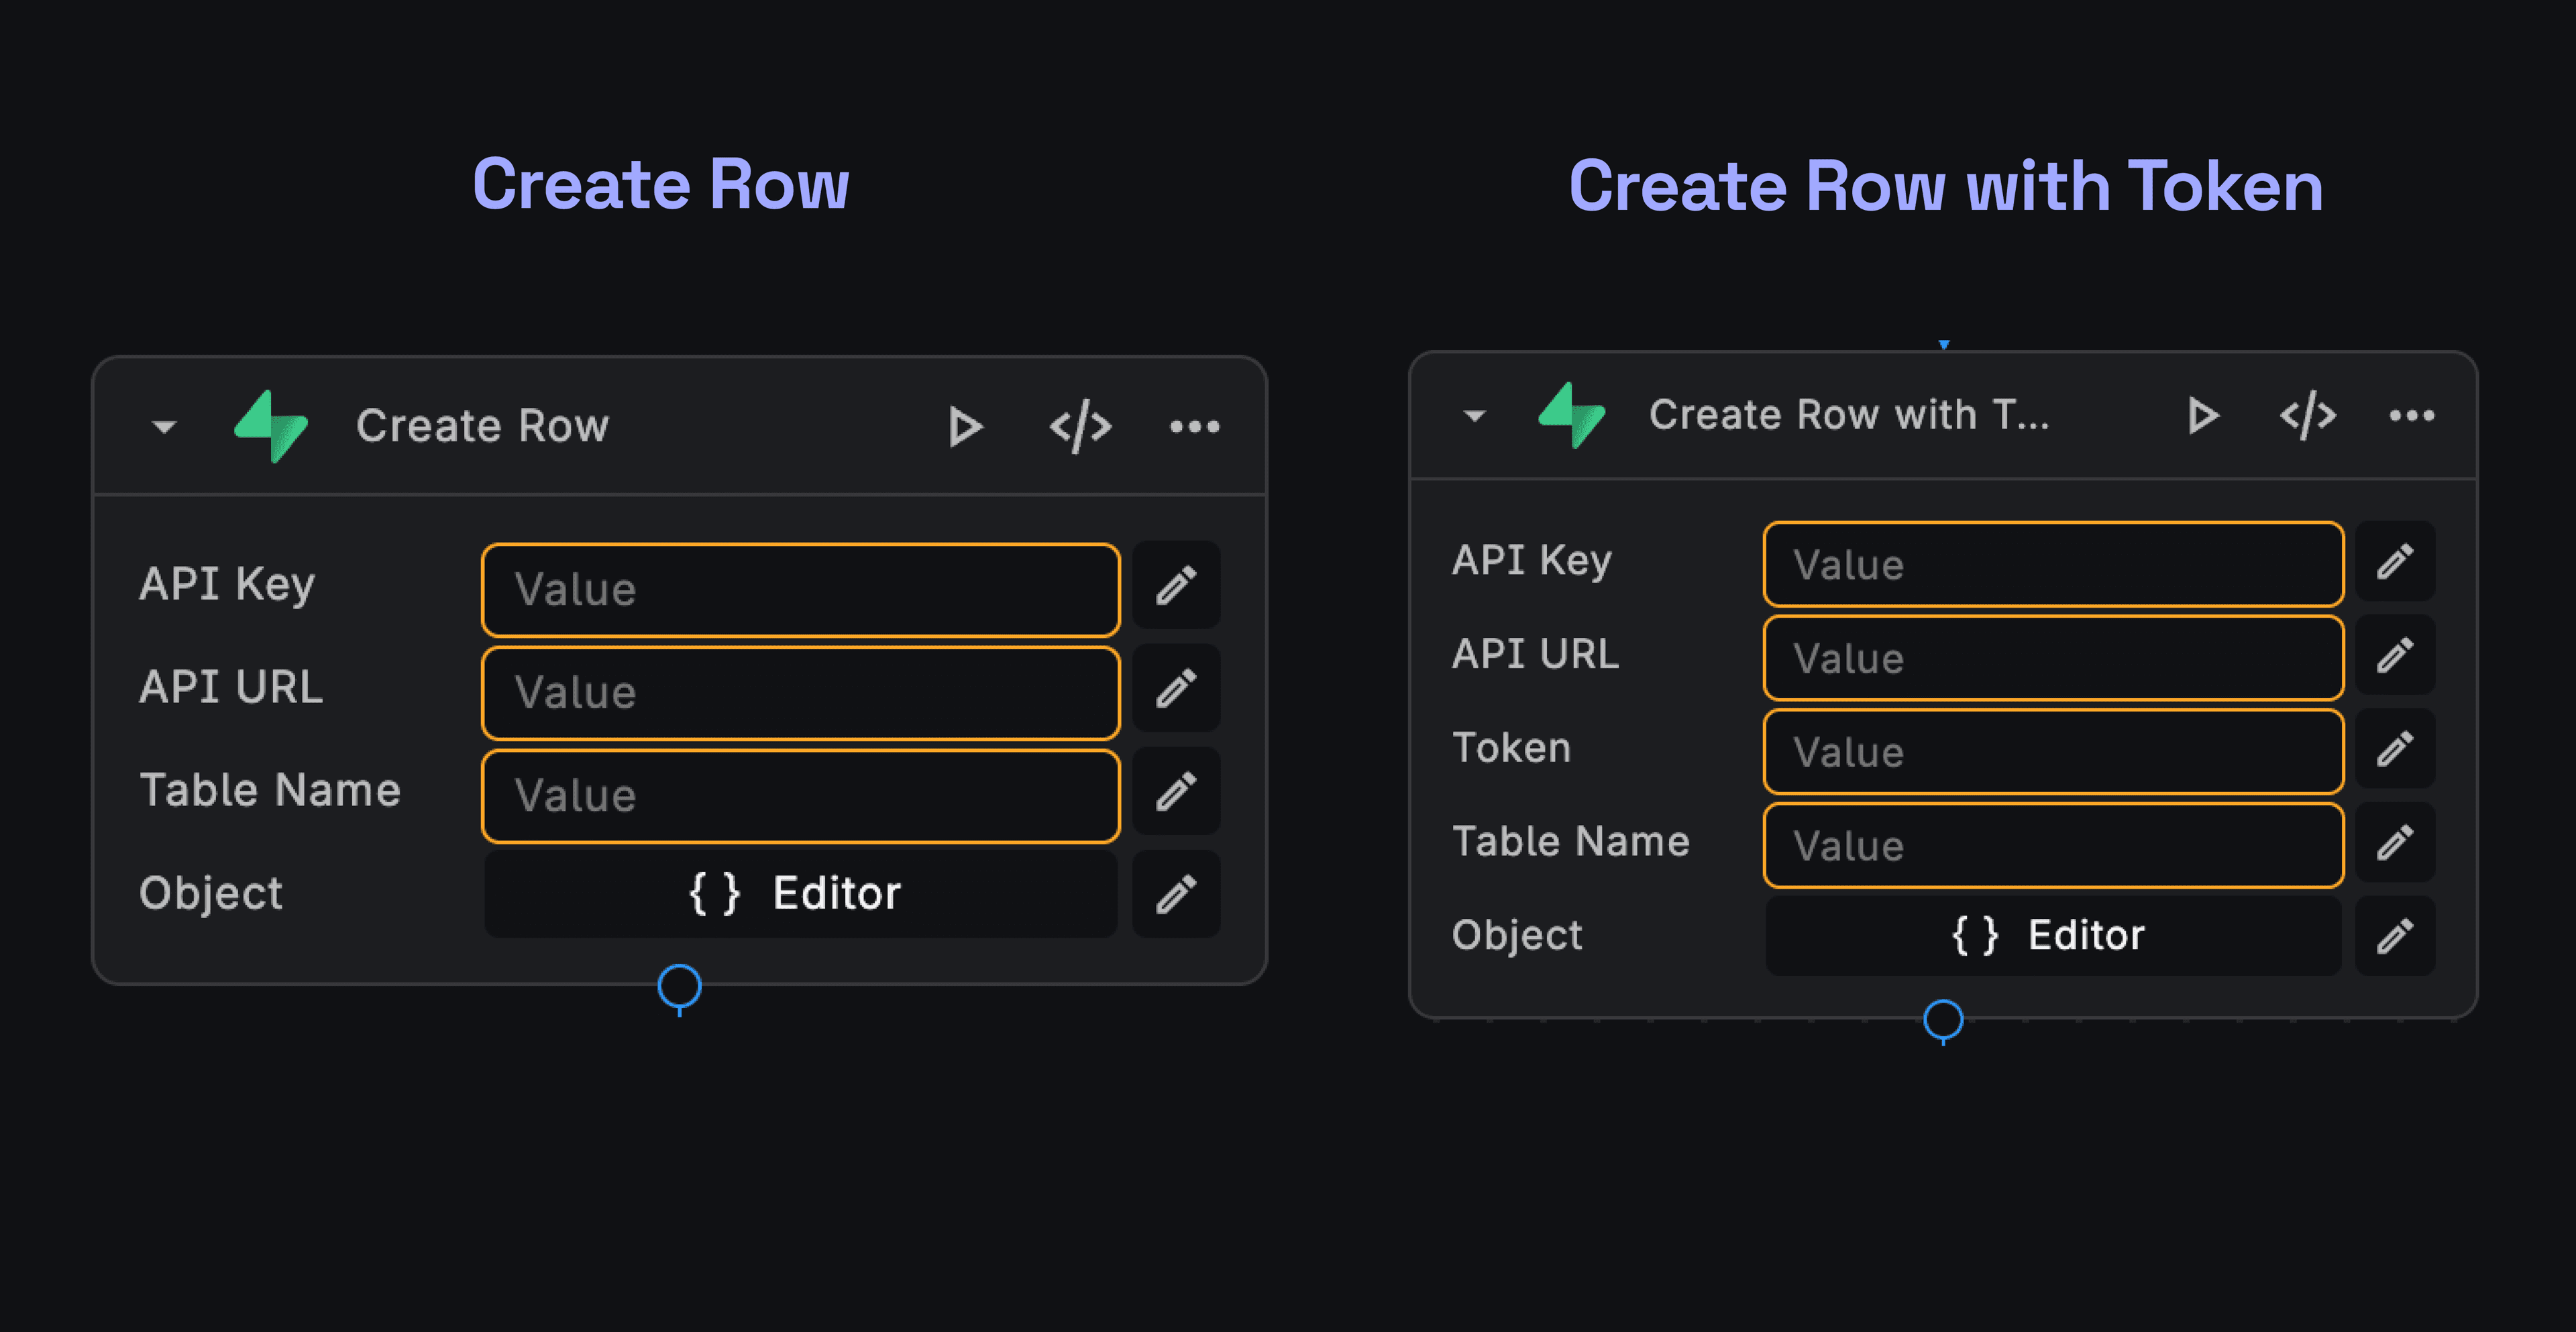
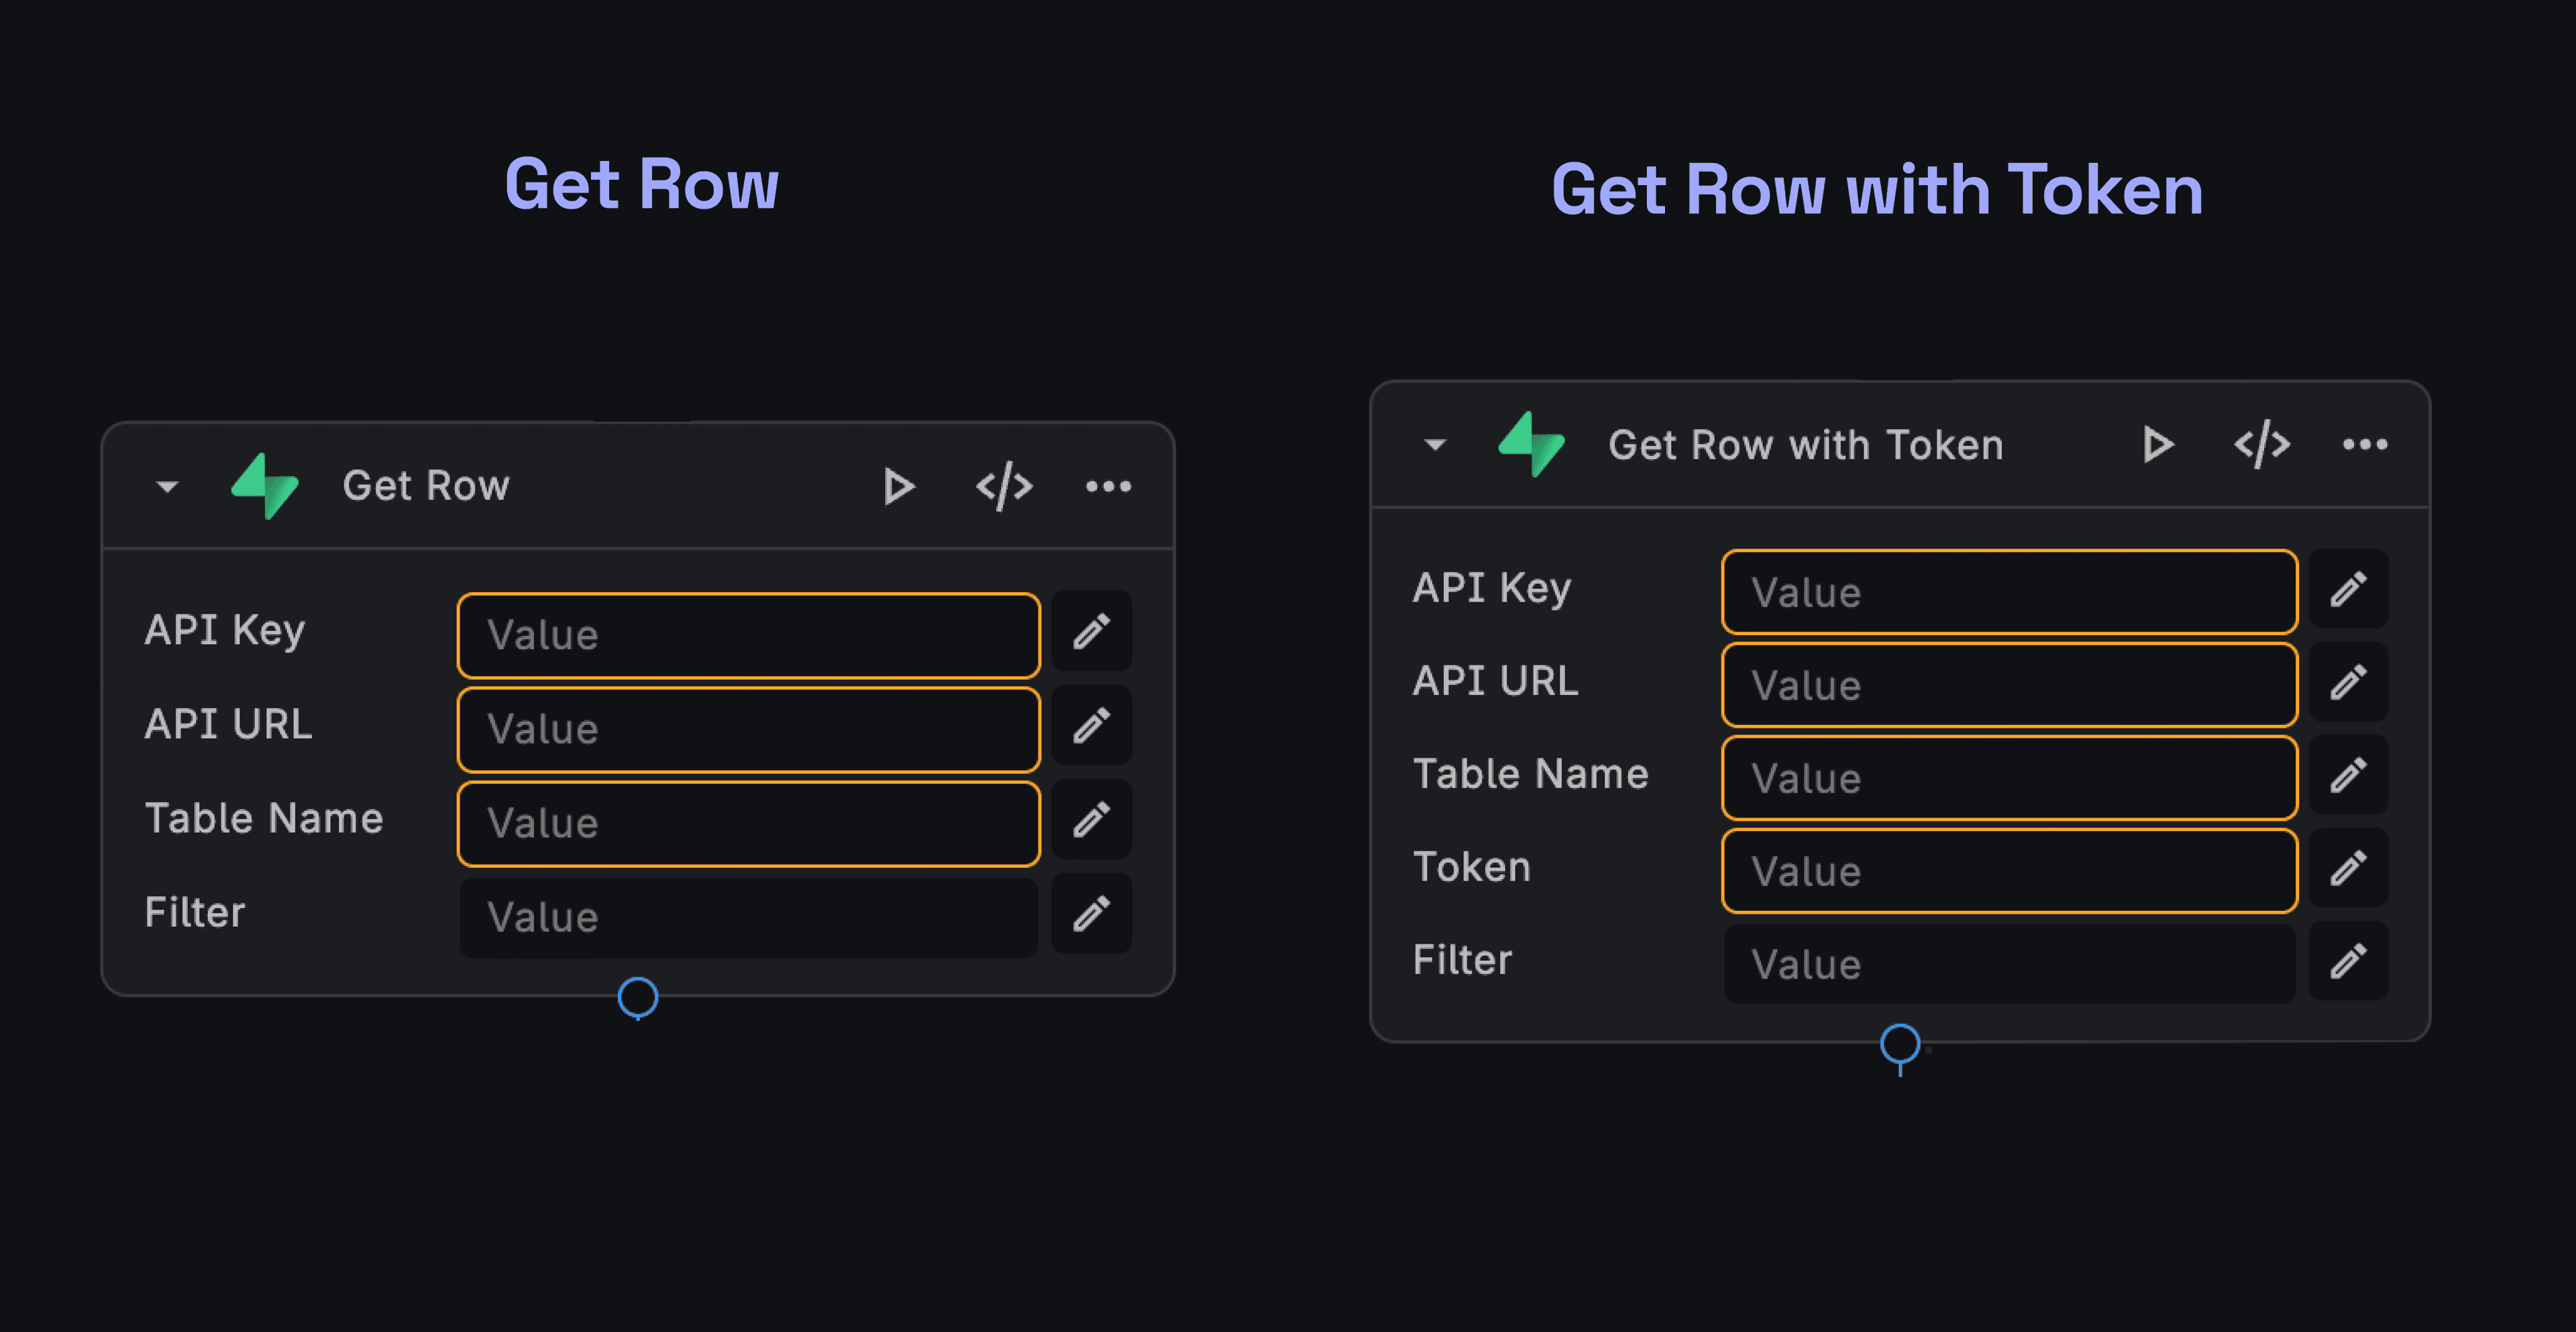
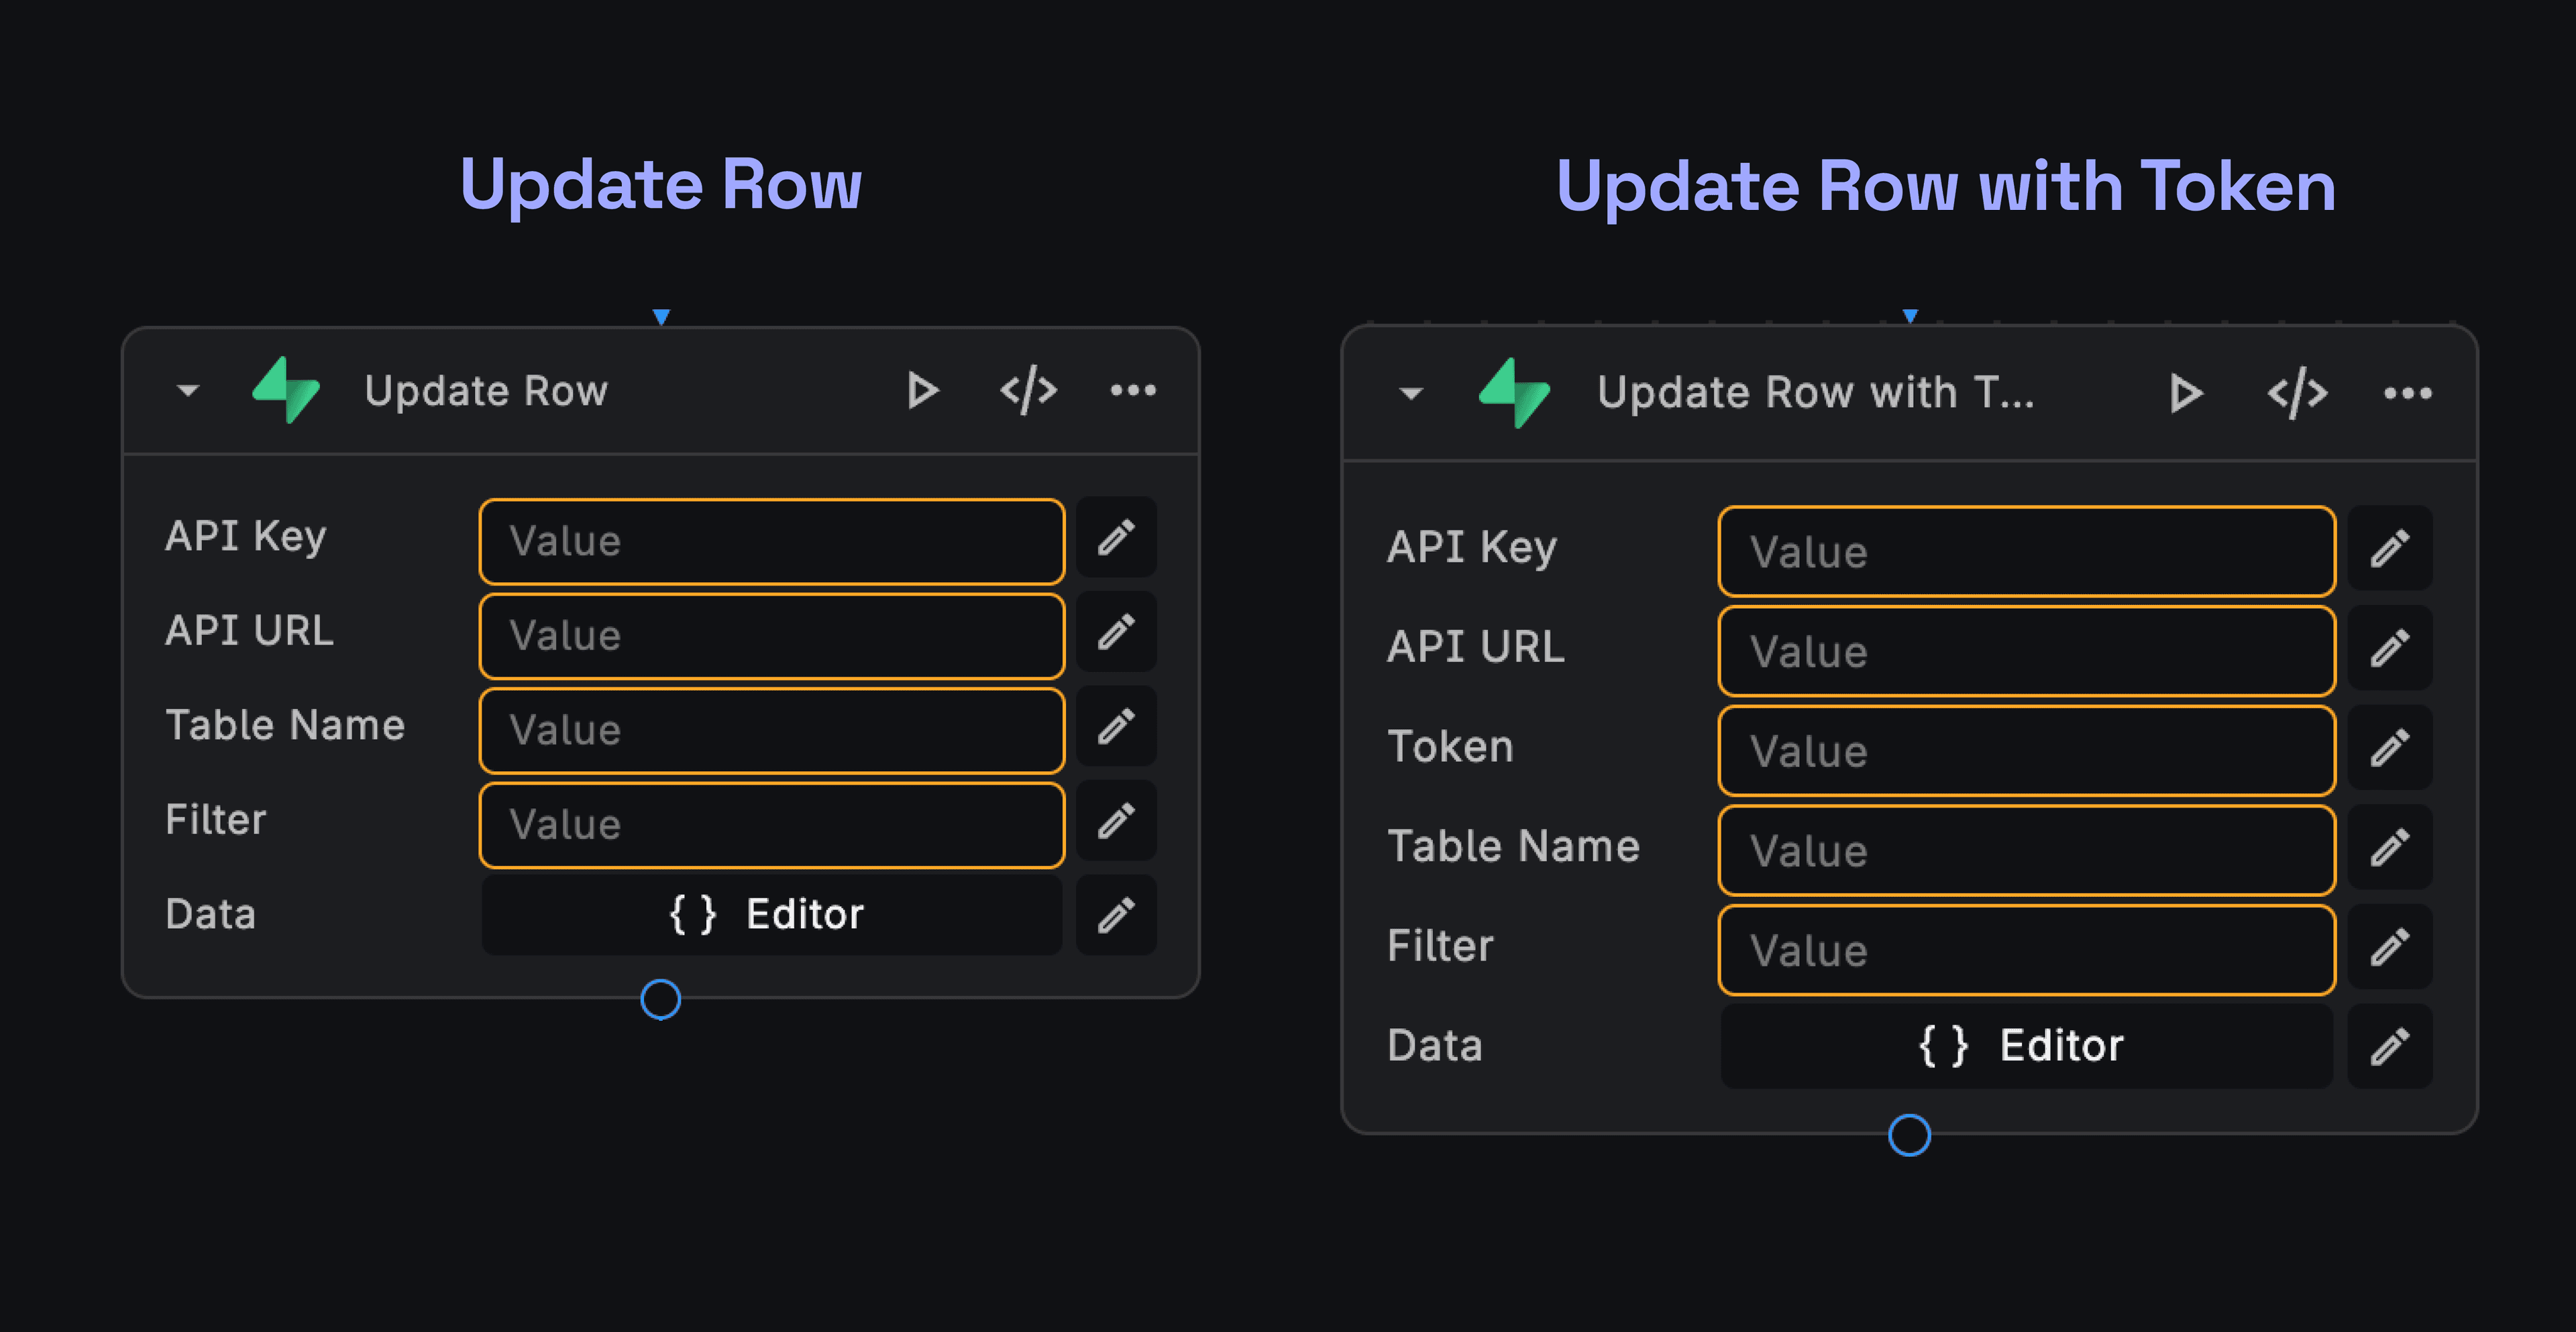
BuildShip offers two sets of Supabase nodes, one with Authorization Token and one without. The with Token nodes are a
slightly adapted version to support an Authorization token being passed in from your client. This allows Supabase
Row Level Security to be utilised as a passthrough with Buildship.
What this means is that you can use the with Token nodes when you are using BuildShip along with FlutterFlow or
other no-code frontend tools, and authenticating with Supabase using their out-of-the-box functionality. This will
allow you to securely pass the Authorization token from your client to BuildShip.
If you're interesting in knowing more about passing the authorization token from your FlutterFlow app to BuildShip, you can read the detailed guide here (opens in a new tab).
If your use case does not require passing the Authorization token from your client to BuildShip, you can use the nodes without the Authorization Token.
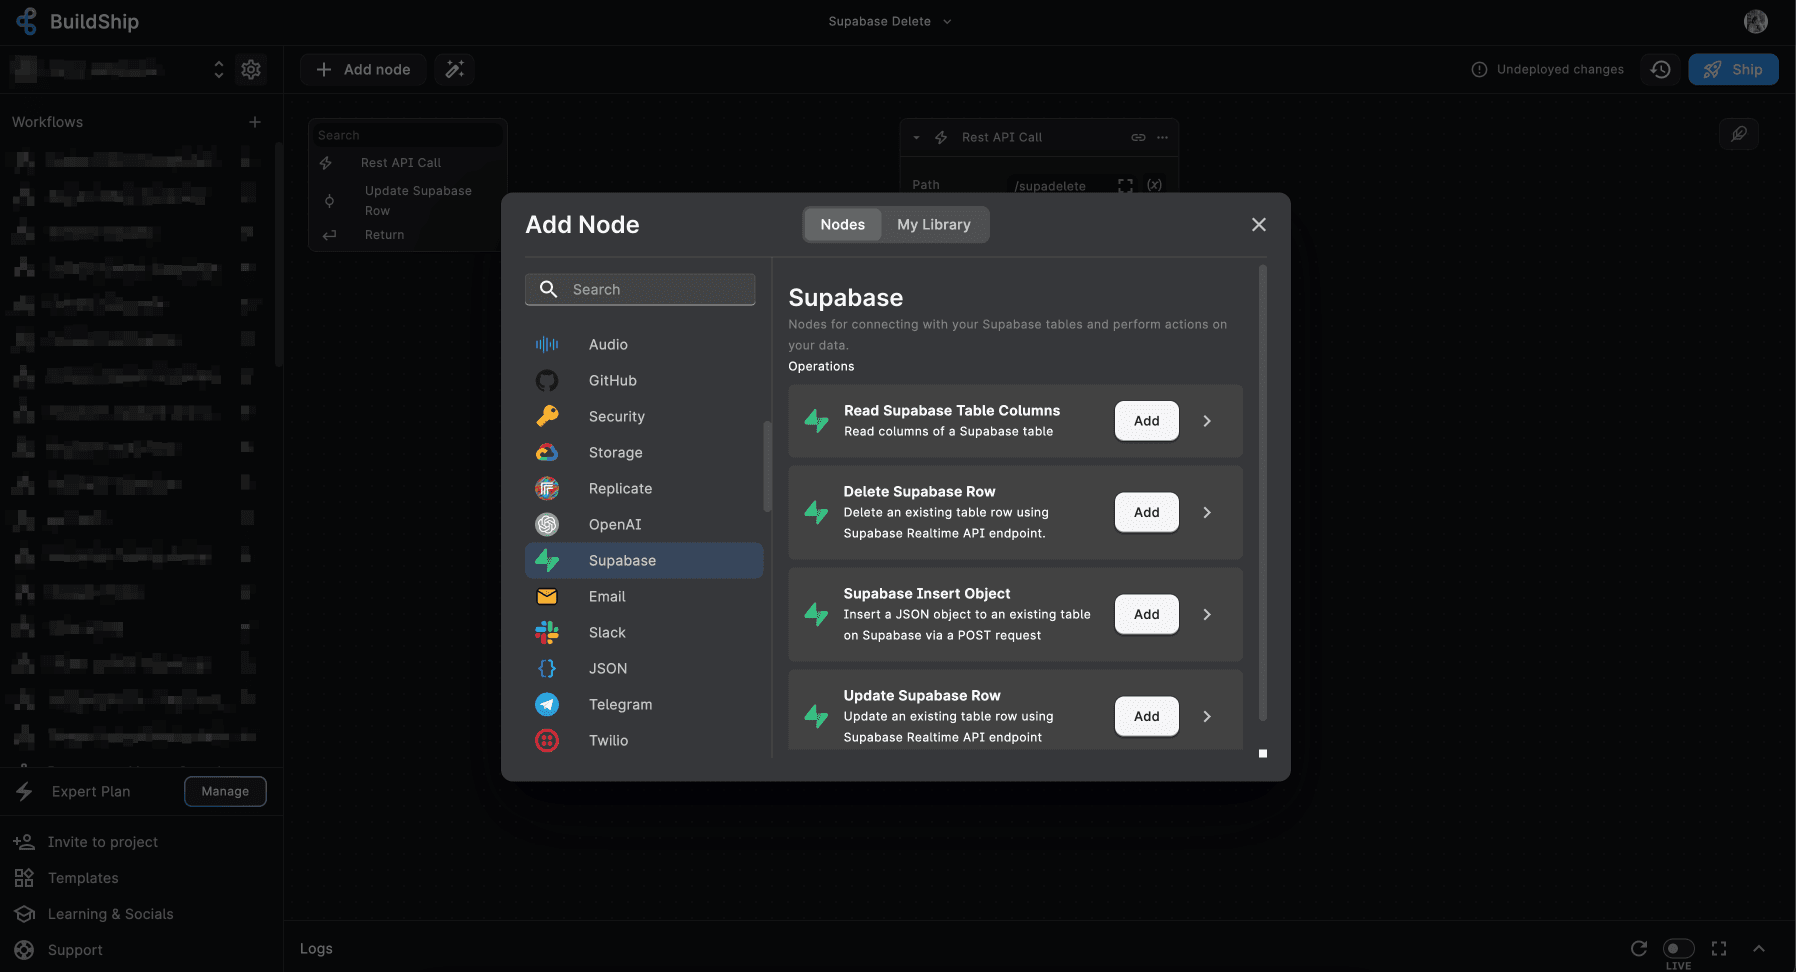
Creating Data
With BuildShip's integration, you can easily create new records in your Supabase PostgreSQL database. Follow these steps:
- In your BuildShip Workflow, add a Supabase Create Node from the Node Explorer. You can find the Supabase Create Node
under the "Supabase" integration category or you could simply enter
Supabaseon the search bar. - Configure the node by providing your Supabase API Key, Bearer Token, Table URL, and Table Name.
- Open the Node Editor to test your node.
- Add the data you want to create in the "Data" field in the form of a JSON object. Here's an example of a JSON object you can use to create a new record in your Supabase table:
{
  "breed_name": "Birman",
  "country_of_origin": "Burma"
}- Test your node by clicking on the "Test" button. If the node is configured correctly, you should see a new record in your Supabase table.
- Optionally, you could modify and customize the node according to your needs. Once you're done, click on the "Save" button to save your node.
- Add more nodes or simply add a Return node to complete your workflow.
BuildShip offers two versions of Supabase nodes, with and without Authorization Token. The with Token nodes are a slightly adapted version to support an Authorization token being passed in from your client. This allows Supabase Row Level Security to be utilised as a passthrough with Buildship.
This is useful for users using BuildShip along with FlutterFlow or other no-code frontend tools, and authenticating with Supabase using their out-of-the-box functionality.
Note: If you do not have an Access Token, use the Supabase "Create Row" node instead.
Reading Data
To retrieve data from your Supabase database, use the Read Node:
- In your BuildShip workflow, add a Supabase Read Node from the Node Explorer. You can find the Supabase Create Node
under the "Supabase" integration category or you could simply enter
Supabaseon the search bar. - Configure the node by providing your Supabase API Key, Bearer Token, Table URL, and Table Name.
- Specify the columns you want to retrieve from your table in the "Columns" field. You can also leave it empty which will by default retrieve all columns.
- Optionally you could customize, test and save the node.
- Execute the workflow, and BuildShip will fetch the data from your Supabase database in real-time.
- Now you can use this data anywhere in your workflow via the Expressions menu.
Updating Data
Updating records in your Supabase database is straightforward with the Update Node:
- In your BuildShip workflow, add a Supabase Update Node from the Node Explorer.
- Configure the node by providing your Supabase API Key, Bearer Token, Table URL, and Table Name.
- You need to add conditions to specify which records should be updated using filters like
eq,lt, andis.
Refer to the Filters section below for more information on how to use filters.
- You can optionally customize, test and save the node.
- Deploy your workflow, and everytime your workflow triggers, your data will be updated in your Supabase database in real-time.
Deleting Data
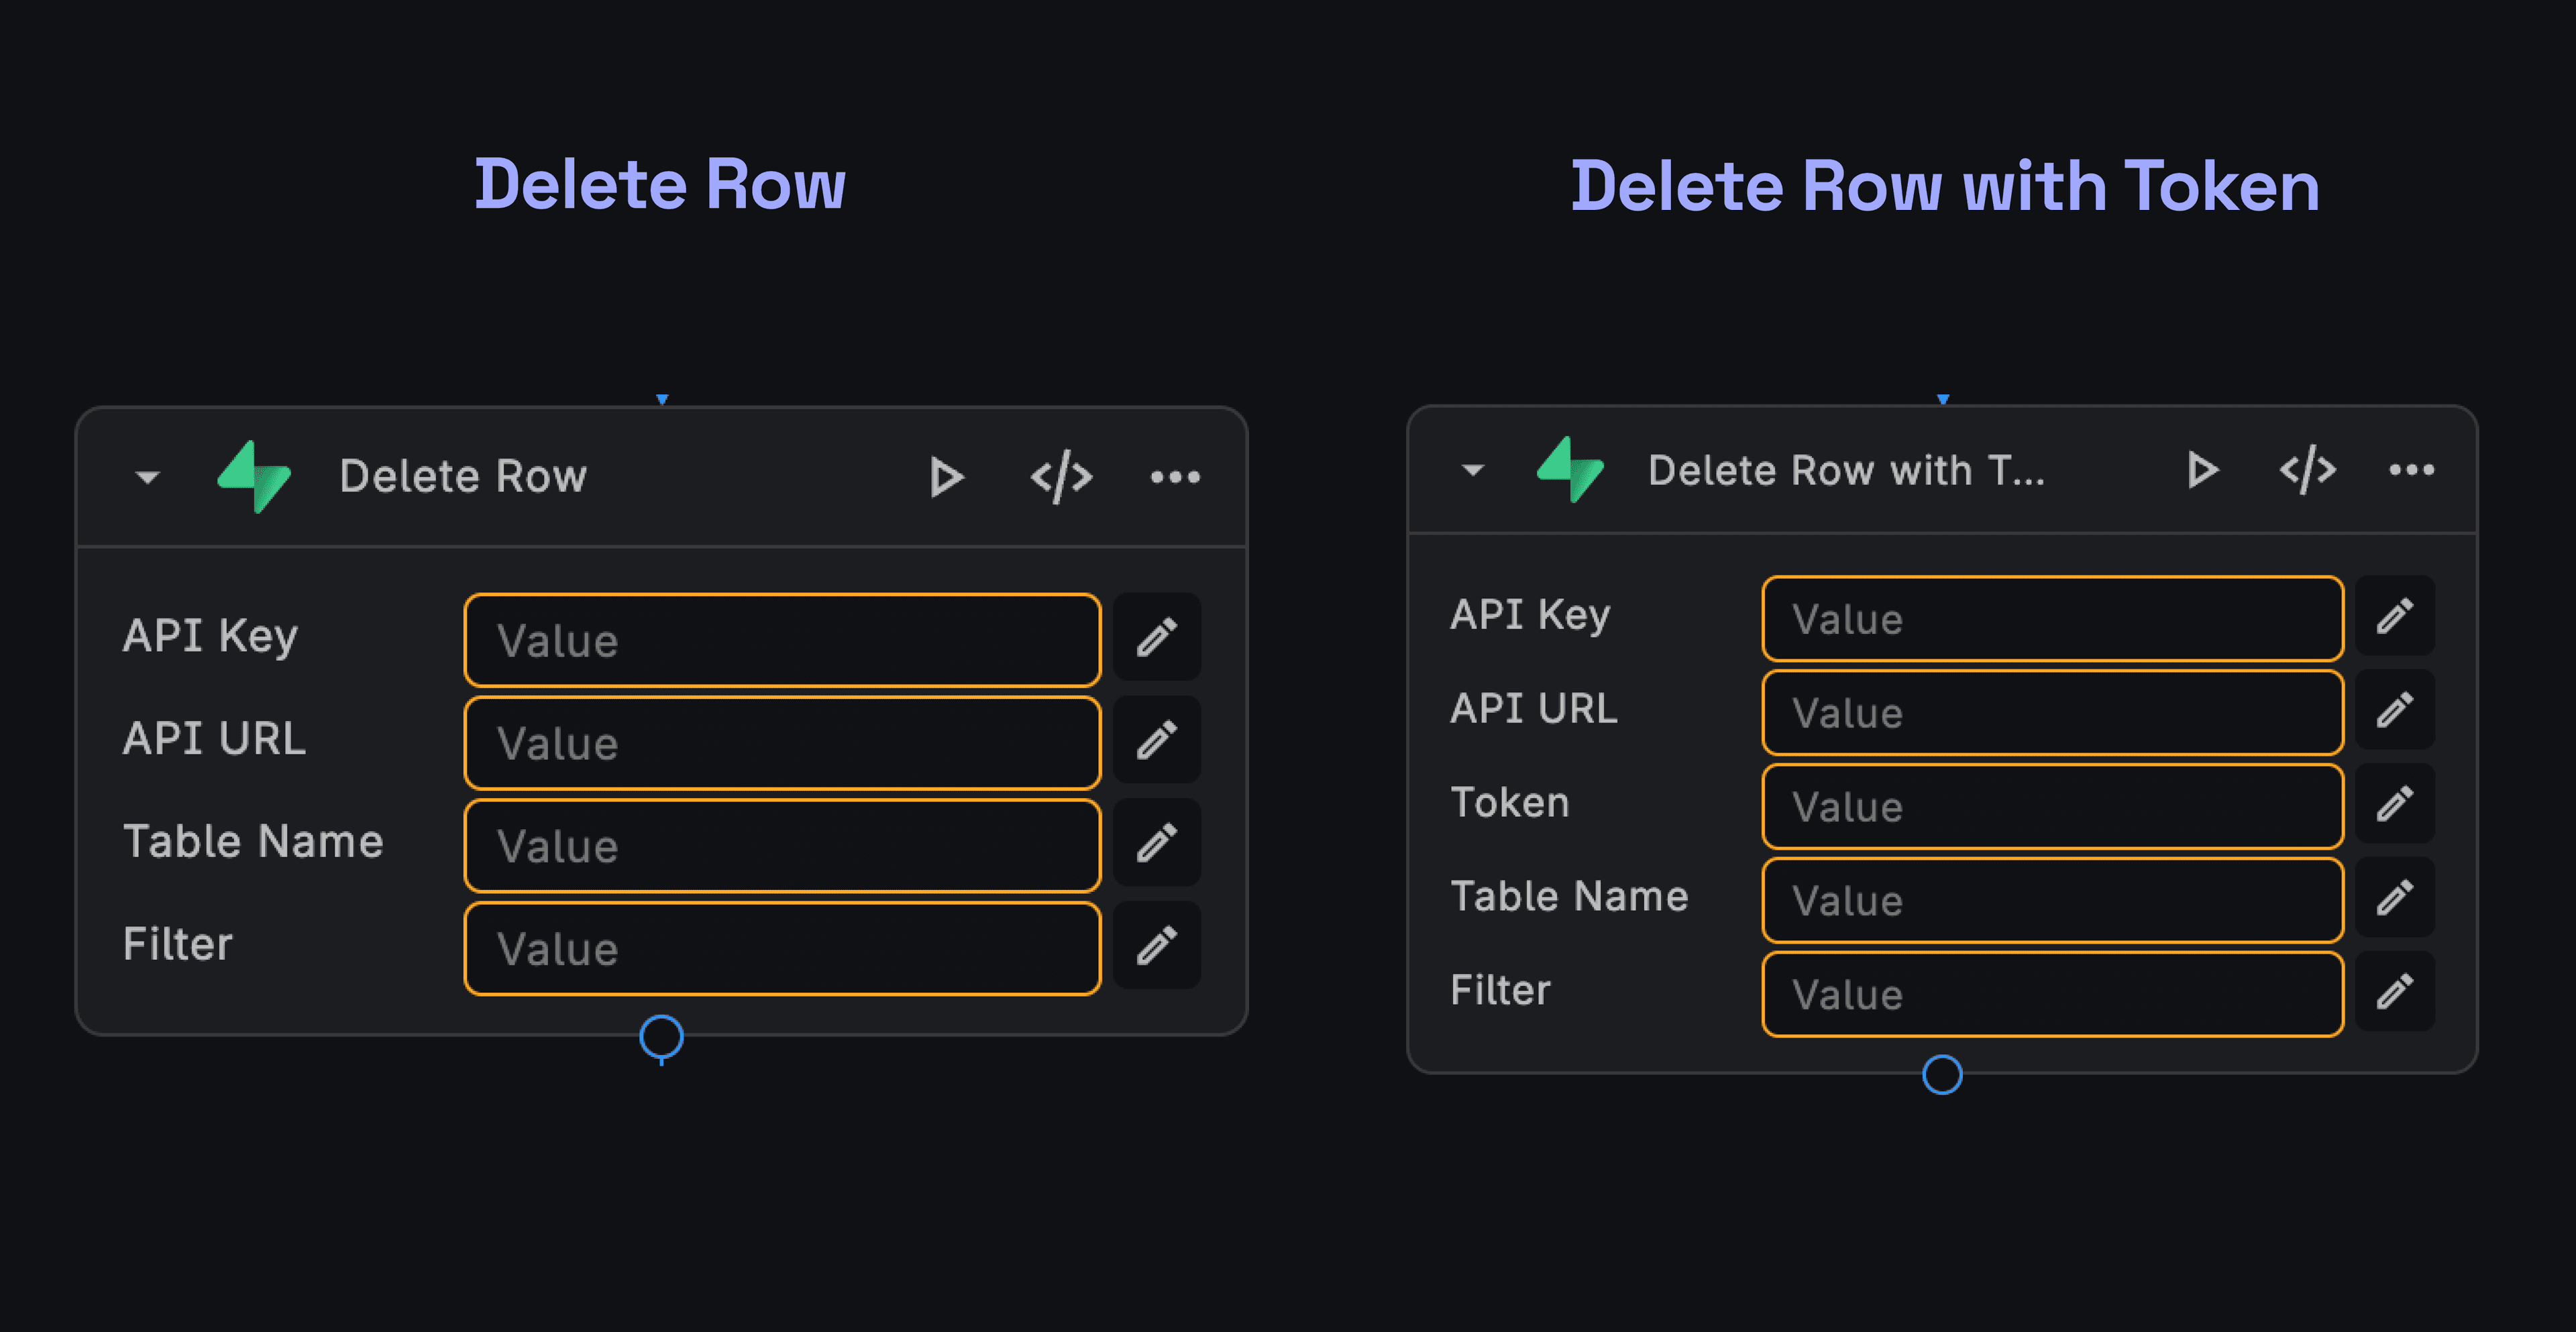
To delete records from your Supabase database, use the Delete Node:
- In your BuildShip workflow, add a Supabase Delete Node from the Node Explorer.
- Configure the node by providing your Supabase API Key, Bearer Token, Table URL, and Table Name.
- Add filters to specify which records should be deleted using filters like
eq,lt, andis.💡Refer to the Filters section below for more information on how to use filters.
- Deploy your workflow and the specified records will be deleted from your Supabase database in real-time.
Filters
Filters are used to specify which records should be retrieved, updated, or deleted. You can add multiple filters to a node. Here's a list of all the filters you can use:
| Operator | Description | Example | Example Explanation |
|---|---|---|---|
eq | Filter records where a specific field is equal to a given value | name=eq.siamese | Match records where the name field is equal to siamese |
neq | Filters records where a specific field is not equal to a given value | age=neq.5 | Match records where the age field is not equal to 5 |
gt | Filter records where a specific field is greater than a given value | age=gt.30 | Match records where the age field is greater than 30 |
lt | Filters records where a specific field is less than a given value | price=lt.10 | Match records where the price field is less than 10 |
gte | Filters records where a specific field is greater than or equal to a given value | quantity=gte.100 | Match records where the quantity field is greater than or equal to 100 |
lte | Filters records where a specific field is less than or equal to a given value | rating=lte.4.5 | Match records where the rating field is less than or equal to 4.5 |
is | Filters records via comparing fields with specific values or conditions, such as checking if a field is null | email=is.null | Match records where the email field is null |
like | Filters records via partial string matching | name=like.%John% | Match records where the name field contains John anywhere in the string |
To use multiple filters, use the & operator to separate them. For example, to filter records where the origin
field equals Germany and the lifespan field is greater than 15, you would use the following filter:
origin=eq.Germany&lifespan=gte.15.
Need Help?
- 💬Join BuildShip Community
An active and large community of no-code / low-code builders. Ask questions, share feedback, showcase your project and connect with other BuildShip enthusiasts.
- 🙋Hire a BuildShip Expert
Need personalized help to build your product fast? Browse and hire from a range of independent freelancers, agencies and builders - all well versed with BuildShip.
- 🛟Send a Support Request
Got a specific question on your workflows / project or want to report a bug? Send a us a request using the "Support" button directly from your BuildShip Dashboard.
- ⭐️Feature Request
Something missing in BuildShip for you? Share on the #FeatureRequest channel on Discord. Also browse and cast your votes on other feature requests.